









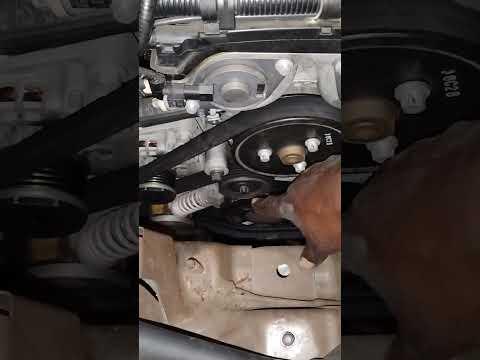







How to Replace the Water Pump on a 2016 Buick Regal 2.0L Turbo (DIY Guide)
Step-by-step instructions with required tools, parts list, safety tips, coolant refill/bleed steps, and torque spec notes for 2014, 2015, 2016, 2017
How to Replace the Water Pump on a 2016 Buick Regal 2.0L Turbo (DIY Guide)
Step-by-step instructions with required tools, parts list, safety tips, coolant refill/bleed steps, and torque spec notes for 2014, 2015, 2016, 2017


🔧 Regal - Water Pump Replacement
Replacing the water pump stops coolant leaks and prevents overheating. On your Regal’s 2.0L turbo, the water pump is typically mounted on the front (passenger-side) of the engine and is driven by the serpentine belt.
Assumption: This procedure is for the common belt-driven (external) water pump. If your pump is behind the timing cover (no pulley on the pump), the job is much larger and requires timing component removal.
Difficulty Level: Intermediate | Estimated Time: 2.5-5.0 hours
⚠️ Safety & Precautions
- ⚠️ Never open the coolant tank when hot; let the engine cool fully.
- ⚠️ Support the car with jack stands; never rely on a floor jack alone.
- ⚠️ Keep hands clear of the serpentine belt path; the tensioner is spring-loaded.
- ⚠️ Coolant is toxic—catch it in a drain pan and dispose of it properly.
- ⚠️ If you remove any engine mount fasteners, support the engine with a jack and block of wood first.
🔧 Required Tools
You'll need the following tools for this repair:
- Safety glasses
- Nitrile gloves
- Floor jack (rated 3-ton minimum)
- Jack stands (rated 3-ton minimum)
- Wheel chocks
- Drain pan (10-quart minimum)
- Funnel with spill-free coolant fill adapter (specialty)
- Metric socket set 8mm-18mm
- 1/4" drive ratchet
- 3/8" drive ratchet
- 3/8" drive torque wrench (10-100 Nm range)
- Extensions set (3" and 6")
- Serpentine belt tool 3/8" drive (specialty)
- Torx bit set (T20-T40)
- Trim clip remover
- Pry bar (12")
- Gasket scraper (plastic)
- Shop towels
- Flashlight
🔩 Required Parts
HowToo sells all the parts you need for this repair:
- Water pump assembly - Qty: 1
- Water pump gasket / seal - Qty: 1
- Dex-Cool compatible coolant (50/50 premix) - Qty: 2-3 gallons
- Serpentine belt - Qty: 1 Optional but smart if worn/cracked
- Accessory drive belt tensioner - Qty: 1 Optional if weak/noisy
📋 Before You Begin
- Park on level ground, set the parking brake, and chock the rear wheels.
- Let the engine cool completely (upper radiator hose should feel cool).
- Raise the front-right corner with a floor jack and support with jack stands.
- Remove the front-right wheel using the correct lug socket.
- Remove the front-right splash shield/liner fasteners using a trim clip remover and Torx bits as needed.
🔨 Step-by-Step Instructions
Follow these steps in order:
Step 1: Drain the coolant
- Place a drain pan (10-quart minimum) under the radiator drain area.
- Slowly loosen the coolant surge tank cap to release any leftover pressure.
- Open the radiator drain (if equipped) or remove the lower radiator hose clamp using an 8mm socket (style varies), then let coolant drain fully.
Step 2: Remove the serpentine belt
- Locate the belt routing sticker; take a photo for reference.
- Use a serpentine belt tool 3/8" drive (specialty) (a long handle used to rotate the tensioner safely) to rotate the tensioner and slip the belt off the water pump pulley.
- Remove the belt from the rest of the pulleys and set it aside.
Step 3: Remove the water pump pulley (if equipped)
- If your pump has a pulley, hold the pulley from turning and remove the pulley bolts using the appropriate metric socket (commonly 10mm).
- Set the pulley aside.
Step 4: Remove components blocking access (as needed)
- Remove any brackets, hoses, or shields in the way using a metric socket set 8mm-18mm and extensions.
- If a coolant hose is attached to the pump, release the clamp and remove the hose carefully. Use shop towels to catch spills.
Step 5: Unbolt and remove the water pump
- Remove the water pump mounting bolts using a ratchet and correct metric socket.
- Gently break the seal and pull the pump away from the engine. Use a pry bar (12") carefully only on sturdy casting points.
- Clean the mating surface with a plastic gasket scraper until smooth and dry. Do not gouge aluminum.
Step 6: Install the new water pump and gasket
- Install the new gasket/seal on the new pump (match orientation exactly).
- Position the pump and hand-start all bolts to avoid cross-threading.
- Tighten bolts evenly in a crisscross pattern using a torque wrench (a tool that tightens bolts to an exact setting).
- Torque to OEM specification for your engine’s water pump fasteners.
Step 7: Reinstall the pulley and belt
- Reinstall the water pump pulley and start bolts by hand.
- Tighten pulley bolts evenly using a torque wrench.
- Torque to OEM specification for the pulley fasteners.
- Route the belt according to your photo/sticker.
- Use the serpentine belt tool 3/8" drive (specialty) to rotate the tensioner and slip the belt fully onto the last pulley.
- Double-check the belt is seated in every pulley groove.
Step 8: Reinstall splash shield and wheel
- Reinstall the splash shield using the Torx bit set and trim clip remover as needed.
- Reinstall the wheel and snug the lug nuts in a star pattern.
- Lower the car and final-tighten lug nuts with a torque wrench.
- Torque to 140 Nm (103 ft-lbs) for the wheel lug nuts.
Step 9: Refill and bleed the cooling system
- Close the radiator drain (or reinstall the lower hose and clamp) using the correct socket.
- Fill the surge tank with Dex-Cool compatible coolant (50/50 premix) using a funnel with spill-free adapter (specialty).
- Start the engine and set HVAC to MAX HEAT with the fan on medium.
- Let it idle and watch coolant level; top off as the level drops. Keep the cap off until warm-up stabilizes.
- Once the radiator fan cycles and heat is steady, install the cap.
✅ After Repair
- Check for leaks around the water pump and hose connections with a flashlight.
- Test drive 10-15 minutes, then recheck coolant level after the engine cools.
- Verify the temperature gauge stays normal and the heater blows hot.
- Listen for belt squeal; if present, re-check belt routing and seating.
💰 DIY vs Shop Cost
Shop Cost: $650-$1,200 (parts + labor)
DIY Cost: $120-$350 (parts only)
You Save: $530-$850 by doing it yourself!
Shop labor rates vary but typically run $100-$150/hour. This repair takes a shop approximately 3-5 hours.
🎯 Ready to get started?
HowToo makes it easy: same-day/2-day shipping on every part, plus all the tools and specialty tools you need! Check out the parts and tools sections below to add everything to your cart.