


How to Replace the Water Pump on a 2016-2022 Honda Pilot (Timing Belt Driven) (Engine: V6 3.5L)
Step-by-step DIY guide with tools, parts list, torque specs, timing mark tips, and coolant bleed steps
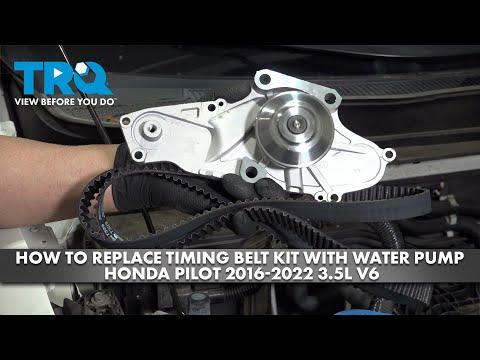
How to Replace the Water Pump on a 2016-2022 Honda Pilot (Timing Belt Driven) (Engine: V6 3.5L)
Step-by-step DIY guide with tools, parts list, torque specs, timing mark tips, and coolant bleed steps for 2016, 2017, 2018, 2019, 2020, 2021, 2022
🔧 Pilot - Water Pump Replacement
On your Pilot, the water pump is driven by the timing belt, so replacing the pump requires removing the timing belt and related covers. Because of that, it’s smartest (and most cost-effective) to replace the timing belt components and coolant at the same time to avoid doing this big job twice.
Difficulty Level: Advanced | Estimated Time: 5-8 hours
⚠️ Safety & Precautions
- ⚠️ Let the engine cool fully before opening the cooling system.
- ⚠️ Support the vehicle with jack stands on solid ground; never rely on a jack.
- ⚠️ You must support the engine before removing the right-side engine mount.
- ⚠️ Keep fingers/tools clear of pinch points around the timing belt and pulleys.
- ⚠️ Disconnect the negative battery cable to prevent accidental cranking.
🔧 Required Tools
You'll need the following tools for this repair:
- Safety glasses
- Nitrile gloves
- Wheel chocks
- Floor jack (rated 3-ton minimum)
- Jack stands (rated 3-ton minimum)
- Drain pan (at least 10-quart)
- Funnel
- Metric socket set (8mm-19mm)
- 19mm impact socket
- 1/2-inch drive breaker bar (24-inch)
- 1/2-inch drive torque wrench (up to 200 ft-lbs)
- 3/8-inch drive torque wrench (in-lb/low ft-lb range)
- Ratchet (3/8-inch drive)
- Extensions (3/8-inch drive, 3-inch and 6-inch)
- Wobble extension (3/8-inch drive)
- Serpentine belt tool (specialty)
- Honda crank pulley holding tool (specialty)
- Harmonic balancer puller (specialty)
- Flat trim clip tool
- Phillips screwdriver
- Plastic scraper
- Shop towels
🔩 Required Parts
HowToo sells all the parts you need for this repair:
- Water pump (with O-ring/gasket) - Qty: 1
- Timing belt - Qty: 1
- Timing belt tensioner - Qty: 1
- Timing belt idler pulley - Qty: 1
- Timing belt tensioner pulley - Qty: 1
- Engine coolant (Honda Type 2 compatible) - Qty: 2-3 gallons
- Accessory drive belt - Qty: 1
📋 Before You Begin
- Park on level ground, set the parking brake, and place wheel chocks behind the rear wheels.
- Disconnect the battery: use a 10mm socket to remove the negative cable and tuck it aside.
- Raise the front-right corner and support with jack stands. Remove the right-front wheel using a 19mm socket.
- Plan to replace the timing belt parts while you’re here. This job overlaps almost 100%.
- “Crank pulley” (also called harmonic balancer) is the big pulley on the bottom of the engine that drives belts.
🔨 Step-by-Step Instructions
Follow these steps in order:
Step 1: Drain the coolant
- Place a drain pan (at least 10-quart) under the radiator.
- Open the radiator cap (only when cool), then open the drain cock (petcock) and drain.
- Use shop towels to catch spills. Coolant is slippery and toxic.
Step 2: Remove splash shields for access
- Remove the lower engine cover and right-side splash shield using a flat trim clip tool, Phillips screwdriver, and 10mm socket.
Step 3: Remove the accessory (serpentine) belt
- Relieve tension with a serpentine belt tool (specialty) and slide the belt off.
- If the belt is cracked/glazed, replace it now.
Step 4: Support the engine and remove the right engine mount
- Position a floor jack (rated 3-ton minimum) under the engine with a block of wood (wood spreads the load so you don’t dent the oil pan).
- Lightly “take the weight” of the engine with the jack (do not lift the vehicle).
- Remove the right-side engine mount fasteners using a metric socket set (14mm-19mm) and extensions (3/8-inch drive, 3-inch and 6-inch).
Step 5: Remove the crank pulley
- Hold the crank pulley using a Honda crank pulley holding tool (specialty).
- Remove the crank bolt using a 19mm impact socket and 1/2-inch drive breaker bar (24-inch).
- Torque to 245 Nm (181 ft-lbs) on reassembly.
- If the pulley is stuck, use a harmonic balancer puller (specialty) to remove it.
Step 6: Remove the timing belt covers
- Remove the upper and lower timing covers using a 10mm socket and wobble extension (3/8-inch drive).
- Set bolts aside in groups so they go back in the same locations.
Step 7: Set the engine to Top Dead Center (TDC)
- Rotate the engine clockwise using a 19mm socket on the crank (crank bolt temporarily threaded in is okay).
- Align the timing marks on the cam pulleys and crank sprocket with their marks on the engine.
- Take clear photos of the timing marks.
Step 8: Release belt tension and remove the timing belt
- Remove the timing belt tensioner and/or release it (depending on your tensioner style) using a metric socket set (12mm-14mm).
- Remove the timing belt from the cam pulleys and crank sprocket.
- Torque to 44 Nm (33 ft-lbs) for the tensioner mounting bolts on reassembly.
Step 9: Remove the water pump
- Place the drain pan (at least 10-quart) under the pump area; more coolant will spill.
- Remove the water pump bolts using a 10mm socket.
- Remove the pump and O-ring/gasket.
- Torque to 12 Nm (9 ft-lbs) for water pump bolts on reassembly.
Step 10: Clean the mating surface and install the new water pump
- Clean the sealing surface with a plastic scraper and shop towels. Do not gouge the aluminum.
- Install the new O-ring/gasket and seat the new pump.
- Hand-start all bolts, then tighten evenly using a 3/8-inch drive torque wrench (in-lb/low ft-lb range).
- Torque to 12 Nm (9 ft-lbs).
Step 11: Install timing components and timing belt
- Replace the idler and tensioner pulleys using a metric socket set (12mm-14mm) and 3/8-inch drive torque wrench (in-lb/low ft-lb range).
- Route the new timing belt, keeping the timing marks aligned.
- Install/activate the tensioner per its design, then verify the belt is tight on the non-tensioned side.
Step 12: Verify timing by rotating the engine
- Rotate the engine clockwise two full turns using a 19mm socket.
- Re-check that all timing marks line up perfectly.
- If marks don’t line up, stop and correct before reassembly.
Step 13: Reassemble covers, crank pulley, mount, and belt
- Reinstall timing covers using a 10mm socket.
- Reinstall the crank pulley and crank bolt using the Honda crank pulley holding tool (specialty), 19mm impact socket, and 1/2-inch drive torque wrench (up to 200 ft-lbs).
- Torque to 245 Nm (181 ft-lbs).
- Reinstall the right engine mount using a metric socket set (14mm-19mm) and torque fasteners to spec.
- Reinstall the serpentine belt using a serpentine belt tool (specialty).
- Reinstall splash shields and wheel using a flat trim clip tool, 10mm socket, and 19mm socket.
Step 14: Refill and bleed the cooling system
- Close the radiator drain, then refill using a funnel with Honda Type 2 compatible coolant.
- Start the engine and set heat to HOT; let it reach operating temperature while watching the temp gauge.
- Top off as the level drops. Once the fans cycle and heat is steady, shut down and let it cool, then recheck level.
✅ After Repair
- Verify there are no coolant leaks around the pump and hose connections.
- Listen for abnormal whining/chirping (could indicate belt alignment/tension issues).
- After the first drive, let it cool and recheck the coolant level in the reservoir.
💰 DIY vs Shop Cost
Shop Cost: $1,200-$2,200 (parts + labor)
DIY Cost: $250-$650 (parts only)
You Save: $950-$1,550 by doing it yourself!
Shop labor rates vary but typically run $100-$150/hour. This repair takes a shop approximately 5-8 hours.
🎯 Ready to get started?
HowToo makes it easy: same-day/2-day shipping on every part, plus all the tools and specialty tools you need! Check out the parts and tools sections below to add everything to your cart.
Guide for Engine Water Pump replace for these Honda vehicles
| Year Make Model | Sub Model | Engine | Body Style |
|---|---|---|---|
| 2022 Honda Pilot | - | V6 3.5L | - |
| 2021 Honda Pilot | - | V6 3.5L | - |
| 2020 Honda Pilot | - | V6 3.5L | - |
| 2019 Honda Pilot | - | V6 3.5L | - |
| 2018 Honda Pilot | - | V6 3.5L | - |
| 2017 Honda Pilot | - | V6 3.5L | - |
| 2016 Honda Pilot | - | V6 3.5L | - |
