









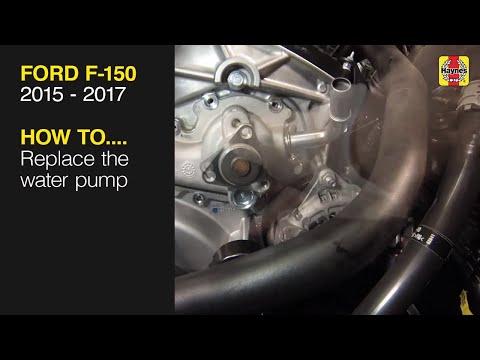







How to Replace the Water Pump on a 2015-2016 Ford F-150 (Engine: V8 5.0L)
Step-by-step instructions with tools, parts, safety tips, and leak check guidance
How to Replace the Water Pump on a 2015-2016 Ford F-150 (Engine: V8 5.0L)
Step-by-step instructions with tools, parts, safety tips, and leak check guidance for 2015, 2016


🔧 Water Pump - Replacement
Your F-150's water pump replacement is an advanced repair because the pump is serviced at the front of the engine and cooling system must be fully drained first. On this engine, you’ll need careful disassembly and reassembly so the timing/front cover area is sealed correctly and the cooling system is bled afterward.
Difficulty Level: Advanced | Estimated Time: 8-12 hours
⚠️ Safety & Precautions
- Never open the cooling system when the engine is hot. Hot coolant can cause severe burns.
- Disconnect the negative battery cable before starting. You will be working near electrical connectors and the starter area.
- Keep coolant away from pets and children. Used coolant is toxic.
- Use jack stands if you raise the truck. Never rely on a jack alone.
- Expect coolant to spill during removal. Have a drain pan ready.
- If your truck has any accessory belt routing differences, photograph the belt before removal.
🔧 Required Tools
You'll need the following tools for this repair:
- Metric socket set
- Metric wrench set
- Torque wrench
- Ratchet with extensions
- 3/8-inch drive breaker bar
- Flat blade screwdriver
- Trim clip removal tool
- Drain pan
- Floor jack (rated 3-ton minimum)
- Jack stands
- Safety glasses
- Nitrile gloves
- Coolant funnel
- Pick tool set
- Gasket scraper
- Serpentine belt tool (specialty)
🔩 Required Parts
HowToo sells all the parts you need for this repair:
- Water pump - Qty: 1
- Water pump gasket or seal - Qty: 1
- Engine coolant - Qty: 2-3 gallons
- Accessory drive belt - Qty: 1
- Water pump bolts - Qty: 1 set
- Thermostat housing gasket - Qty: 1
- RTV sealant - Qty: 1 tube
📋 Before You Begin
- Park on level ground and set the parking brake.
- Let the engine cool completely before opening the cooling system.
- Disconnect the negative battery cable.
- Drain the coolant into a clean drain pan for proper disposal.
- Take photos of hose and belt routing first.
🔨 Step-by-Step Instructions
Follow these steps in order:
Step 1: Drain the cooling system
- Use a drain pan under the radiator drain area.
- Open the radiator drain or remove the lower hose, depending on access.
- Drain enough coolant to get the level below the water pump area.
Step 2: Remove the intake and front accessories as needed
- Use the appropriate metric socket set and trim clip tool to remove the air intake ducting and any covers blocking access.
- Disconnect any electrical connectors and move harnesses aside carefully.
Step 3: Remove the serpentine belt
- Use the serpentine belt tool to relieve tension from the belt tensioner.
- Slide the belt off the pulleys and inspect it for cracks or glazing.
Step 4: Remove components blocking water pump access
- Use the metric socket set and wrench set to remove brackets, covers, and any accessory brackets in the way.
- Label bolts as you remove them so they go back in the same place.
Step 5: Remove the water pump
- Use the metric socket set and ratchet to remove the water pump bolts.
- Break the pump loose gently with a flat blade screwdriver if needed, but do not pry on sealing surfaces.
- Remove the pump and gasket or seal.
Step 6: Clean the mounting surface
- Use a gasket scraper to clean the engine mating surface.
- Remove all old gasket material and coolant residue.
- Do not gouge the aluminum surface.
Step 7: Install the new water pump
- Install the new gasket or seal on the new pump.
- Position the water pump on the engine and start all bolts by hand.
- Tighten the bolts evenly with a torque wrench.
- Torque to factory specification for your engine application.
Step 8: Reinstall removed components
- Reinstall brackets, covers, and accessories removed earlier using the metric socket set.
- Reinstall the serpentine belt using the belt tool and confirm it is seated on every pulley.
Step 9: Refill the cooling system
- Use a coolant funnel to refill with the correct engine coolant.
- Fill slowly to reduce air pockets.
- If equipped with a bleed point, open it until coolant flows without bubbles.
Step 10: Bleed air and check for leaks
- Reconnect the battery.
- Start the engine and let it reach operating temperature.
- Watch coolant level, heater output, and temperature gauge.
- Inspect the pump area, hoses, and drain points for leaks.
✅ After Repair
- Recheck coolant level after the first heat cycle and top off if needed.
- Verify the heater blows hot air and the engine stays at normal temperature.
- Inspect again after a short drive for any coolant seepage.
- Dispose of old coolant properly.
💰 DIY vs Shop Cost
Shop Cost: $900-$1,800 (parts + labor)
DIY Cost: $180-$450 (parts only)
You Save: $450-$1,350 by doing it yourself!
Shop labor rates vary but typically run $100-$150/hour. This repair takes a shop approximately 8-12 hours.
🎯 Ready to get started?
HowToo makes it easy: same-day/2-day shipping on every part, plus all the tools and specialty tools you need! Check out the parts and tools sections below to add everything to your cart.
Guide for Engine Water Pump replace for these Ford vehicles
| Year Make Model | Sub Model | Engine | Body Style |
|---|---|---|---|
| 2016 Ford F-150 | - | V6 2.7L | - |
| 2015 Ford F-150 | - | V6 2.7L | - |