











How to Replace the Water Pump on a 2015-2016 Ford F-150 3.5L EcoBoost (Engine: V8 5.0L)
Step-by-step instructions with tools, parts, torque specs, safety tips, and leak checks
How to Replace the Water Pump on a 2015-2016 Ford F-150 3.5L EcoBoost (Engine: V8 5.0L)
Step-by-step instructions with tools, parts, torque specs, safety tips, and leak checks for 2015, 2016


🔧 Water Pump - Replacement
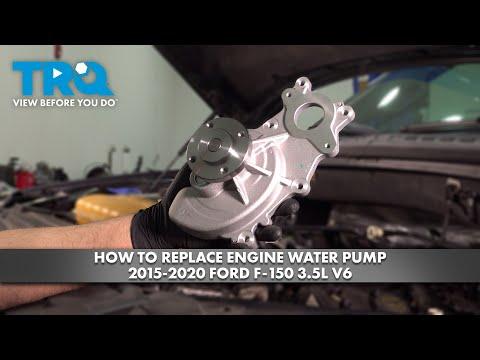
On your F-150 3.5L EcoBoost, the water pump is mounted behind the front timing cover and is driven by the timing chain. This is a major repair because the front of the engine has to come apart, and coolant contamination can damage the engine oil if the pump has been leaking.
Difficulty Level: Advanced | Estimated Time: 8-12 hours
⚠️ Safety & Precautions
- Work only on a fully cooled engine. Hot coolant can cause severe burns.
- Drain coolant before opening the system. Keep coolant off the serpentine belt and electrical connectors.
- Battery disconnect is required before major front-engine disassembly.
- Replace engine oil and filter if there is any sign of coolant contamination.
- Timing components must be kept in the correct position. Do not rotate the crankshaft or camshafts once timing is set unless instructed.
- Use jack stands if you raise the truck. Never rely on a jack alone.
🔧 Required Tools
You'll need the following tools for this repair:
- 8mm socket
- 10mm socket
- 12mm socket
- 13mm socket
- 15mm socket
- 18mm socket
- 1/4-inch ratchet
- 3/8-inch ratchet
- 1/2-inch breaker bar
- Torque wrench
- Serpentine belt tool (specialty)
- Timing chain holding tool (specialty)
- Harmonic balancer puller (specialty)
- Seal installer tool (specialty)
- Drain pan
- Floor jack (rated 3-ton minimum)
- Jack stands
- Safety glasses
- Nitrile gloves
- Plastic trim removal tool
- Scraper
- Funnel
🔩 Required Parts
HowToo sells all the parts you need for this repair:
- Water pump - Qty: 1
- Water pump gasket/seal - Qty: 1
- Front cover sealant - Qty: 1
- Engine coolant - Qty: 1 refill
- Engine oil - Qty: 1 refill if contaminated
- Oil filter - Qty: 1 if contaminated
- Serpentine belt - Qty: 1 if worn or coolant-soaked
- Thermostat housing gasket - Qty: 1 if removed
- Front timing cover gasket set - Qty: 1
- One-time-use bolts - Qty: 1 set if required during reassembly
📋 Before You Begin
- Park on level ground and set the parking brake.
- Let the engine cool completely.
- Disconnect the negative battery cable before starting.
- Raise the front of the truck only if needed for splash shield access, then support it with jack stands.
- Have a clean container ready for coolant.
- Tip: Label bolts as you remove them.
🔨 Step-by-Step Instructions
Follow these steps in order:
Step 1: Drain the coolant
- Use a drain pan under the radiator drain area and open the drain carefully.
- Remove the coolant reservoir cap slowly to release pressure.
- Drain enough coolant to get the system level below the water pump.
Step 2: Disconnect power and remove access parts
- Use a 10mm socket to disconnect the negative battery cable.
- Remove the air intake ducting and any covers blocking front-engine access using an 8mm socket and plastic trim removal tool.
- Remove the serpentine belt using the serpentine belt tool (specialty).
- Tip: Take a quick photo before belt removal.
Step 3: Remove the front drive components
- Use a 15mm socket and breaker bar to remove the crankshaft pulley bolt.
- Remove the crankshaft pulley/harmonic balancer with the harmonic balancer puller (specialty).
- Remove the front splash shield if needed using an 8mm socket or 10mm socket.
Step 4: Remove timing cover-related components
- Remove any brackets, accessory fasteners, and covers blocking the timing cover with 10mm, 12mm, and 13mm sockets.
- If the engine mount bracket blocks access, support the engine with a jack and wood block, then remove the bracket fasteners.
- Keep all timing components clean and dry.
Step 5: Set and secure engine timing
- Rotate the engine only as needed to the timing position using the crankshaft bolt and a breaker bar.
- Install the timing chain holding tool (specialty) to keep the timing components aligned.
- Do not rotate the crankshaft or camshafts after timing is locked.
- Tip: Mark the chain before disassembly.
Step 6: Remove the front timing cover
- Use a 10mm socket and 12mm socket to remove the timing cover bolts.
- Break the seal gently and remove the cover without prying against sealing surfaces.
- Inspect the cover and gasket area for oil or coolant contamination.
Step 7: Remove the water pump
- Use a 10mm socket to remove the water pump bolts.
- Pull the water pump straight out from the housing.
- Remove the old gasket/seal and clean the mounting surface with a scraper.
- Make sure no old seal material remains in the cavity.
Step 8: Install the new water pump
- Install the new water pump gasket/seal in the correct position.
- Set the new water pump in place by hand first.
- Use a 10mm socket to tighten the bolts evenly in a crisscross pattern.
- Torque to 10 Nm (89 in-lbs) unless your service information for the exact build shows a different value.
Step 9: Reinstall the timing cover and front components
- Apply the correct front cover sealant at the specified joints.
- Reinstall the timing cover and all bolts with a 10mm socket and 12mm socket.
- Torque to 10-12 Nm (89-106 in-lbs) for small cover bolts unless otherwise specified by the service procedure.
- Reinstall the crankshaft pulley and tighten the bolt with a 15mm socket and torque wrench.
- Torque to 150 Nm (111 ft-lbs) plus angle if specified by Ford for your build.
Step 10: Reinstall accessories and refill fluids
- Reinstall brackets, intake parts, and the serpentine belt using the serpentine belt tool (specialty).
- Reconnect the negative battery cable with a 10mm socket.
- Refill the cooling system with the correct engine coolant using a funnel.
- If coolant entered the oil, change the oil and filter before starting the engine.
✅ After Repair
- Start the engine and let it idle while checking for coolant leaks.
- Watch coolant level and top off as air bleeds out of the system.
- Confirm normal operating temperature and heater output.
- Recheck the coolant level after the first heat cycle and again after a short drive.
- If the old pump leaked internally, verify oil condition after a short run.
- Tip: Recheck every hose connection twice.
💰 DIY vs Shop Cost
Shop Cost: $1,400-$2,400 (parts + labor)
DIY Cost: $180-$450 (parts only)
You Save: $950-$1,950 by doing it yourself!
Shop labor rates vary but typically run $100-$150/hour. This repair takes a shop approximately 8-12 hours.
🎯 Ready to get started?
HowToo makes it easy: same-day/2-day shipping on every part, plus all the tools and specialty tools you need! Check out the parts and tools sections below to add everything to your cart.
Guide for Engine Water Pump replace for these Ford vehicles
| Year Make Model | Sub Model | Engine | Body Style |
|---|---|---|---|
| 2016 Ford F-150 | - | V6 3.5L | - |
| 2016 Ford F-150 | - | V8 5.0L | - |
| 2016 Ford F-150 | - | V6 2.7L | - |
| 2015 Ford F-150 | - | V6 3.5L | - |
| 2015 Ford F-150 | - | V8 5.0L | - |
| 2015 Ford F-150 | - | V6 2.7L | - |