









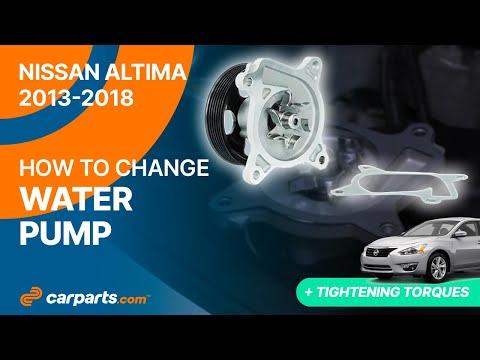



How to Replace the Water Pump on a 2013-2018 Nissan Altima 3.5L V6 (Trim: SL | Engine: Inline 4 2.5L | Body: Sedan)
Step-by-step timing cover access guide with tools, parts, torque specs, and safety tips for 2013, 2014, 2015, 2016, 2017
How to Replace the Water Pump on a 2013-2018 Nissan Altima 3.5L V6 (Trim: SL | Engine: Inline 4 2.5L | Body: Sedan)
Step-by-step timing cover access guide with tools, parts, torque specs, and safety tips for 2013, 2014, 2015, 2016, 2017


🔧 Altima - Water Pump Replacement
The water pump on your Altima’s 3.5L V6 is mounted behind the front timing cover and is driven by the timing chain, so this is not a simple external bolt-on pump. This repair requires draining the coolant, removing front engine components, carefully accessing the pump, and resealing the timing cover so the cooling system does not leak.
Difficulty Level: Advanced | Estimated Time: 6-9 hours
⚠️ Safety & Precautions
- ⚠️ Work only on a fully cool engine. Hot coolant can spray out and burn you.
- ⚠️ Disconnect the negative battery cable before working around the belt, pulley, and timing cover area.
- ⚠️ Support your Altima with jack stands. Never rely on a floor jack alone.
- ⚠️ Do not rotate the crankshaft or camshafts separately with timing components exposed.
- ⚠️ Keep old sealant, dirt, and coolant out of the timing chain area.
- ⚠️ Coolant is toxic. Keep it away from children and pets and recycle it properly.
- ⚠️ This job can damage the engine if timing-chain components are disturbed. Go slowly and label everything.
🔧 Required Tools
You'll need the following tools for this repair:
- Metric socket set 8mm-22mm
- 10mm socket
- 12mm socket
- 14mm socket
- 19mm socket
- 3/8-inch ratchet
- 1/2-inch breaker bar
- 3/8-inch extension set
- Torque wrench 20-250 in-lbs
- Torque wrench 10-150 ft-lbs
- Serpentine belt tool 14mm
- Crankshaft pulley holder (specialty)
- Harmonic balancer puller (specialty)
- Plastic gasket scraper
- Trim clip removal tool
- Flat-blade screwdriver 1/4-inch
- Coolant drain pan 3-gallon minimum
- Long-neck funnel
- Cooling system vacuum fill tool (specialty)
- Shop light
- Floor jack rated 3-ton minimum
- Jack stands rated 3-ton minimum
- Wheel chocks
- Shop towels
- Nitrile gloves
- Safety glasses
🔩 Required Parts
HowToo sells all the parts you need for this repair:
- Water pump - Qty: 1
- Water pump gasket/O-ring - Qty: 1
- Timing cover RTV sealant - Qty: 1 tube
- Nissan-compatible long-life coolant - Qty: 2 gallons
- Distilled water - Qty: 2 gallons if using coolant concentrate
- Serpentine belt - Qty: 1 if cracked, glazed, or coolant-soaked
- Engine oil - Qty: 5 quarts if coolant entered the oil pan
- Oil filter - Qty: 1 if coolant entered the oil pan
📋 Before You Begin
- Park your Altima on flat ground, shift to Park, and apply the parking brake.
- Place wheel chocks behind the rear wheels.
- Let the engine cool completely before opening the radiator cap.
- Use a 10mm socket to disconnect the negative battery cable.
- Raise the front of the vehicle with a floor jack rated 3-ton minimum.
- Set the vehicle securely on jack stands rated 3-ton minimum.
- A harmonic balancer puller is a tool that pulls the crank pulley off straight without prying.
- A torque wrench tightens bolts to a specific tightness so they are not loose or over-tightened.
- A cooling system vacuum fill tool pulls air out of the cooling system before adding coolant, helping prevent overheating from trapped air.
🔨 Step-by-Step Instructions
Follow these steps in order:
Step 1: Remove the Lower Splash Shield
- Put on safety glasses and nitrile gloves.
- Use a trim clip removal tool to remove the plastic clips from the lower engine splash shield.
- Use a 10mm socket to remove the splash shield bolts.
- Lower the shield and set the clips and bolts aside in order.
Step 2: Drain the Coolant
- Place a coolant drain pan 3-gallon minimum under the radiator drain area.
- Remove the radiator cap only when the engine is cold.
- Use a flat-blade screwdriver 1/4-inch to open the radiator drain if equipped.
- Let the coolant drain fully into the pan.
- Close the drain once the coolant has stopped flowing.
Step 3: Remove the Right Front Wheel and Fender Liner
- Use a 19mm socket and 1/2-inch breaker bar to loosen the right front lug nuts if they are still tight.
- Remove the lug nuts with a 19mm socket.
- Remove the right front wheel.
- Use a trim clip removal tool to remove the fender liner clips.
- Use a 10mm socket to remove the fender liner screws.
- Pull the fender liner aside to access the crankshaft pulley area.
Step 4: Remove the Serpentine Belt
- Use a shop light to view the belt routing clearly.
- Take a photo of the belt path before removing it. Photos prevent routing mistakes.
- Use a serpentine belt tool 14mm on the belt tensioner.
- Rotate the tensioner to release belt tension.
- Slide the belt off the pulleys and remove it from the engine bay.
Step 5: Remove the Crankshaft Pulley
- Install the crankshaft pulley holder (specialty) to keep the pulley from spinning.
- Use a 19mm socket and 1/2-inch breaker bar to loosen the crankshaft pulley bolt.
- Remove the crankshaft pulley bolt and washer.
- Attach the harmonic balancer puller (specialty) to the crankshaft pulley.
- Use the puller to draw the pulley straight off the crankshaft.
- Do not pry on the timing cover. It is aluminum and can crack.
Step 6: Remove Front Timing Cover Fasteners
- Use a shop light to identify all visible timing cover bolts.
- Use a 10mm socket, 12mm socket, and 14mm socket to remove the timing cover bolts and nearby brackets blocking access.
- Use a 3/8-inch extension set for recessed bolts.
- Place bolts in labeled groups because they are different lengths.
- Use a plastic gasket scraper at the cover seam to gently break the RTV seal.
- Carefully remove the timing cover without bending it.
Step 7: Access the Water Pump
- Use a shop light to locate the water pump inside the timing-chain area.
- Stuff clean shop towels below the work area to catch coolant and debris.
- Do not remove timing chain guides, sprockets, or chains unless absolutely necessary for access.
- Mark the visible chain position with a paint marker if you need a reference. Do not rely only on memory.
Step 8: Remove the Old Water Pump
- Use a 10mm socket and 3/8-inch ratchet to remove the water pump bolts.
- Pull the water pump straight out by hand.
- If it sticks, gently work it loose by hand. Do not gouge the aluminum bore.
- Use shop towels to catch coolant that drains from the pump opening.
Step 9: Clean the Water Pump Sealing Area
- Remove the old gasket or O-ring from the pump opening.
- Use a plastic gasket scraper to clean the sealing surface.
- Wipe the area with shop towels until it is clean and dry.
- Do not scratch the aluminum surface. Scratches can cause leaks.
Step 10: Install the New Water Pump
- Install the new water pump gasket/O-ring onto the new pump.
- Lightly wet the O-ring with clean coolant so it slides in smoothly.
- Push the new water pump straight into the engine by hand.
- Start all water pump bolts by hand first.
- Use a 10mm socket and torque wrench 20-250 in-lbs to tighten the bolts evenly.
- Torque to 9.8 Nm (87 in-lbs).
Step 11: Clean and Reseal the Timing Cover
- Use a plastic gasket scraper to remove old RTV sealant from the timing cover and engine surface.
- Use shop towels to wipe both sealing surfaces clean and dry.
- Apply a continuous bead of timing cover RTV sealant along the original sealing path.
- Install the timing cover carefully before the RTV skins over.
- Start all timing cover bolts by hand.
- Use a 10mm socket, 12mm socket, 14mm socket, and torque wrench 20-250 in-lbs to tighten the small cover bolts evenly.
- Torque small timing cover bolts to 12 Nm (106 in-lbs).
- Use a torque wrench 10-150 ft-lbs for larger bracket bolts if removed.
- Torque larger support/bracket bolts to their original service spec if removed.
Step 12: Reinstall the Crankshaft Pulley
- Slide the crankshaft pulley onto the crankshaft by hand.
- Install the crankshaft pulley bolt and washer.
- Hold the pulley with the crankshaft pulley holder (specialty).
- Use a 19mm socket and torque wrench 10-150 ft-lbs to tighten the crankshaft pulley bolt.
- Torque to 44 Nm (33 ft-lbs), then tighten an additional 60 degrees.
Step 13: Reinstall the Serpentine Belt
- Use your photo to route the serpentine belt correctly around the pulleys.
- Use a serpentine belt tool 14mm to rotate the tensioner.
- Slide the belt over the last pulley, then slowly release the tensioner.
- Use a shop light to confirm the belt ribs are seated in every pulley groove.
Step 14: Reinstall the Fender Liner, Wheel, and Splash Shield
- Use a 10mm socket to reinstall the fender liner screws.
- Use a trim clip removal tool or your fingers to reinstall the plastic clips.
- Reinstall the right front wheel.
- Use a 19mm socket to snug the lug nuts in a star pattern.
- Reinstall the lower splash shield using a 10mm socket and trim clip removal tool.
- Lower your Altima using the floor jack rated 3-ton minimum.
- Use a 19mm socket and torque wrench 10-150 ft-lbs to tighten the wheel lug nuts.
- Torque to 113 Nm (83 ft-lbs).
Step 15: Refill the Cooling System
- Make sure the radiator drain is closed.
- Use a cooling system vacuum fill tool (specialty) if available to refill the cooling system.
- If filling without the vacuum tool, use a long-neck funnel and slowly add Nissan-compatible long-life coolant mixture through the radiator fill neck.
- Fill the coolant reservoir to the MAX line.
- Use a 10mm socket to reconnect the negative battery cable.
Step 16: Bleed Air From the Cooling System
- Start the engine and set the heater to full hot with the fan on low.
- Let the engine idle while watching the temperature gauge.
- Use a long-neck funnel to add coolant as the level drops.
- Carefully squeeze the upper radiator hose while wearing nitrile gloves to help move air bubbles.
- When bubbles stop and the heater blows warm air, install the radiator cap.
- Use a shop light to inspect for coolant leaks around the timing cover and lower engine area.
✅ After Repair
- ✅ Let the engine reach normal operating temperature and confirm the gauge stays steady.
- ✅ Check that the cabin heater blows hot air at idle.
- ✅ Shut the engine off and let it cool fully, then recheck the radiator and reservoir level.
- ✅ Look under the car for coolant drips after the first short drive.
- ✅ Recheck coolant level again after 1-2 complete warm-up and cool-down cycles.
- ✅ If coolant mixed with engine oil, change the oil and filter before regular driving.
💰 DIY vs Shop Cost
Shop Cost: $900-$1,600 (parts + labor)
DIY Cost: $120-$350 (parts only)
You Save: $780-$1,250 by doing it yourself!
Shop labor rates vary but typically run $100-$150/hour. This repair takes a shop approximately 5-8 hours.
🎯 Ready to get started?
HowToo makes it easy: same-day/2-day shipping on every part, plus all the tools and specialty tools you need! Check out the parts and tools sections below to add everything to your cart.