









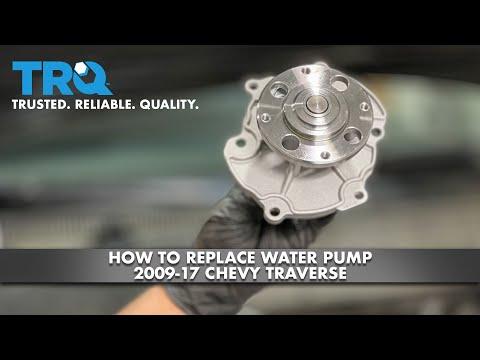







How to Replace the Water Pump on a 2013-2017 Chevrolet Traverse 3.6L V6 (Timing Chain Driven) (Engine: V6 3.6L)
Step-by-step internal water pump replacement with tools, parts list, safety tips, and GM torque specs guidance
How to Replace the Water Pump on a 2013-2017 Chevrolet Traverse 3.6L V6 (Timing Chain Driven) (Engine: V6 3.6L)
Step-by-step internal water pump replacement with tools, parts list, safety tips, and GM torque specs guidance for 2013, 2014, 2015, 2016, 2017


🔧 Traverse - Water Pump Replacement
On your Traverse’s 3.6L V6, the water pump is driven by the timing chain and sits behind the engine front cover. Replacing it is a big job because you must remove the front cover and manage timing components carefully to avoid engine damage.
Difficulty Level: Advanced | Estimated Time: 8-12 hours
Assumption: 3.6L timing-chain-driven internal water pump (most 2016 Traverse 3.6L).
⚠️ Safety & Precautions
- ⚠️ Never open the coolant system hot; let it cool fully.
- ⚠️ Support the vehicle with jack stands before working underneath.
- ⚠️ Disconnect the negative battery cable to prevent accidental cranking.
- ⚠️ Keep the timing chain area clean; dirt can cause rapid wear.
- ⚠️ If you disturb cam/crank timing, the engine can be damaged on start-up.
🔧 Required Tools
You'll need the following tools for this repair:
- Safety glasses
- Nitrile gloves
- Floor jack (rated 3-ton minimum)
- Jack stands (rated 3-ton minimum)
- Wheel chocks
- Drain pan (at least 10-quart)
- Funnel
- Shop towels
- Plastic trim clip remover
- Serpentine belt tool 15mm
- 1/4" drive ratchet
- 3/8" drive ratchet
- 1/2" drive breaker bar
- Torque wrench (10-150 ft-lbs)
- Torque angle gauge (specialty)
- Socket set (8mm-24mm)
- E-Torx socket set (E8-E14)
- Torx bit set (T20-T50)
- Extensions (3", 6", 12")
- Swivel adapter 3/8"
- Flat screwdriver
- Pry bar
- Harmonic balancer puller kit (specialty)
- Harmonic balancer installer kit (specialty)
- Engine support bar (specialty)
- Gasket scraper (plastic)
- Razor scraper
🔩 Required Parts
HowToo sells all the parts you need for this repair:
- Water pump - Qty: 1
- Water pump gasket/O-ring - Qty: 1
- Engine front cover gasket set - Qty: 1
- Crankshaft balancer bolt - Qty: 1
- Dex-Cool coolant (50/50 premix) - Qty: 3-4 gallons
- RTV sealant (GM-spec) - Qty: 1
- Serpentine belt - Qty: 1
- Engine oil - Qty: 6 quarts
- Oil filter - Qty: 1
📋 Before You Begin
- Park on level ground, set the parking brake, and chock the rear wheels.
- Disconnect the negative battery cable using a socket.
- Raise the front of the Traverse with a floor jack and set it on jack stands.
- Place a drain pan under the radiator drain area.
- Take photos as you go for bolt locations.
🔨 Step-by-Step Instructions
Follow these steps in order:
Step 1: Drain the coolant
- Remove the coolant reservoir cap by hand only when the engine is cool.
- Open the radiator drain (or remove the lower hose) and drain into a drain pan.
Step 2: Remove the right front wheel and splash shields
- Use a socket set to remove the lug nuts and remove the wheel.
- Use a plastic trim clip remover and sockets to remove the inner fender liner/splash shields.
Step 3: Remove the serpentine belt
- Use a serpentine belt tool 15mm to rotate the tensioner and slip the belt off.
- Draw the belt routing before removal.
Step 4: Support the engine and remove the right engine mount
- Install an engine support bar (a bar that holds the engine from above) and take the engine’s weight.
- Use sockets and E-Torx sockets to remove the right engine mount and bracket hardware.
- Torque all mount fasteners to GM service specification on reassembly.
Step 5: Remove front accessory brackets as needed
- Use sockets/E-Torx sockets to remove any brackets blocking the front cover.
- Move components aside without stressing hoses/wires; use shop towels to protect surfaces.
Step 6: Remove the harmonic balancer (crank pulley)
- Use a breaker bar and the correct socket to remove the crankshaft balancer bolt.
- Use a harmonic balancer puller kit to pull the balancer off.
- Never pry on the balancer sealing surface.
Step 7: Remove the engine front cover
- Use sockets and E-Torx sockets to remove all front cover bolts (note lengths/locations).
- Use a pry bar gently at the designated pry points to separate the cover.
- Use a drain pan and towels; more coolant/oil may drip when the cover comes off.
Step 8: Lock in timing position and manage the timing chain tension
- Rotate the engine by hand only using a socket on the crankshaft until timing marks align.
- Relieve and secure timing chain tension per GM procedure before removing the pump.
- If timing marks don’t make sense, stop.
Step 9: Remove the water pump
- Use sockets to remove the water pump fasteners.
- Remove the water pump and gasket/O-ring.
- Clean the sealing surface with a plastic gasket scraper and shop towels.
Step 10: Install the new water pump
- Install the new gasket/O-ring on the new pump.
- Position the pump and hand-start all bolts.
- Tighten evenly using a torque wrench.
- Torque water pump fasteners to GM service specification.
Step 11: Reinstall the front cover with correct sealant points
- Clean the front cover mating surfaces with a razor scraper carefully.
- Install the front cover gasket set.
- Apply RTV sealant only at the GM-specified joints/seams, then install the cover.
- Hand-start bolts, then tighten in sequence using a torque wrench.
- Torque front cover fasteners to GM service specification.
Step 12: Reinstall the harmonic balancer with a new bolt
- Use a harmonic balancer installer kit to press the balancer on straight.
- Install a new crankshaft balancer bolt.
- Use a torque wrench and torque angle gauge to tighten.
- Torque crankshaft balancer bolt to GM torque-plus-angle specification.
Step 13: Reinstall the engine mount, belt, shields, and wheel
- Reinstall the right engine mount and bracket using sockets and E-Torx sockets.
- Torque all mount fasteners to GM service specification.
- Install the serpentine belt using the serpentine belt tool 15mm.
- Reinstall splash shields and the wheel using a socket set.
- Torque wheel lug nuts to GM service specification.
Step 14: Refill coolant and bleed air
- Close the radiator drain and refill with Dex-Cool coolant using a funnel.
- Start the engine and set the heater to HOT to help purge air.
- Top off as the level drops, and watch for leaks.
Step 15: Change the oil if contaminated
- If you saw coolant/oil mixing at disassembly, change engine oil and filter using sockets and a drain pan.
✅ After Repair
- Recheck coolant level after the first full warm-up and after the next drive.
- Inspect for leaks around the front cover, water pump area, and hoses.
- Listen for abnormal chain noise; shut off immediately if heard.
- Verify cabin heat works and engine temperature stays normal.
💰 DIY vs Shop Cost
Shop Cost: $1,200-$2,500 (parts + labor)
DIY Cost: $250-$700 (parts only)
You Save: $500-$1,800 by doing it yourself!
Shop labor rates vary but typically run $100-$150/hour. This repair takes a shop approximately 8-12 hours.
🎯 Ready to get started?
HowToo makes it easy: same-day/2-day shipping on every part, plus all the tools and specialty tools you need! Check out the parts and tools sections below to add everything to your cart.
Guide for Engine Water Pump replace for these Chevrolet vehicles
| Year Make Model | Sub Model | Engine | Body Style |
|---|---|---|---|
| 2017 Chevrolet Traverse | - | V6 3.6L | - |
| 2016 Chevrolet Traverse | - | V6 3.6L | - |
| 2015 Chevrolet Traverse | - | V6 3.6L | - |
| 2014 Chevrolet Traverse | - | V6 3.6L | - |
| 2013 Chevrolet Traverse | - | V6 3.6L | - |