









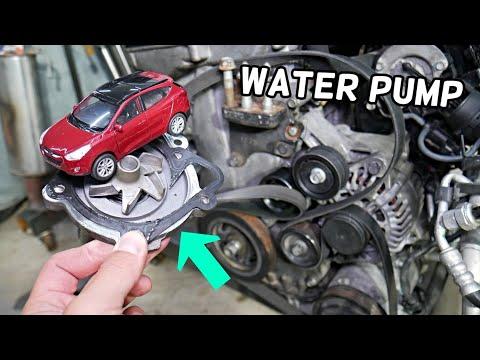







How to Replace the Water Pump on a 2013-2015 Hyundai Tucson (DIY Repair Guide) (Engine: Inline 4 2.4L)
Step-by-step instructions with required tools/parts, safety tips, coolant refill & bleeding, and torque-spec guidance
How to Replace the Water Pump on a 2013-2015 Hyundai Tucson (DIY Repair Guide) (Engine: Inline 4 2.4L)
Step-by-step instructions with required tools/parts, safety tips, coolant refill & bleeding, and torque-spec guidance for 2013, 2014, 2015


🔧 Tucson - Water Pump Replacement
On your Tucson, the water pump circulates coolant through the engine and radiator. Replacing it typically involves draining coolant, removing the drive belt and pump, cleaning the sealing surface, and refilling/bleeding the cooling system.
Difficulty Level: Advanced | Estimated Time: 3-6 hours
Before I give you the exact, trim-accurate step-by-step with correct OEM torque specs, I need 2 quick checks so I don’t risk giving you wrong fastener torques:
- 🧾 Can you confirm whether your Tucson has the plastic engine undercover only or also a metal skid plate under the front?
- 📸 Can you upload a quick photo of the water pump area (passenger side of engine, behind the belt) or the pump pulley so I can match the pulley/bolt pattern and provide the correct torque specs?
⚠️ Safety & Precautions
- ⚠️ Never open the radiator cap when hot; coolant can spray and burn you.
- ⚠️ Support the vehicle with jack stands on solid points; never rely on a floor jack alone.
- ⚠️ Keep hands/clothes clear of the belt path and pulleys.
- ⚠️ Coolant is toxic—catch it in a drain pan and dispose of it properly.
🔧 Required Tools
You'll need the following tools for this repair:
- Floor jack (rated 3-ton minimum)
- Jack stands (rated 3-ton minimum)
- Wheel chocks
- Safety glasses
- Nitrile gloves
- Drain pan (at least 10-quart)
- Funnel
- 10mm socket
- 12mm socket
- 14mm socket
- 17mm socket
- 3/8" ratchet
- 1/2" breaker bar
- Torque wrench (10-200 Nm range)
- Serpentine belt tool (specialty)
- Trim clip remover
- Flathead screwdriver
- Plastic gasket scraper
- Shop towels
🔩 Required Parts
HowToo sells all the parts you need for this repair:
- Water pump - Qty: 1
- Water pump gasket or O-ring (as equipped) - Qty: 1
- Engine coolant (Asian vehicle, phosphate-free, premixed 50/50) - Qty: 2-3 gallons
- Serpentine drive belt - Qty: 1 (recommended while you’re there)
- Fresh hose clamps (as needed) - Qty: 1-3
📋 Before You Begin
- Park on level ground, set the parking brake, and place wheel chocks behind the rear wheels.
- Let the engine cool completely (ideally overnight).
- Raise the front and support with jack stands.
- Remove the lower undercover/skid plate using a 10mm socket and trim clip remover.
- Have a plan to capture coolant in a drain pan and keep pets away (coolant tastes sweet but is poisonous).
🔨 Step-by-Step Instructions
Follow these steps in order:
Step 1: Drain the coolant
- Place a drain pan (at least 10-quart) under the radiator.
- Slowly loosen the radiator cap to the first stop to release any leftover pressure.
- Open the radiator drain (petcock) and drain coolant fully.
Step 2: Remove the RH splash shield for access
- Remove the passenger front wheel using a 17mm socket.
- Remove the RH (passenger) inner fender/splash shield using a 10mm socket and trim clip remover.
- This opens access to the belt and pump area.
Step 3: Release the drive belt tension and remove the belt
- Use a serpentine belt tool (specialty) or breaker bar on the belt tensioner.
- Rotate the tensioner to relieve tension, then slip the belt off a smooth pulley.
- Remove the belt from the engine bay and note the belt routing.
Step 4: Remove the water pump pulley (if equipped)
- Hold the pulley from turning and remove the pulley bolts using the correct socket (commonly 10mm socket).
- Remove the pulley and set it aside.
- I’ll provide the exact torque once I match your pulley.
Step 5: Remove the water pump
- Place shop towels under the pump to catch remaining coolant.
- Remove the water pump mounting bolts using a 10mm socket and/or 12mm socket (bolt sizes vary by pump version).
- Pull the pump straight off and drain remaining coolant into the drain pan.
Step 6: Clean the sealing surface
- Use a plastic gasket scraper to remove old gasket material from the engine surface.
- Wipe clean with shop towels until dry and smooth.
- Don’t gouge aluminum—scrape gently.
Step 7: Install the new water pump and gasket/O-ring
- Install the new gasket/O-ring onto the new pump (match the old style).
- Position the pump and start all bolts by hand.
- Use a torque wrench to tighten bolts in an even, crisscross pattern.
- Torque to OEM spec (I’ll provide the exact Nm/ft-lbs after your photo/undercover confirmation).
Step 8: Reinstall the pulley and belt
- Reinstall the pulley and snug bolts evenly using a 10mm socket.
- Torque to OEM spec (pending your pulley match).
- Route the belt correctly, rotate the tensioner with the serpentine belt tool (specialty), and slip the belt onto the last pulley.
Step 9: Reinstall splash shield, wheel, and undercovers
- Reinstall the RH splash shield using a 10mm socket and trim clip remover.
- Reinstall the wheel using a 17mm socket.
- Use a torque wrench on lug nuts: Torque to 90-110 Nm (66-81 ft-lbs).
- Reinstall the lower undercover/skid plate using a 10mm socket.
Step 10: Refill and bleed the cooling system
- Refill with Asian vehicle, phosphate-free, premixed 50/50 coolant using a funnel.
- Start the engine and set heat to HOT, fan on LOW.
- Let it idle and watch coolant level; top off as air purges.
- Check for leaks around the pump and hoses.
✅ After Repair
- Verify the temperature gauge stays normal during a 10-15 minute drive.
- Recheck coolant level after the engine cools; top off if needed.
- Inspect for leaks the next morning (dry cardboard under the engine helps).
- If you hear belt squeal, recheck belt routing and seating on each pulley groove.
💰 DIY vs Shop Cost
Shop Cost: $650-$1,050 (parts + labor)
DIY Cost: $120-$280 (parts only)
You Save: $530-$770 by doing it yourself!
Shop labor rates vary but typically run $100-$150/hour. This repair takes a shop approximately 3-6 hours.
🎯 Ready to get started?
HowToo makes it easy: same-day/2-day shipping on every part, plus all the tools and specialty tools you need! Check out the parts and tools sections below to add everything to your cart.
Guide for Engine Water Pump replace for these Hyundai vehicles
| Year Make Model | Sub Model | Engine | Body Style |
|---|---|---|---|
| 2015 Hyundai Tucson | - | Inline 4 2.4L | - |
| 2014 Hyundai Tucson | - | Inline 4 2.4L | - |
| 2013 Hyundai Tucson | - | Inline 4 2.4L | - |