









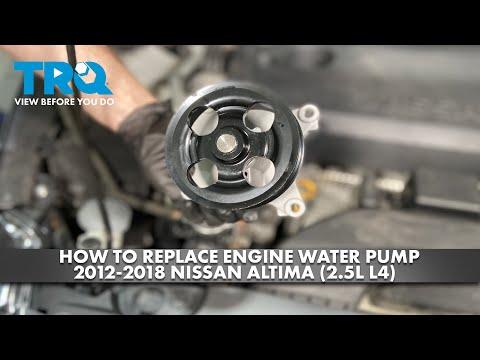







How to Replace the Water Pump on a 2013-2014 Nissan Altima 3.5L V6 (Engine: Inline 4 2.5L)
Step-by-step timing cover removal guide with tools, parts, torque specs, and safety tips for 2013, 2014
How to Replace the Water Pump on a 2013-2014 Nissan Altima 3.5L V6 (Engine: Inline 4 2.5L)
Step-by-step timing cover removal guide with tools, parts, torque specs, and safety tips for 2013, 2014


🔧 Altima - Water Pump Replacement
The water pump on your Altima’s 3.5L V6 is mounted behind the front timing cover and is driven by the timing chain. This is not a simple external water pump job; it requires careful timing cover removal, engine support, coolant service, and clean resealing to prevent leaks.
Difficulty Level: Advanced | Estimated Time: 6-9 hours
⚠️ Safety & Precautions
- ⚠️ Work only on a completely cool engine. Hot coolant can spray and burn you badly.
- ⚠️ Disconnect the negative battery cable before removing engine mount parts.
- ⚠️ Support the engine before removing the right-side engine mount.
- ⚠️ Do not rotate the crankshaft or camshafts with the water pump removed.
- ⚠️ Keep the timing chain from moving. If timing jumps, the engine may be damaged.
- ⚠️ Used coolant is poisonous. Store it safely and recycle it properly.
🔧 Required Tools
You'll need the following tools for this repair:
- Safety glasses
- Nitrile gloves
- Wheel chocks
- Floor jack (rated 3-ton minimum)
- Jack stands (rated 3-ton minimum)
- Engine support bar (specialty)
- Drain pan (2-gallon minimum)
- Coolant spill-free funnel kit
- Metric socket set 8mm-22mm
- 10mm socket
- 12mm socket
- 14mm socket
- 17mm socket
- 19mm socket
- 21mm socket
- 27mm socket
- 3/8-inch ratchet
- 1/2-inch breaker bar
- 3/8-inch torque wrench (5-80 ft-lbs)
- 1/2-inch torque wrench (10-150 ft-lbs)
- Long socket extension set
- Serpentine belt tool (specialty)
- Harmonic balancer puller (specialty)
- Crankshaft pulley holding tool (specialty)
- Plastic trim clip remover
- Flat-blade screwdriver
- Needle-nose pliers
- Hose clamp pliers
- Plastic gasket scraper
- Paint marker
- Brake cleaner spray
- Shop towels
- Scan tool with live coolant temperature
🔩 Required Parts
HowToo sells all the parts you need for this repair:
- Water pump - Qty: 1
- Water pump O-ring/gasket - Qty: 1
- Timing cover sealant/gasket set - Qty: 1
- Front crankshaft seal - Qty: 1
- Nissan-compatible blue long-life coolant premix - Qty: 2 gallons
- Serpentine belt - Qty: 1 recommended if worn or coolant-contaminated
- Engine oil - Qty: 5 quarts if oil pan seal is disturbed
- Oil filter - Qty: 1 if oil change is performed
📋 Before You Begin
- 🅿️ Park your Altima on level ground and set the parking brake.
- ❄️ Let the engine cool for several hours before opening the cooling system.
- 🔋 Use a 10mm socket to disconnect the negative battery cable.
- 🧰 An engine support bar holds the engine from above when the side mount is removed.
- 🧰 A harmonic balancer puller safely removes the crankshaft pulley without hammering.
- 🧰 A torque wrench tightens bolts to the correct tightness so parts do not leak or break.
- 📸 Take photos of belt routing, bracket locations, and bolt locations before removal.
🔨 Step-by-Step Instructions
Follow these steps in order:
Step 1: Raise the Front of the Vehicle
- Use wheel chocks behind the rear wheels.
- Use a floor jack to lift the front of your Altima at the front center jacking point.
- Place jack stands under the approved front support points.
- Lower the vehicle onto the jack stands and confirm it is stable before going underneath.
Step 2: Disconnect the Battery
- Use a 10mm socket to loosen the negative battery terminal clamp.
- Move the cable aside so it cannot touch the battery post.
- Black cable comes off first.
Step 3: Drain the Coolant
- Place a drain pan under the radiator drain area.
- Use a flat-blade screwdriver or needle-nose pliers to open the radiator drain cock if accessible.
- Slowly remove the radiator cap after confirming the system is cool.
- Let the coolant drain completely.
- If the drain cock is not accessible, use hose clamp pliers to remove the lower radiator hose and drain from there.
Step 4: Remove the Right Front Wheel and Splash Shield
- Use a 21mm socket to remove the right front wheel lug nuts.
- Remove the wheel and set it aside flat.
- Use a plastic trim clip remover and 10mm socket to remove the right inner splash shield.
- Save all clips and screws in a cup or tray.
- During final installation, tighten the wheel lug nuts to Torque to 113 Nm (83 ft-lbs).
Step 5: Remove the Serpentine Belt
- Use a paint marker or phone photo to record the belt routing.
- Use a serpentine belt tool to rotate the belt tensioner and release belt tension.
- Slide the belt off the pulleys.
- Inspect the belt and replace it if it is cracked, shiny, stretched, or coolant-soaked.
Step 6: Support the Engine
- Install the engine support bar across the upper engine bay support points.
- Attach the support hook or chain to a solid engine lifting point.
- Apply light upward tension with the support bar.
- Do not lift the vehicle with the engine support bar.
- Support first, then unbolt.
Step 7: Remove the Right Engine Mount and Bracket
- Use 14mm and 17mm sockets with long extensions to remove the right engine mount fasteners.
- Remove the mount and bracket as needed for timing cover access.
- Keep bolts organized by location.
- During reassembly, tighten typical mount fasteners to Torque to 62-88 Nm (46-65 ft-lbs).
Step 8: Remove the Crankshaft Pulley
- Use the crankshaft pulley holding tool to prevent the pulley from turning.
- Use a 27mm socket and 1/2-inch breaker bar to loosen the crankshaft pulley bolt.
- Install the harmonic balancer puller and pull the pulley straight off.
- Do not hammer or pry against the pulley.
- During installation, tighten the pulley bolt to Torque to 44 Nm (33 ft-lbs), then turn an additional 90 degrees.
Step 9: Remove Timing Cover Bolts
- Use 10mm, 12mm, and 14mm sockets to remove the front timing cover bolts.
- Use a paint marker or cardboard template to track each bolt location.
- Some bolts are different lengths, so do not mix them up.
Step 10: Remove the Front Timing Cover
- Use a plastic gasket scraper to carefully separate the timing cover where sealant holds it.
- Pull the cover off slowly by hand.
- Do not pry with a metal screwdriver on the aluminum sealing surfaces.
- Keep loose sealant pieces out of the timing chain area.
Step 11: Mark the Timing Chain Position
- Use a paint marker to mark the timing chain and nearby sprocket positions.
- This gives you a visual reference if anything shifts slightly.
- Do not rotate the crankshaft or camshafts after marking.
Step 12: Remove the Old Water Pump
- Place the drain pan below the pump area because more coolant may come out.
- Use a 10mm socket to remove the water pump bolts.
- Pull the water pump straight out by hand.
- Remove the old O-ring or gasket.
Step 13: Clean the Sealing Surface
- Use a plastic gasket scraper to clean the water pump mounting surface.
- Use brake cleaner spray on a shop towel to wipe the surface clean.
- Do not spray brake cleaner directly into the timing chain cavity.
- The surface must be clean, dry, and smooth.
Step 14: Install the New Water Pump
- Lightly coat the new O-ring with clean coolant if your replacement pump uses an O-ring.
- Install the water pump by hand and make sure it seats evenly.
- Use a 10mm socket to start all water pump bolts by hand.
- Use a 3/8-inch torque wrench to tighten the bolts evenly to Torque to 9-12 Nm (80-106 in-lbs).
- Do not overtighten small bolts.
Step 15: Reseal the Timing Cover
- Use a plastic gasket scraper to remove old sealant from the timing cover and engine surfaces.
- Use brake cleaner spray on shop towels to clean the sealing surfaces.
- Install the new front crankshaft seal into the timing cover.
- Apply timing cover RTV sealant in the same pattern as the original sealant bead.
- Install the timing cover carefully without smearing the sealant.
- Use 10mm, 12mm, and 14mm sockets to reinstall the timing cover bolts in their original locations.
- Use a 3/8-inch torque wrench to tighten small timing cover bolts to Torque to 12 Nm (106 in-lbs).
- Use a 3/8-inch torque wrench to tighten larger timing cover bolts to Torque to 25 Nm (18 ft-lbs).
Step 16: Reinstall the Crankshaft Pulley
- Slide the crankshaft pulley onto the crankshaft by hand.
- Use the crankshaft pulley holding tool to keep the pulley still.
- Use a 27mm socket and torque wrench to tighten the pulley bolt to Torque to 44 Nm (33 ft-lbs), then turn an additional 90 degrees.
Step 17: Reinstall the Right Engine Mount
- Use the engine support bar to slightly adjust engine height until the mount holes line up.
- Start all mount bolts by hand.
- Use 14mm and 17mm sockets to tighten the mount fasteners.
- Use a torque wrench to tighten typical mount fasteners to Torque to 62-88 Nm (46-65 ft-lbs).
- Remove the engine support bar after the mount is fully tightened.
Step 18: Reinstall the Serpentine Belt
- Route the belt according to your photo or diagram.
- Use the serpentine belt tool to rotate the tensioner.
- Slip the belt over the final pulley and slowly release the tensioner.
- Check that the belt ribs sit correctly in every pulley groove.
Step 19: Reinstall the Splash Shield and Wheel
- Use the plastic trim clip remover and 10mm socket to reinstall the right splash shield.
- Install the wheel and hand-start all lug nuts.
- Use a 21mm socket to snug the lug nuts in a star pattern.
- Lower the vehicle with the floor jack.
- Use a torque wrench and 21mm socket to tighten the lug nuts to Torque to 113 Nm (83 ft-lbs).
Step 20: Refill the Cooling System
- Close the radiator drain or reconnect the lower radiator hose using hose clamp pliers.
- Install a coolant spill-free funnel kit at the radiator fill neck.
- Fill with Nissan-compatible blue long-life coolant premix.
- Use a 10mm socket to reconnect the negative battery cable.
- Set the heater to full hot and the fan to low.
- Start the engine and let it idle.
- Add coolant as air bubbles come out through the funnel.
- Use a scan tool to watch live coolant temperature.
- Stop the engine if the temperature climbs too high or the heater does not blow warm air.
Step 21: Final Leak Check
- Use a flashlight to inspect the timing cover, water pump area, radiator hoses, and drain point.
- Look for coolant leaks, oil leaks, or belt wobble.
- After the engine cools fully, top off the radiator and reservoir if needed.
✅ After Repair
- ✅ Let the timing cover sealant cure according to the sealant instructions before long driving.
- ✅ Road-test gently for 10-15 minutes while watching the temperature gauge.
- ✅ Recheck coolant level after one full heat-up and cool-down cycle.
- ✅ Reinspect for leaks the next day.
- ✅ If you hear timing chain noise, see overheating, or find coolant in the oil, stop driving immediately.
- ✅ Recycle old coolant safely. Do not pour it on the ground or into a drain.
💰 DIY vs Shop Cost
Shop Cost: $950-$1,600 (parts + labor)
DIY Cost: $180-$450 (parts only)
You Save: $770-$1,150 by doing it yourself!
Shop labor rates vary but typically run $100-$150/hour. This repair takes a shop approximately 6-8 hours.
🎯 Ready to get started?
HowToo makes it easy: same-day/2-day shipping on every part, plus all the tools and specialty tools you need! Check out the parts and tools sections below to add everything to your cart.