









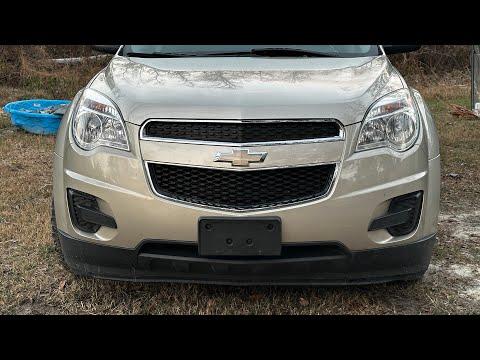







How to Replace the Water Pump on a 2012-2015 Chevrolet Equinox (Engine: Inline 4 2.4L)
Step-by-step repair guide with tools, parts, torque specs, and cooling system bleed instructions
How to Replace the Water Pump on a 2012-2015 Chevrolet Equinox (Engine: Inline 4 2.4L)
Step-by-step repair guide with tools, parts, torque specs, and cooling system bleed instructions for 2012, 2013, 2014, 2015


🔧 Water Pump - Replacement
The water pump circulates coolant through your engine, radiator, and heater core. On your Equinox, a failing pump can leak coolant, make noise, or cause overheating, so replacing it promptly helps prevent engine damage.
Difficulty Level: Intermediate | Estimated Time: 3-5 hours
⚠️ Safety & Precautions
- Let the engine cool completely before opening the cooling system. Hot coolant can cause severe burns.
- Use jack stands on level ground. Never rely on a jack alone.
- Disconnect the negative battery cable before working near the belt drive or starter wiring.
- Dispose of old coolant properly. It is toxic to people and pets.
- Bleed the cooling system carefully after repair. Air trapped in the system can cause overheating.
🔧 Required Tools
You'll need the following tools for this repair:
- Safety glasses
- Nitrile gloves
- Drain pan
- Floor jack (rated 3-ton minimum)
- Jack stands
- Wheel chocks
- 10mm socket
- 13mm socket
- 15mm socket
- Socket wrench
- Breaker bar
- Belt tensioner tool (specialty)
- Torque wrench
- Flat-blade screwdriver
- Plastic trim tool
- Coolant funnel
- Shop towels
🔩 Required Parts
HowToo sells all the parts you need for this repair:
- Water pump - Qty: 1
- Water pump gasket or seal - Qty: 1
- Engine coolant (DEX-COOL 50/50 premix) - Qty: 1-2 gallons
- Serpentine belt - Qty: 1
- Water pump pulley bolts - Qty: 1 set, if required
- Thermostat housing gasket - Qty: 1, if removed
📋 Before You Begin
- Park on level ground and set the parking brake.
- Let the engine cool fully.
- Disconnect the negative battery cable.
- Raise the front of the vehicle and support it securely with jack stands.
- Remove the right front wheel and inner splash shield for access.
🔨 Step-by-Step Instructions
Follow these steps in order:
Step 1: Drain the cooling system
- Place a drain pan under the radiator drain area.
- Use a flat-blade screwdriver or pliers, depending on the drain style, to open the radiator drain and drain coolant.
- Remove the coolant reservoir cap to help the system drain faster.
Step 2: Remove the right front wheel and splash shield
- Use a 19mm socket to remove the wheel nuts.
- Use a 7mm or 10mm socket, depending on fastener style, to remove the inner fender/splash shield fasteners.
- Remove the shield for access to the belt drive area.
Step 3: Remove the serpentine belt
- Use a belt tensioner tool to rotate the tensioner and relieve belt tension.
- Slip the belt off the pulleys and remove it from the engine bay.
- Take a quick photo of the belt route first.
Step 4: Remove components blocking access
- Use a 10mm socket to remove any coolant hoses, brackets, or covers in the way.
- If the coolant reservoir or nearby brackets block the pump, remove them with the appropriate 10mm or 13mm socket.
- Move hoses aside carefully so they do not crack or kink.
Step 5: Remove the water pump
- Use a 10mm socket to remove the water pump bolts.
- Pull the water pump straight off the engine.
- Drain any remaining coolant into the pan.
- Remove the old gasket or seal from the mounting surface.
Step 6: Clean the mounting surface
- Use a plastic trim tool and shop towels to clean the engine mating surface.
- Do not scratch the aluminum surface.
- Make sure the surface is dry and free of old gasket material.
Step 7: Install the new water pump
- Install the new gasket or seal on the pump.
- Position the new water pump onto the engine.
- Hand-start all bolts first.
- Use a torque wrench to tighten the water pump bolts evenly in a crisscross pattern.
- Torque to 10 Nm (89 in-lbs)
Step 8: Reinstall removed components
- Reinstall any brackets, hoses, or covers using the correct socket size.
- Reinstall the serpentine belt with the belt tensioner tool.
- Make sure the belt sits fully in every pulley groove.
Step 9: Reassemble the wheel area
- Reinstall the splash shield using the 7mm or 10mm socket.
- Reinstall the wheel and hand-tighten the lug nuts.
- Lower the vehicle and torque the lug nuts in a star pattern.
- Torque to 140 Nm (103 ft-lbs)
Step 10: Refill and bleed the cooling system
- Fill the system with DEX-COOL 50/50 coolant through the reservoir using a coolant funnel.
- Start the engine and let it idle with the heater set to HOT.
- Watch the coolant level and add coolant as air purges out.
- Continue until no more bubbles appear and the level stabilizes.
- Keep the cap off until air stops burping out.
Step 11: Check for leaks and verify operation
- Inspect the water pump, hoses, and drain area for leaks.
- Verify the radiator fan cycles normally.
- Watch the temperature gauge for stable operation.
✅ After Repair
- Recheck coolant level after the first drive and again the next day.
- Look for dried coolant residue around the pump and hose connections.
- If the engine overheats or loses coolant, stop driving and recheck the bleed process.
- Top off coolant only with the correct DEX-COOL mix.
💰 DIY vs Shop Cost
Shop Cost: $550-$950 (parts + labor)
DIY Cost: $120-$280 (parts only)
You Save: $430-$670 by doing it yourself!
Shop labor rates vary but typically run $100-$150/hour. This repair takes a shop approximately 3-5 hours.
🎯 Ready to get started?
HowToo makes it easy: same-day/2-day shipping on every part, plus all the tools and specialty tools you need! Check out the parts and tools sections below to add everything to your cart.
Guide for Engine Water Pump replace for these Chevrolet vehicles
| Year Make Model | Sub Model | Engine | Body Style |
|---|---|---|---|
| 2015 Chevrolet Equinox | - | Inline 4 2.4L | - |
| 2014 Chevrolet Equinox | - | Inline 4 2.4L | - |
| 2013 Chevrolet Equinox | - | Inline 4 2.4L | - |
| 2012 Chevrolet Equinox | - | Inline 4 2.4L | - |