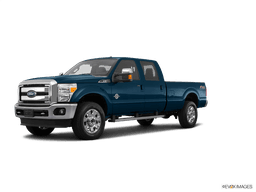









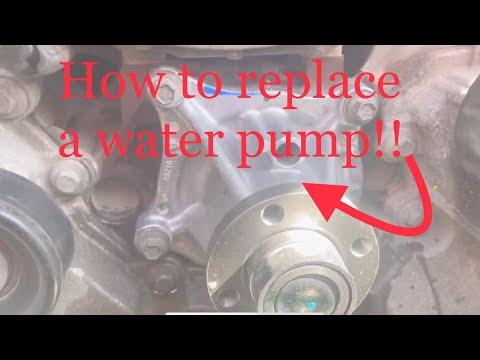







How to Replace the Water Pump on a 2011-2016 Ford F-350 Super Duty 6.2L (Engine: V8 6.2L)
Step-by-step DIY replacement with tools list, parts, safety tips, and torque specs (13 ft-lbs)
How to Replace the Water Pump on a 2011-2016 Ford F-350 Super Duty 6.2L (Engine: V8 6.2L)
Step-by-step DIY replacement with tools list, parts, safety tips, and torque specs (13 ft-lbs) for 2011, 2012, 2013, 2014, 2015, 2016


🔧 Water Pump - Replacement
The water pump circulates coolant through the engine and radiator. If it’s leaking, noisy, or the engine is overheating, replacing the pump restores proper cooling and prevents engine damage.
Difficulty Level: Advanced | Estimated Time: 3-5 hours
Assumption: your F-350 has the 6.2L with a mechanical fan clutch.
⚠️ Safety & Precautions
- ⚠️ Never open the coolant cap on a hot engine; let it cool fully.
- ⚠️ Support the truck with jack stands if you raise it; never rely on a jack.
- ⚠️ Keep hands/tools clear of the fan and belt path.
- ⚠️ Coolant is toxic; capture all coolant and clean spills immediately.
- ⚠️ Battery disconnect is recommended when working around the fan/belt: remove the negative battery terminal first.
🔧 Required Tools
You'll need the following tools for this repair:
- Safety glasses
- Nitrile gloves
- Drain pan (at least 4-gallon)
- Floor jack (rated 3-ton minimum)
- Jack stands (rated 3-ton minimum)
- Wheel chocks
- 1/4" drive ratchet
- 3/8" drive ratchet
- 1/2" drive breaker bar
- 3/8" drive torque wrench (10-80 ft-lbs range)
- 8mm socket
- 10mm socket
- 13mm socket
- 15mm socket
- Long handle serpentine belt tool with 15mm socket
- Fan clutch wrench 36mm (specialty)
- Fan pulley holding tool (specialty)
- Hose clamp pliers
- Pick tool
- Plastic trim tool
- Gasket scraper (plastic)
- Brake cleaner spray
- Shop towels
- Funnel
🔩 Required Parts
HowToo sells all the parts you need for this repair:
- Water pump (6.2L) - Qty: 1
- Water pump gasket/O-ring (if not included with pump) - Qty: 1
- Engine coolant (Ford-approved OAT) - Qty: 3-4 gallons
- Distilled water - Qty: 3-4 gallons
- Serpentine belt - Qty: 1
📋 Before You Begin
- 🅿️ Park on level ground, set the parking brake, and chock the rear wheels.
- Let the engine cool completely (upper radiator hose should feel cool).
- Place a large drain pan under the radiator drain area.
- Disconnect the battery: use a 10mm socket to remove the negative terminal and isolate it.
- If you raise the front, lift with a floor jack and support with jack stands under the frame.
🔨 Step-by-Step Instructions
Follow these steps in order:
Step 1: Drain the coolant
- Remove the coolant degas bottle cap slowly (only when cold).
- Position the drain pan under the radiator drain.
- Open the radiator drain (petcock) and drain the coolant.
- Use hose clamp pliers to remove the lower radiator hose at the radiator if you need faster draining.
Step 2: Remove the intake duct (for access)
- Use an 8mm socket to loosen the intake hose clamps.
- Release any clips with a plastic trim tool and lift the duct out.
Step 3: Remove the fan shroud and mechanical fan
- Remove the upper fan shroud fasteners using a 10mm socket.
- Set the shroud loose in the bay (some setups lift out with the fan).
- Install the fan pulley holding tool (specialty) to keep the pulley from spinning.
- Use the 36mm fan clutch wrench (specialty) to loosen the fan clutch nut (standard right-hand thread: loosen counterclockwise).
- Lift the fan and shroud out together carefully.
- Tip: Cardboard protects the radiator fins.
Step 4: Remove the serpentine belt
- Take a photo of the belt routing (or use the under-hood belt diagram).
- Use a serpentine belt tool with 15mm socket to rotate the tensioner and slip the belt off.
- Inspect the belt; replace it if cracked, glazed, or oil-soaked.
Step 5: Remove hoses from the water pump
- Use hose clamp pliers to release clamps on the water pump hoses.
- Twist hoses gently to break them free; use a pick tool carefully if they’re stuck (don’t gouge the hose neck).
- Move hoses aside and catch any remaining coolant with the drain pan.
Step 6: Remove the water pump
- Remove the water pump bolts using a 10mm socket.
- Note the location of any different-length bolts (lay them out in order).
- Pull the pump straight off the front cover; some coolant will spill.
Step 7: Clean the sealing surface
- Use a plastic gasket scraper to remove old gasket material without scratching the aluminum.
- Spray brake cleaner onto a shop towel and wipe the surface clean and dry.
- Do not let debris fall into the open coolant passages.
Step 8: Install the new water pump
- Install the new gasket/O-ring onto the new pump (if applicable).
- Position the pump and start all bolts by hand to avoid cross-threading.
- Tighten bolts evenly in a crisscross pattern using a 10mm socket.
- Final tighten with a torque wrench: Torque to 18 Nm (13 ft-lbs).
Step 9: Reinstall hoses, belt, fan, and shroud
- Reconnect water pump hoses and secure clamps using hose clamp pliers.
- Route the belt and rotate the tensioner using the serpentine belt tool with 15mm socket, then slip the belt on.
- Spin pulleys by hand to confirm the belt is seated in every groove.
- Reinstall the fan/shroud assembly carefully.
- Thread the fan clutch onto the hub by hand, then snug with the 36mm fan clutch wrench while holding with the fan pulley holding tool.
- Reinstall shroud fasteners using a 10mm socket.
Step 10: Refill and bleed the cooling system
- Close the radiator drain.
- Mix coolant 50/50 using Ford-approved OAT coolant and distilled water (unless your coolant is pre-mixed).
- Fill the degas bottle slowly using a funnel to the correct level.
- Reconnect the battery negative terminal using a 10mm socket.
- Start the engine and set the HVAC to heat (this opens flow through the heater core).
- Let it idle and watch the coolant level; top off as air purges.
- Check for leaks around the pump and hose connections.
✅ After Repair
- 🔎 Test drive 10-15 minutes while monitoring the temperature gauge.
- Let the engine cool completely, then recheck and adjust the degas bottle level.
- Inspect for coolant leaks the next morning (cold) around the water pump weep area and hose ends.
- Dispose of old coolant properly (most parts stores accept waste fluids).
💰 DIY vs Shop Cost
Shop Cost: $700-$1,200 (parts + labor)
DIY Cost: $150-$380 (parts only)
You Save: $550-$820 by doing it yourself!
Shop labor rates vary but typically run $100-$150/hour. This repair takes a shop approximately 3-5 hours.
🎯 Ready to get started?
HowToo makes it easy: same-day/2-day shipping on every part, plus all the tools and specialty tools you need! Check out the parts and tools sections below to add everything to your cart.
Guide for Engine Water Pump replace for these Ford vehicles
| Year Make Model | Sub Model | Engine | Body Style |
|---|---|---|---|
| 2016 Ford F-350 Super Duty | - | V8 6.2L | - |
| 2015 Ford F-350 Super Duty | - | V8 6.2L | - |
| 2014 Ford F-350 Super Duty | - | V8 6.2L | - |
| 2013 Ford F-350 Super Duty | - | V8 6.2L | - |
| 2012 Ford F-350 Super Duty | - | V8 6.2L | - |
| 2011 Ford F-350 Super Duty | - | V8 6.2L | - |