









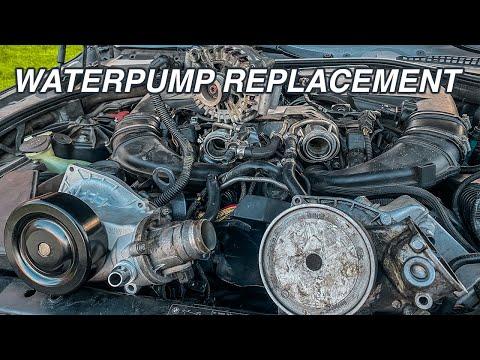







How to Replace the Water Pump on a 2011-2016 BMW 550i (N63TU) (Engine: V8 4.4L)
Step-by-step DIY instructions with tools, parts list, torque specs, coolant refill/bleed procedure, and safety tips
How to Replace the Water Pump on a 2011-2016 BMW 550i (N63TU) (Engine: V8 4.4L)
Step-by-step DIY instructions with tools, parts list, torque specs, coolant refill/bleed procedure, and safety tips for 2011, 2012, 2013, 2014, 2015, 2016


🔧 550i - Water Pump Replacement
On your 550i, the water pump circulates coolant through the engine and radiator. If it leaks, seizes, or can’t move enough coolant, you can get overheating, coolant loss, and warning messages.
Difficulty Level: Advanced | Estimated Time: 4-7 hours
Assumption: Stock N63TU setup with a belt-driven main water pump; access is tight.
⚠️ Safety & Precautions
- ⚠️ Never open the coolant tank hot; let the engine cool fully.
- ⚠️ Support the car on jack stands; never rely on a jack.
- ⚠️ Coolant is toxic; keep it off skin and away from pets.
- ⚠️ Keep fingers/tools clear of the electric radiator fan; it can turn on unexpectedly.
- 🔋 If you’ll unplug major connectors near the fan/shroud area, disconnect the negative battery cable first.
🔧 Required Tools
You'll need the following tools for this repair:
- Floor jack (rated 3-ton minimum)
- Jack stands (rated 3-ton minimum)
- Wheel chocks
- Safety glasses
- Nitrile gloves
- Drain pan (at least 3-gallon)
- Metric socket set (8mm, 10mm, 13mm, 16mm)
- E-Torx socket set (E10, E12)
- Torx bit set (T25, T30, T60)
- 3/8" drive ratchet
- 3/8" drive extensions (3" and 6")
- Torque wrench (5–60 Nm range)
- Serpentine belt tool or long-handled 3/8" breaker bar
- Pick tool
- Hose clamp pliers
- Trim clip removal tool
- Funnel
- Cooling system vacuum fill tool (specialty)
- OBD-II scan tool (BMW-capable) (specialty)
🔩 Required Parts
HowToo sells all the parts you need for this repair:
- Water pump - Qty: 1
- Water pump gasket / O-ring (included with pump if supplied) - Qty: 1
- BMW-approved coolant concentrate (HT-12 equivalent) - Qty: 2-3 gallons mixed 50/50 with distilled water
- Distilled water - Qty: 2-3 gallons
- Coolant hose clamps (single-use style, if equipped) - Qty: 2-6
- Serpentine belt - Qty: 1
📋 Before You Begin
- Park on level ground, set the parking brake, and chock the rear wheels.
- Let the engine cool completely (coolant should be cold to the touch).
- Lift the front and place it securely on jack stands at the factory jacking points.
- Set your HVAC before bleeding later: Temperature: MAX heat and Fan: Low.
- Take photos as you go. They help during reassembly.
🔨 Step-by-Step Instructions
Follow these steps in order:
Step 1: Remove the lower splash shields (undertrays)
- Use a Torx T25 and Torx T30 to remove the underbody panel screws.
- Use a trim clip removal tool for any push-clips.
- Set panels and hardware aside in order.
Step 2: Drain the coolant
- Place a drain pan (at least 3-gallon) under the radiator/lower hose area.
- Slowly loosen the coolant tank cap by hand to release any remaining pressure.
- Use hose clamp pliers to release the lower radiator hose clamp (or open the radiator drain if equipped), then drain coolant into the pan.
- Coolant drains fast—be ready.
Step 3: Create access at the front of the engine
- From above, remove intake ducting/airbox pieces as needed using a 8mm socket, 10mm socket, and Torx T25.
- If the fan/shroud blocks access, unplug the connector(s) and remove fasteners with a 10mm socket and Torx T30, then lift the assembly out carefully.
- Don’t force connectors—use the pick gently.
Step 4: Remove the serpentine belt
- Take a clear photo of the belt routing before removal.
- Use a Torx T60 or 16mm socket on the belt tensioner (varies by tensioner style).
- Rotate the tensioner to relieve belt tension, then slide the belt off a smooth pulley.
- Remove the belt from the engine bay.
Step 5: Disconnect coolant hoses from the water pump
- Place the drain pan under the pump area (more coolant will spill).
- Use hose clamp pliers to release clamps, then twist hoses gently to break them free.
- Use a pick tool carefully if a hose is stuck (do not gouge the sealing surface).
Step 6: Unbolt and remove the water pump
- Use an E-Torx E10 / E-Torx E12 (bolt head style can vary) to remove the water pump mounting bolts.
- Support the pump with one hand as you remove the last bolt.
- Remove the pump and gasket/O-ring.
- Clean the mating surface using a clean rag; do not scrape aluminum aggressively.
Step 7: Install the new water pump
- Install the new gasket/O-ring onto the new pump (lightly wet with fresh coolant if needed).
- Position the pump and start all bolts by hand (prevents cross-threading).
- Tighten evenly, then Torque to 10 Nm (7 ft-lbs) unless your pump kit/service info specifies otherwise.
- Hand-start every bolt first.
Step 8: Reconnect hoses and reinstall removed components
- Reconnect coolant hoses and secure with the original clamps using hose clamp pliers.
- Reinstall the fan/shroud (if removed) using a 10mm socket and Torx T30; reconnect electrical connectors firmly.
- Reinstall intake ducting using a 8mm socket, 10mm socket, and Torx T25.
Step 9: Install the serpentine belt
- Route the belt exactly like your photo.
- Use a Torx T60 or 16mm socket to rotate the tensioner and slip the belt on last.
- Visually confirm the belt is seated in every pulley groove.
Step 10: Refill and bleed the cooling system
- Close any drains and reconnect any hoses you opened.
- Refill the coolant tank with 50/50 BMW-approved coolant + distilled water using a funnel.
- Bleed procedure (BMW electric bleed routine):
- Switch ignition on (engine off), set heat to max and fan to low.
- Press the accelerator pedal to the floor for ~10 seconds to command the bleed routine (you may hear pumps running).
- Let the routine complete (often ~10–15 minutes). Top off as needed.
- A vacuum fill tool prevents air pockets.
Step 11: Reinstall undertrays and lower the car
- Reinstall undertrays using Torx T25 and Torx T30.
- Lower the car safely using the floor jack.
✅ After Repair
- Start the engine and let it idle while you watch for leaks with a flashlight.
- Bring it up to operating temperature, then re-check coolant level after it cools completely.
- Use an OBD-II scan tool (BMW-capable) (specialty) to clear any cooling system faults and verify coolant temp is stable.
- Do a short test drive, then inspect again for seepage around hose connections and the pump.
💰 DIY vs Shop Cost
Shop Cost: $1,200-$2,200 (parts + labor)
DIY Cost: $300-$850 (parts only)
You Save: $350-$1,900 by doing it yourself!
Shop labor rates vary but typically run $100-$150/hour. This repair takes a shop approximately 4-7 hours.
🎯 Ready to get started?
HowToo makes it easy: same-day/2-day shipping on every part, plus all the tools and specialty tools you need! Check out the parts and tools sections below to add everything to your cart.
Guide for Engine Water Pump replace for these BMW vehicles
| Year Make Model | Sub Model | Engine | Body Style |
|---|---|---|---|
| 2016 BMW 550i | - | V8 4.4L | - |
| 2015 BMW 550i | - | V8 4.4L | - |
| 2014 BMW 550i | - | V8 4.4L | - |
| 2013 BMW 550i | - | V8 4.4L | - |
| 2012 BMW 550i | - | V8 4.4L | - |
| 2011 BMW 550i | - | V8 4.4L | - |