









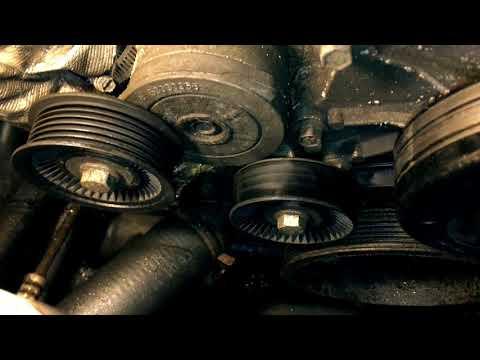







How to Replace the Water Pump on a 2008 Jeep Grand Cherokee 4.7L V8
Step-by-step DIY guide with required tools, parts list, torque specs, coolant refill/bleed steps, and safety tips for 1999, 2000, 2001, 2002, 2003, 2004, 2005, 2006, 2007, 2008, 2009
How to Replace the Water Pump on a 2008 Jeep Grand Cherokee 4.7L V8
Step-by-step DIY guide with required tools, parts list, torque specs, coolant refill/bleed steps, and safety tips for 1999, 2000, 2001, 2002, 2003, 2004, 2005, 2006, 2007, 2008, 2009


🔧 Grand Cherokee - Water Pump Replacement
The water pump circulates coolant through your A4. When it leaks or the bearing fails, you can get overheating, coolant loss, or a grinding/whining noise. On your Grand Cherokee’s 4.7L, the pump sits at the front of the engine and is driven by the serpentine belt.
Difficulty Level: Intermediate | Estimated Time: 2.5-4.5 hours
⚠️ Safety & Precautions
- ⚠️ Work on a fully cool engine; hot coolant can cause severe burns.
- ⚠️ Use jack stands; never rely on a floor jack alone.
- ⚠️ Keep hands/clothes clear of the fan and belt area.
- ⚠️ Capture coolant in a drain pan; coolant is toxic to people and pets.
- Disconnecting the battery is not strictly required, but recommended if your hands will be near the electric fan wiring.
🔧 Required Tools
You'll need the following tools for this repair:
- Safety glasses
- Nitrile gloves
- Floor jack (rated 3-ton minimum)
- Jack stands (rated 3-ton minimum)
- Wheel chocks
- Drain pan (at least 3-gallon)
- Funnel
- 3/8" drive ratchet
- 1/2" drive breaker bar
- Torque wrench (10–100 ft-lbs range)
- Socket set (8mm, 10mm, 13mm, 15mm)
- Wrench set (10mm, 13mm, 15mm)
- Serpentine belt tool or 1/2" drive long handle (specialty)
- Fan clutch wrench set (specialty)
- Hose clamp pliers (specialty)
- Trim clip remover
- Plastic gasket scraper
- Shop rags
- Flashlight
🔩 Required Parts
HowToo sells all the parts you need for this repair:
- Water pump - Qty: 1
- Water pump gasket/O-ring (as equipped) - Qty: 1
- Engine coolant (HOAT coolant, 50/50 mix) - Qty: 2-3 gallons
- Serpentine belt - Qty: 1 Optional but smart if cracked
- Upper radiator hose clamp - Qty: 1 Optional if clamp is weak
📋 Before You Begin
- Park on level ground, set the parking brake, and chock the rear wheels.
- Let the engine cool completely (radiator hose should feel cool).
- Raise the front with a floor jack and support with jack stands.
- Remove the radiator cap only after it’s cool to relieve any residual pressure.
- Tip: Take a quick photo of the belt routing.
🔨 Step-by-Step Instructions
Follow these steps in order:
Step 1: Drain the coolant
- Place a drain pan under the radiator drain (petcock) area.
- Slowly remove the radiator cap by hand (cool engine only).
- Open the radiator petcock (use pliers only if needed) and drain coolant.
- Close the petcock when finished.
Step 2: Remove the upper fan shroud (if equipped)
- Remove any plastic push-pins using a trim clip remover.
- Remove shroud bolts using a 10mm socket.
- Lift the shroud up and out enough to access the fan/clutch area.
Step 3: Remove the mechanical fan and clutch (if equipped)
- Use a fan clutch wrench set (specialty) to loosen the fan clutch nut at the water pump pulley.
- Lift the fan and clutch out carefully (watch the radiator fins).
- Tip: Cardboard against the radiator protects fins.
Step 4: Remove the serpentine belt
- Rotate the belt tensioner using a serpentine belt tool or 1/2" drive breaker bar.
- Slip the belt off one pulley, then release the tensioner slowly.
- Remove the belt fully and set it aside.
Step 5: Remove the water pump pulley (if needed for access)
- Hold the pulley from turning by hand, then remove bolts using a 13mm socket.
- Remove the pulley and set it aside.
Step 6: Disconnect hoses from the water pump
- Use hose clamp pliers to release spring clamps (or a 8mm socket if worm-gear clamps).
- Twist the hose gently to break it loose, then pull it off.
- Catch any remaining coolant in the drain pan.
Step 7: Remove the water pump
- Remove the water pump mounting bolts using a 10mm socket.
- Note bolt locations if there are different lengths.
- Pull the pump forward and out. If stuck, tap lightly with the handle of a ratchet (do not pry on sealing surfaces).
Step 8: Clean the sealing surface
- Use a plastic gasket scraper to remove old gasket material from the timing cover surface.
- Wipe clean with shop rags.
- Do not gouge the aluminum surface.
Step 9: Install the new water pump
- Install the new gasket/O-ring onto the new pump (follow how it seats on the pump).
- Position the pump and hand-start all bolts using your fingers.
- Tighten bolts evenly using a 10mm socket.
- Final tighten using a torque wrench: Torque to 40 Nm (30 ft-lbs).
Step 10: Reinstall pulley, belt, and fan
- Reinstall the water pump pulley and tighten bolts using a 13mm socket: Torque to 28 Nm (21 ft-lbs).
- Route the belt per the under-hood diagram, then apply tension with a serpentine belt tool.
- If removed, reinstall the fan/clutch using a fan clutch wrench set (specialty) (snug firmly; it self-tightens in operation).
- Reinstall the fan shroud using a 10mm socket.
Step 11: Refill and bleed the cooling system
- Refill the radiator and reservoir using a funnel with HOAT coolant 50/50.
- Start the engine and set heat to max hot (high fan) so coolant can flow through the heater core.
- Let it idle and watch coolant level; top off as the thermostat opens.
- Shut off, let cool, then recheck and top off radiator and reservoir.
✅ After Repair
- Check for leaks around the water pump and hose connections with the engine running.
- Verify the heater blows hot and the temperature gauge stays normal.
- After 1–2 drive cycles and a full cool-down, recheck coolant level and top off if needed.
- Inspect belt tracking (it should run centered on pulleys).
💰 DIY vs Shop Cost
Shop Cost: $650-$1,050 (parts + labor)
DIY Cost: $140-$320 (parts only)
You Save: $330-$910 by doing it yourself!
Shop labor rates vary but typically run $100-$150/hour. This repair takes a shop approximately 2.5-4.5 hours.
🎯 Ready to get started?
HowToo makes it easy: same-day/2-day shipping on every part, plus all the tools and specialty tools you need! Check out the parts and tools sections below to add everything to your cart.