









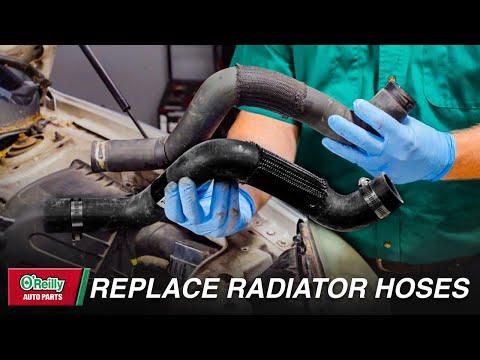





How to Replace the Upper Radiator Hose on a 2019 Chevrolet Equinox
Step-by-step instructions with tools, parts, coolant refill, bleeding, and leak checks
How to Replace the Upper Radiator Hose on a 2019 Chevrolet Equinox
Step-by-step instructions with tools, parts, coolant refill, bleeding, and leak checks


🔧 Radiator Hose - Replacement
Assumption: This guide covers the upper radiator hose. If you mean the lower hose, the removal path is different but the safety steps and refill process are similar.
The radiator hose carries hot coolant between the engine and radiator. Replacing a cracked or swollen hose prevents leaks, overheating, and engine damage.
Difficulty Level: Beginner | Estimated Time: 1-2 hours
⚠️ Safety & Precautions
- Never open the cooling system when the engine is hot. Hot coolant can cause severe burns.
- Let the engine cool fully before starting.
- Wear safety glasses and gloves.
- Keep coolant away from pets and children.
- Disconnect the negative battery cable only if you need extra room near electrical connectors.
🔧 Required Tools
You'll need the following tools for this repair:
- Flat blade screwdriver
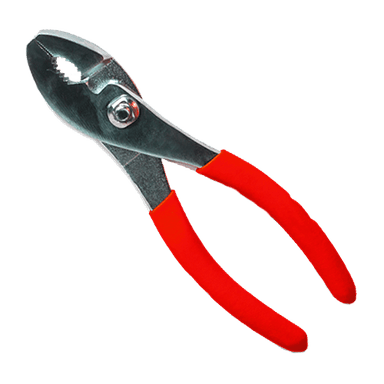
- Pliers
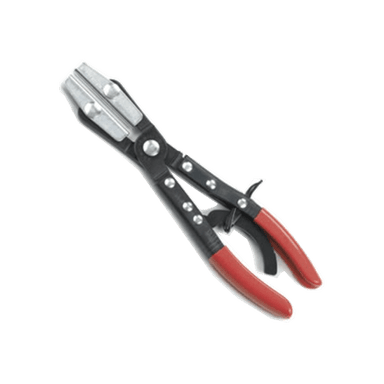
- Hose clamp pliers (specialty)
- Drain pan
- Funnel
- Safety glasses
- Nitrile gloves
- Shop towels
- 10mm socket
- Ratchet
🔩 Required Parts
HowToo sells all the parts you need for this repair:
- Upper radiator hose - Qty: 1
- Coolant - Qty: 1-2 gallons
- Radiator hose clamps - Qty: 2
📋 Before You Begin
- Park on level ground and set the parking brake.
- Make sure the engine is fully cool.
- Have the drain pan ready before removing any hose.
- If there is a plastic engine cover in the way, remove it first with a 10mm socket.
🔨 Step-by-Step Instructions
Follow these steps in order:
Step 1: Release cooling system pressure
- With the engine cold, slowly remove the coolant reservoir cap.
- If there is any pressure, stop and let it vent fully before continuing.
Step 2: Drain coolant below the hose level
- Place the drain pan under the radiator.
- Open the radiator drain if equipped, or disconnect the lower hose only if needed to lower coolant level.
- Drain enough coolant so the hose ends stay below the fluid level.
Step 3: Remove the old hose clamps
- Use hose clamp pliers (specialty) or pliers to compress the spring clamps.
- Slide the clamps back on the hose so the hose can move freely.
Step 4: Remove the hose
- Use a flat blade screwdriver to gently break the hose seal if it is stuck.
- Twist the hose back and forth, then pull it off the radiator neck and engine pipe.
- Twist first, then pull.
Step 5: Clean the hose connections
- Use a shop towel to clean the sealing surfaces on both ends.
- Make sure there is no old rubber, rust, or coolant residue left behind.
Step 6: Install the new hose
- Slide the new radiator hose clamps onto the hose first.
- Push the new hose fully onto both fittings until it seats against the stop.
- Move the clamps into the original clamp groove or marked area.
Step 7: Secure the clamps
- Use hose clamp pliers (specialty) or pliers to position each clamp correctly.
- Make sure both clamps sit squarely and are not pinching the hose.
Step 8: Refill the cooling system
- Use a funnel to refill with the correct coolant.
- Fill the reservoir to the proper level mark.
- If air is trapped, squeeze the hose gently by hand to help purge bubbles.
Step 9: Bleed air and check for leaks
- Start the engine and let it idle with the reservoir cap on loosely if needed for initial bleeding.
- Watch the hose connections for leaks.
- Let the engine reach operating temperature, then recheck coolant level and top off as needed.
- Use only cold-engine checks for final fill.
✅ After Repair
- Inspect both hose ends after a short drive.
- Check coolant level again when the engine is cold.
- Watch the temperature gauge for normal operation.
- Dispose of old coolant properly at a recycling center.
💰 DIY vs Shop Cost
Shop Cost: $220-$450 (parts + labor)
DIY Cost: $45-$120 (parts only)
You Save: $175-$330 by doing it yourself!
Shop labor rates vary but typically run $100-$150/hour. This repair takes a shop approximately 1-2 hours.
🎯 Ready to get started?
HowToo makes it easy: same-day/2-day shipping on every part, plus all the tools and specialty tools you need! Check out the parts and tools sections below to add everything to your cart.
Guide for Radiator Coolant Hose replace for these Chevrolet vehicles
| Year Make Model | Sub Model | Engine | Body Style |
|---|