















How to Replace the Upper or Lower Radiator Hose on a 2018 Hyundai Ioniq
Step-by-step coolant drain/refill and air-bleeding guide with required tools, parts, and safety tips for 2017, 2018, 2019, 2021, 2022
How to Replace the Upper or Lower Radiator Hose on a 2018 Hyundai Ioniq
Step-by-step coolant drain/refill and air-bleeding guide with required tools, parts, and safety tips for 2017, 2018, 2019, 2021, 2022


🔧 Ioniq - Radiator Hose Replacement
Replacing a radiator hose on your Ioniq means draining some engine coolant, swapping the old rubber hose for a new one, then refilling and bleeding air out of the cooling system. A worn hose can leak, swell, or split and quickly cause overheating.
Difficulty Level: Intermediate | Estimated Time: 1.0-2.5 hours
⚠️ Safety & Precautions
- ⚠️ Work only on a fully cool engine; hot coolant can spray and burn.
- ⚠️ Wear gloves and safety glasses; coolant is toxic and slippery.
- ⚠️ Hybrid caution: avoid pulling on any orange high-voltage cables; this job is on the engine coolant hose, not the hybrid/inverter coolant circuit.
- ⚠️ Support the car with jack stands if you go underneath; never rely on a jack alone.
- ⚠️ Battery disconnect is usually not required for a radiator hose, but keep the key fob away and the car OFF.
🔧 Required Tools
You'll need the following tools for this repair:
- Safety glasses
- Nitrile gloves
- Drain pan (at least 2-gallon)
- Trim clip removal tool
- Flat-blade screwdriver
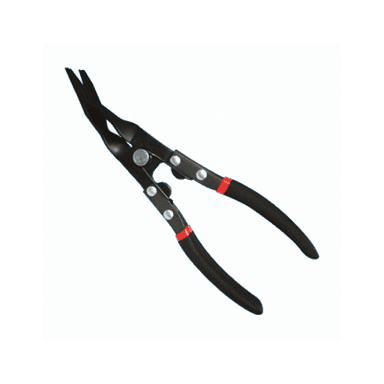
- Hose clamp pliers
- Channel-lock pliers
- Pick tool set
- Shop rags
- Funnel
- Floor jack (rated 3-ton minimum)
- Jack stands (rated 3-ton minimum)
- Wheel chocks
- 10mm socket
- Ratchet
- Extension bar (3-inch)
🔩 Required Parts
HowToo sells all the parts you need for this repair:
- Upper radiator hose - Qty: 1
- Lower radiator hose - Qty: 1
- Radiator hose clamps - Qty: 2-4
- Hyundai/Kia Long Life coolant (P-OAT) pre-mixed - Qty: 1-2 gallons
- Undercover/undertray clips - Qty: 2-6
📋 Before You Begin
- Park on level ground, shift to Park, and set the parking brake.
- Let the engine cool completely (at least 2-3 hours).
- Put wheel chocks behind the rear wheels.
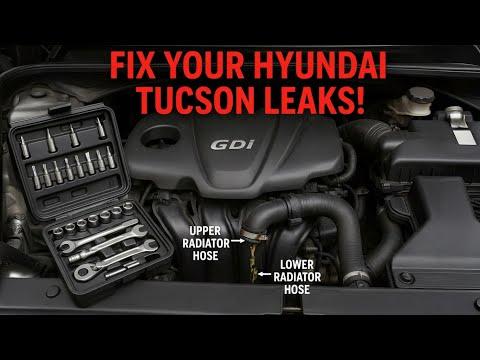
- Decide which hose you’re replacing: the upper hose runs from the top of the radiator to the engine; the lower hose runs from the bottom of the radiator to the engine.
- Tip: Take a photo before removal.
🔨 Step-by-Step Instructions
Follow these steps in order:
Step 1: Relieve any leftover pressure
- Place a drain pan (at least 2-gallon) under the front of the car.
- Slowly loosen the coolant reservoir/pressure cap by hand using a shop rag over it, then remove it once you’re sure there’s no pressure.
Step 2: Raise the front (needed for lower hose access)
- Chock the rear wheels with wheel chocks.
- Lift the front with a floor jack (rated 3-ton minimum) at the proper front lift point.
- Set the car securely on jack stands (rated 3-ton minimum).
Step 3: Remove the lower engine undercover (if equipped)
- Remove the plastic clips using a trim clip removal tool.
- Remove any small bolts using a 10mm socket, ratchet, and extension bar (3-inch).
- Set the undercover and hardware aside in a small pile so nothing gets lost.
Step 4: Drain enough coolant so the hose swap doesn’t gush
- Position the drain pan (at least 2-gallon) under the radiator’s lower area.
- Open the radiator drain cock (petcock) carefully by hand or with a flat-blade screwdriver if needed.
- Drain until the coolant level is below the hose you’re replacing, then close the drain cock.
- Tip: Only drain what you need.
Step 5A: Remove and replace the UPPER radiator hose (top hose path)
- Locate the upper hose at the top of the radiator and at the engine connection.
- Move the spring clamps back using hose clamp pliers (spring clamp = a clamp you squeeze, not screw-tighten).
- Twist the hose to break it free using channel-lock pliers gently, then pull it off by hand.
- If it’s stuck, carefully work the edge with a pick tool set to break the seal (do not gouge the radiator neck).
- Wipe the radiator and engine hose necks clean using shop rags.
- Install the new upper hose fully seated in the same orientation.
- Reposition the clamps in the same spots using hose clamp pliers.
Step 5B: Remove and replace the LOWER radiator hose (bottom hose path)
- From underneath, locate the lower hose at the bottom of the radiator and at the engine-side connection.
- Move the spring clamps back using hose clamp pliers.
- Twist the hose to break it free, using channel-lock pliers gently, then pull the hose off.
- Expect some coolant to spill; keep the drain pan (at least 2-gallon) directly under the hose ends.
- Clean the sealing surfaces with shop rags.
- Install the new lower hose fully seated, then reinstall the clamps using hose clamp pliers.
Step 6: Reinstall the undercover (if removed)
- Reinstall the undercover using the 10mm socket and ratchet.
- Reinstall plastic clips using the trim clip removal tool (replace any broken clips).
Step 7: Refill coolant
- Lower the car off the stands using the floor jack (rated 3-ton minimum).
- Fill the coolant reservoir/pressure tank using a funnel with Hyundai/Kia Long Life coolant (P-OAT) pre-mixed.
- Fill to the “MAX” line (or just below it if you expect expansion).
Step 8: Bleed air and verify operation
- Start the car and set the cabin heat to HOT (this helps circulate coolant through the heater core).
- Let the engine reach operating temperature while watching the temperature gauge and looking for leaks.
- With the engine idling, carefully squeeze the upper hose by hand using nitrile gloves to help push trapped air out.
- Shut the car OFF, let it cool, then recheck the coolant level and top off using the funnel.
✅ After Repair
- Check for drips around both ends of the replaced hose with the engine running.
- Take a short 10-15 minute drive, then recheck for leaks and recheck coolant level after a full cool-down.
- Make sure the heater blows hot and the engine temperature stays normal.
- Dispose of old coolant properly (most parts stores accept it).
💰 DIY vs Shop Cost
Shop Cost: $250-$550 (parts + labor)
DIY Cost: $40-$160 (parts only)
You Save: $90-$510 by doing it yourself!
Shop labor rates vary but typically run $100-$150/hour. This repair takes a shop approximately 1.0-2.0 hours.
🎯 Ready to get started?
HowToo makes it easy: same-day/2-day shipping on every part, plus all the tools and specialty tools you need! Check out the parts and tools sections below to add everything to your cart.