









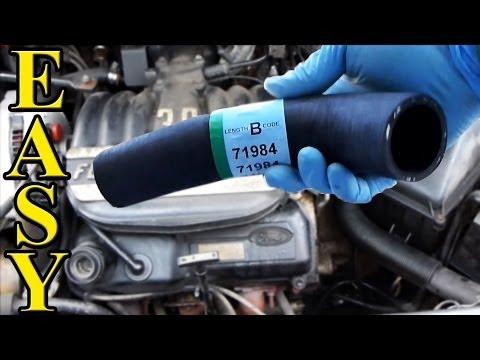







How to Replace the Upper or Lower Radiator Hose on a 2018 Hyundai Elantra
Step-by-step hose swap with required tools/parts, coolant drain & refill, bleeding air, and leak checks
How to Replace the Upper or Lower Radiator Hose on a 2018 Hyundai Elantra
Step-by-step hose swap with required tools/parts, coolant drain & refill, bleeding air, and leak checks


🔧 Elantra - Radiator Hose Replacement
On your Elantra, radiator hoses carry coolant between the engine and radiator. Replacing a leaking/soft hose prevents overheating and coolant loss. Because there are multiple radiator hoses, the steps change depending on which one you’re replacing.
Difficulty Level: Intermediate | Estimated Time: 1.0–2.0 hours
⚠️ Safety & Precautions
- ⚠️ Never open the coolant cap on a hot engine; hot coolant can spray and burn.
- ⚠️ Support the car with jack stands before going underneath; never rely on a jack alone.
- ⚠️ Coolant is toxic; keep it away from kids/pets and clean spills immediately.
- 🔋 Battery disconnect is not required for this job, but keep tools away from the cooling fan area.
🔧 Required Tools
You'll need the following tools for this repair:
- Safety glasses
- Nitrile gloves
- Floor jack (rated 2-ton minimum)
- Jack stands (rated 2-ton minimum)
- Wheel chocks
- Drain pan (at least 2-gallon)
- Pliers for spring clamps
- Hose clamp pliers (specialty)
- Flathead screwdriver
- 8mm socket
- 10mm socket
- Ratchet (3/8" drive)
- 3" extension (3/8" drive)
- Pick tool (specialty)
- Funnel
- Shop rags
- Torque wrench (3/8" drive)
🔩 Required Parts
HowToo sells all the parts you need for this repair:
- Radiator hose (upper or lower, as needed) - Qty: 1
- Hose clamps (OE-style spring clamps or worm-gear clamps) - Qty: 2
- Engine coolant (Hyundai/Kia compatible, phosphate-based) - Qty: 1–2 gallons (mix depends on product)
- Distilled water - Qty: 1 gallon
📋 Before You Begin
- Park on level ground, set the parking brake, and place wheel chocks behind the rear wheels.
- Let the engine cool completely (ideally overnight).
- Confirm which hose you’re replacing:
- Upper radiator hose runs from the top of the radiator to the engine/thermostat area.
- Lower radiator hose runs from the bottom of the radiator to the engine/water pump area and usually needs access from underneath.
🔨 Step-by-Step Instructions
Follow these steps in order:
Step 1: Confirm hose type (upper vs lower)
- Open the hood and locate the hose you’re replacing.
- If you tell me “upper” or “lower,” I can tailor the exact access steps. If you want to proceed now, the steps below cover both paths.
Step 2: Relieve pressure safely
- With the engine cold, place shop rags around the coolant reservoir cap.
- Slowly loosen the cap to release any leftover pressure, then remove it.
Step 3: Raise the front (needed for lower hose and easier draining)
- Use a floor jack to lift the front of the car at the front center jack point.
- Set it securely on jack stands.
Step 4: Drain enough coolant to get below the hose level
- Place a drain pan under the radiator area.
- If equipped with an under cover, remove fasteners using a 10mm socket and ratchet.
- Open the radiator drain (petcock) if accessible by hand; if it’s tight, use an 8mm socket carefully (do not over-tighten plastic drains).
- Drain until the coolant level is below the hose you’re replacing, then close the drain snugly by hand.
- Tip: Drain less = less mess later.
Step 5: Remove the hose clamps
- At each end of the hose, compress the spring clamp using pliers for spring clamps or hose clamp pliers (specialty).
- Slide the clamp back a few inches onto the hose.
- If you have worm-gear clamps, loosen them with a flathead screwdriver.
- Tip: Take a photo before removing anything.
Step 6: Break the hose free (don’t yank)
- Twist the hose back and forth by hand to break it loose from the fitting.
- If it’s stuck, gently work the edge with a pick tool (specialty) to separate it from the nipple (the metal/plastic tube the hose sits on).
- Pull the hose off and aim it into the drain pan for any remaining coolant.
Step 7: Prep the fittings
- Use shop rags to wipe the radiator neck and engine-side fitting clean.
- Check for cracks on plastic radiator necks and corrosion on metal fittings.
Step 8: Install the new hose
- Put the clamps onto the new hose first.
- Push the hose fully onto each fitting until it seats against the stop/bead.
- Reposition clamps to the same location as original (usually just behind the raised bead on the fitting) using hose clamp pliers (specialty) or pliers for spring clamps.
- If using worm-gear clamps, tighten with a flathead screwdriver (snug; do not crush the hose).
Step 9: Reinstall any covers
- Reinstall the under cover using a 10mm socket, ratchet, and 3" extension.
- Torque to 8 Nm (71 in-lbs) for small under cover bolts if applicable.
Step 10: Refill coolant
- Use a funnel to refill the reservoir/radiator fill point with the correct coolant mix (typically 50/50 coolant and distilled water unless your coolant is premixed).
- Add coolant slowly to reduce air pockets.
Step 11: Bleed air from the cooling system
- Start the engine and set the heater to HOT with the fan on low.
- Let the engine idle until it reaches normal operating temperature; watch for the radiator fan to cycle on.
- As the thermostat opens, the coolant level may drop—top off as needed using the funnel.
- Squeeze the upper hose gently (with gloves) to help push air out.
- Install the reservoir cap once the level stabilizes.
✅ After Repair
- Check for leaks at both hose ends while idling and after a short drive.
- Verify the heater blows hot air (helps confirm coolant flow).
- After the engine cools fully, recheck the coolant level and top off if needed.
- Dispose of old coolant properly (never dump on the ground).
💰 DIY vs Shop Cost
Shop Cost: $200–$450 (parts + labor)
DIY Cost: $40–$120 (parts only)
You Save: $160–$330 by doing it yourself!
Shop labor rates vary but typically run $100-$150/hour. This repair takes a shop approximately 1.0–2.0 hours.
🎯 Ready to get started?
Quick question so I can tailor the exact access points on your Elantra: are you replacing the upper radiator hose or the lower radiator hose?
HowToo makes it easy: same-day/2-day shipping on every part, plus all the tools and specialty tools you need! Check out the parts and tools sections below to add everything to your cart.
Guide for Radiator Coolant Hose replace for these Hyundai vehicles
| Year Make Model | Sub Model | Engine | Body Style |
|---|