












How to Replace the Timing Chain on a 2016-2018 Hyundai Tucson (Engine: Inline 4 1.6L)
Step-by-step guide with tools, parts, torque specs, timing marks, and safety tips
How to Replace the Timing Chain on a 2016-2018 Hyundai Tucson (Engine: Inline 4 1.6L)
Step-by-step guide with tools, parts, torque specs, timing marks, and safety tips for 2016, 2017, 2018


🔧 Tucson - Timing Chain Replacement
Your Tucson uses a timing chain, not a timing belt. The timing chain synchronizes the crankshaft and camshafts so the valves and pistons move at the correct time. This is a major engine repair that requires accurate timing alignment and careful sealing of the front timing cover.
Difficulty Level: Advanced | Estimated Time: 8-12 hours
⚠️ Safety & Precautions
- ⚠️ This engine is an interference design, meaning incorrect timing can cause piston-to-valve contact and severe engine damage.
- ⚠️ Disconnect the negative battery cable before starting.
- ⚠️ Support the engine before removing the passenger-side engine mount.
- ⚠️ Never rotate the crankshaft or camshafts with the timing chain removed unless instructed and controlled.
- ⚠️ Work only on a completely cool engine.
- ⚠️ Keep sealant away from oil passages and timing components.
- ⚠️ If timing marks do not align exactly, stop and recheck before starting the engine.
🔧 Required Tools
You'll need the following tools for this repair:
- 10mm socket
- 12mm socket
- 14mm socket
- 17mm socket
- 19mm socket
- 21mm socket
- E10 external Torx socket
- 3/8-inch ratchet
- 1/2-inch breaker bar
- 3/8-inch torque wrench
- 1/2-inch torque wrench
- Socket extension set
- Universal joint socket adapter
- Serpentine belt tool (specialty)
- Crankshaft pulley holding tool (specialty)
- Harmonic balancer puller (specialty)
- Engine support bar (specialty)
- Camshaft holding tool (specialty)
- Plastic scraper
- Gasket scraper
- Torque angle gauge (specialty)
- Oil drain pan
- Coolant drain pan
- Funnel
- Digital multimeter
- Floor jack (rated 2-ton minimum)
- Jack stands (rated 2-ton minimum)
- Wheel chocks
- Safety glasses
- Mechanic gloves
🔩 Required Parts
HowToo sells all the parts you need for this repair:
- Timing chain kit - Qty: 1
- Timing chain tensioner - Qty: 1
- Timing chain guides - Qty: 1 set
- Crankshaft front seal - Qty: 1
- Valve cover gasket - Qty: 1
- Timing cover sealant - Qty: 1
- Engine oil (5W-30 synthetic) - Qty: 5 quarts
- Oil filter - Qty: 1
- Engine coolant - Qty: As needed
- Serpentine drive belt - Qty: 1
- Crankshaft pulley bolt - Qty: 1
📋 Before You Begin
- Park your Tucson on level ground, shift to Park, and set the parking brake.
- Place wheel chocks behind the rear wheels.
- Disconnect the negative battery cable with a 10mm socket.
- Take photos of hose routing, wiring clips, and belt routing before removal.
- Raise the front with a floor jack and support it with jack stands.
- Drain engine oil into an oil drain pan.
- Drain coolant into a coolant drain pan if any coolant components block timing cover access.
- Support the engine with an engine support bar before removing the passenger-side engine mount.
🔨 Step-by-Step Instructions
Follow these steps in order:
Step 1: Disconnect Power and Remove Covers
- Use a 10mm socket to disconnect the negative battery cable.
- Use a 10mm socket to remove the engine cover fasteners if equipped.
- Use a trim clip removal tool if plastic retainers are present.
- Set covers and clips aside in labeled containers.
Step 2: Remove Intake Ducting and Obstructions
- Use a flat-blade screwdriver to loosen intake hose clamps.
- Use a 10mm socket to remove air box or duct fasteners as needed.
- Use needle-nose pliers to release small hose clamps carefully.
- Move wiring harnesses aside without pulling on the wires.
Step 3: Raise and Support the Vehicle
- Use a floor jack to raise the front of your Tucson.
- Place jack stands under the front support points.
- Use a 10mm socket and trim clip removal tool to remove the lower splash shield.
- Shake gently to confirm stability.
Step 4: Remove the Serpentine Belt
- Use a 17mm socket with a 1/2-inch breaker bar or serpentine belt tool on the belt tensioner.
- Rotate the tensioner to remove belt tension.
- Slide the belt off the alternator pulley first.
- Slowly release the tensioner.
- Remove the belt from the engine bay.
Step 5: Support the Engine
- Install the engine support bar across the strut towers.
- Attach the support hook to the engine lift point.
- Take up light tension only. Do not lift the vehicle body.
- The engine support bar holds the engine after the mount is removed.
Step 6: Remove the Passenger-Side Engine Mount
- Use a 14mm socket and 17mm socket to remove the engine mount bracket fasteners.
- Use a 1/2-inch breaker bar if the bolts are tight.
- Remove the mount and bracket from the timing cover area.
- Keep bolts grouped by location.
- During installation, tighten engine mount fasteners to Torque to 65-85 Nm (48-63 ft-lbs).
Step 7: Remove the Valve Cover
- Use a 10mm socket to remove ignition coil fasteners if they block the valve cover.
- Use a 10mm socket to remove valve cover bolts.
- Lift the valve cover straight up.
- Use a plastic scraper to remove old gasket material from the sealing surface.
- Do not gouge the aluminum surface.
Step 8: Set Cylinder 1 to Top Dead Center
- Use a 21mm socket and 1/2-inch breaker bar on the crankshaft pulley bolt.
- Rotate the engine clockwise only.
- Align the crankshaft mark to top dead center. Top dead center means piston 1 is at the top of its compression stroke.
- Confirm the camshaft timing marks align with their reference marks.
- Turn clockwise only.
Step 9: Remove the Crankshaft Pulley
- Install the crankshaft pulley holding tool to prevent the pulley from turning.
- Use a 21mm socket and 1/2-inch breaker bar to loosen the crankshaft pulley bolt.
- Remove the bolt and washer.
- Use a harmonic balancer puller to remove the pulley if it does not slide off by hand.
- Replace the crankshaft pulley bolt during reassembly.
Step 10: Remove the Timing Cover
- Use a 10mm socket, 12mm socket, and E10 external Torx socket to remove timing cover fasteners.
- Note bolt lengths and locations before removal.
- Use a plastic scraper to carefully break the sealant bond.
- Remove the timing cover without prying against machined surfaces.
- Use a gasket scraper only where needed, keeping debris out of the engine.
Step 11: Verify Timing Marks Before Disassembly
- Use the 21mm socket to fine-adjust the crankshaft clockwise if needed.
- Confirm the crankshaft and camshaft timing marks still align.
- Mark the old chain and sprockets with a paint marker if available.
- If marks do not align, do not remove the chain until alignment is corrected.
Step 12: Remove the Timing Chain Tensioner and Guides
- Use a 10mm socket or 12mm socket to remove the timing chain tensioner bolts.
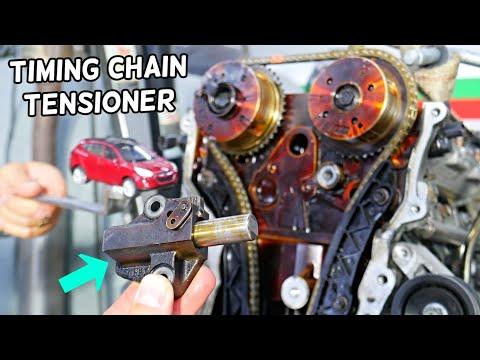
- Remove the tensioner. The tensioner pushes on a guide to keep the chain tight.
- Use a 10mm socket to remove the timing chain guide bolts.
- Remove the chain guides.
- Keep fingers clear because the chain may shift when tension is released.
Step 13: Remove the Timing Chain
- Hold the camshafts steady with a camshaft holding tool.
- Lift the timing chain off the camshaft sprockets and crankshaft sprocket.
- Do not rotate the camshafts or crankshaft after the chain is removed.
- Inspect sprocket teeth for sharp points, hooking, or damage.
Step 14: Install the New Timing Chain
- Match the colored links on the new timing chain to the timing marks on the crankshaft and camshaft sprockets.
- Use the camshaft holding tool to keep the camshafts steady.
- Install the chain over the crankshaft sprocket first, then over the camshaft sprockets.
- Confirm every colored link lines up exactly with its timing mark.
- Exact timing is critical.
Step 15: Install New Guides and Tensioner
- Install the new timing chain guides by hand.
- Use a 10mm socket and 3/8-inch torque wrench to tighten guide bolts to Torque to 9-12 Nm (80-106 in-lbs).
- Install the new tensioner with the retaining pin still installed.
- Use a 10mm socket or 12mm socket and 3/8-inch torque wrench to tighten tensioner bolts to Torque to 9-12 Nm (80-106 in-lbs).
- Pull the tensioner retaining pin only after the chain and guides are fully installed.
Step 16: Rotate Engine by Hand and Recheck Timing
- Use a 21mm socket and 1/2-inch breaker bar to rotate the crankshaft clockwise two full turns.
- Stop if you feel hard resistance.
- Return cylinder 1 to top dead center.
- Confirm camshaft and crankshaft timing marks align again.
- If marks are off, remove tension and reset the chain before continuing.
Step 17: Prepare and Seal the Timing Cover
- Use a plastic scraper and gasket scraper to clean old sealant from the timing cover and engine block.
- Wipe sealing surfaces clean and dry.
- Install a new crankshaft front seal into the timing cover if not preinstalled.
- Apply a continuous bead of timing cover sealant to the cover sealing surface.
- Use a thin, even bead.
Step 18: Reinstall the Timing Cover
- Place the timing cover onto the engine carefully without smearing the sealant.
- Start all bolts by hand.
- Use a 10mm socket, 12mm socket, and E10 external Torx socket to snug fasteners evenly.
- Use a 3/8-inch torque wrench to tighten small timing cover bolts to Torque to 9-12 Nm (80-106 in-lbs).
- Use a 3/8-inch torque wrench to tighten larger timing cover bolts to Torque to 18-25 Nm (13-18 ft-lbs).
Step 19: Reinstall the Crankshaft Pulley
- Slide the crankshaft pulley onto the crankshaft by hand.
- Install a new crankshaft pulley bolt.
- Hold the pulley with the crankshaft pulley holding tool.
- Use a 21mm socket, 1/2-inch torque wrench, and torque angle gauge to tighten the crankshaft pulley bolt to Torque to 49 Nm (36 ft-lbs) plus 90°.
Step 20: Reinstall the Valve Cover
- Install the new valve cover gasket into the valve cover groove.
- Place the valve cover onto the cylinder head.
- Start all bolts by hand.
- Use a 10mm socket and 3/8-inch torque wrench to tighten valve cover bolts to Torque to 8-10 Nm (71-89 in-lbs).
Step 21: Reinstall the Engine Mount
- Position the passenger-side engine mount and bracket.
- Start all bolts by hand.
- Use a 14mm socket, 17mm socket, and 1/2-inch torque wrench to tighten mount fasteners to Torque to 65-85 Nm (48-63 ft-lbs).
- Remove the engine support bar only after the mount is fully tightened.
Step 22: Reinstall Belt, Covers, Oil, and Coolant
- Install the new serpentine drive belt using the 17mm socket and serpentine belt tool to rotate the tensioner.
- Use a 10mm socket to reinstall the splash shield and upper covers.
- Install a new oil filter by hand.
- Use a funnel to refill the engine with engine oil.
- Use a funnel to refill engine coolant if drained.
Step 23: Reconnect the Battery and Initial Start
- Use a 10mm socket to reconnect the negative battery cable.
- Before starting, use a digital multimeter to confirm battery voltage is above 12 volts.
- Start the engine and let it idle.
- Listen for rattling, knocking, or chain slap.
- Shut the engine off immediately if loud mechanical noise occurs.
✅ After Repair
- ✅ Check for oil leaks around the timing cover and valve cover.
- ✅ Check coolant level after the engine reaches operating temperature.
- ✅ Confirm the engine idles smoothly and the check engine light stays off.
- ✅ Recheck engine oil level after shutdown and a 5-minute wait.
- ✅ Reset the clock and radio presets if battery power was disconnected.
- ✅ If the power window auto function is lost, fully lower the window, fully raise it, then hold the switch up for 2-5 seconds.
💰 DIY vs Shop Cost
Shop Cost: $1,800-$3,200 USD equivalent (parts + labor)
DIY Cost: $350-$850 USD equivalent (parts only)
You Save: $1,200-$2,350 USD equivalent by doing it yourself!
Shop labor rates vary but typically run $100-$150/hour. This repair takes a shop approximately 7-10 hours.
🎯 Ready to get started?
HowToo makes it easy: same-day/2-day shipping on every part, plus all the tools and specialty tools you need! Check out the parts and tools sections below to add everything to your cart.
Guide for Engine Timing Chain Kit replace for these Hyundai vehicles
| Year Make Model | Sub Model | Engine | Body Style |
|---|---|---|---|
| 2018 Hyundai Tucson | - | Inline 4 1.6L | - |
| 2018 Hyundai Tucson | - | Inline 4 2.0L | - |
| 2018 Hyundai Tucson | - | Inline 4 2.4L | - |
| 2017 Hyundai Tucson | - | Inline 4 1.6L | - |
| 2017 Hyundai Tucson | - | Inline 4 2.0L | - |
| 2016 Hyundai Tucson | - | Inline 4 1.6L | - |
| 2016 Hyundai Tucson | - | Inline 4 2.0L | - |