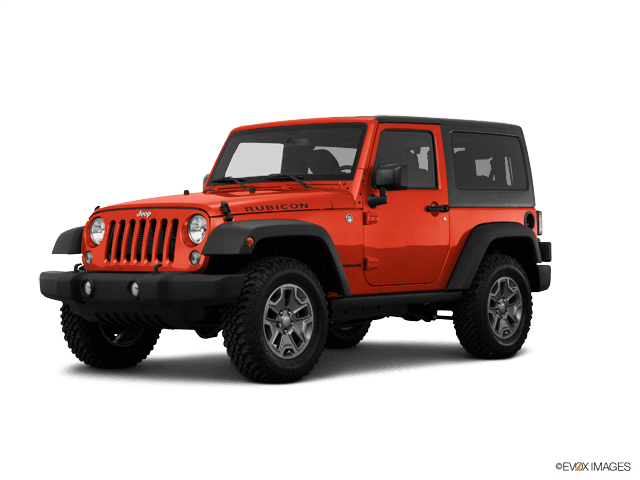

















How to Replace the Timing Chain on a 2015 Jeep Wrangler 3.6L Pentastar (Not a Timing Belt)
Step-by-step teardown guide with required tools, parts list, timing alignment tips, and OEM torque spec notes
How to Replace the Timing Chain on a 2015 Jeep Wrangler 3.6L Pentastar (Not a Timing Belt)
Step-by-step teardown guide with required tools, parts list, timing alignment tips, and OEM torque spec notes


🔧 Wrangler - Timing Chain Replacement
Your Wrangler’s 3.6L engine uses a timing chain, not a timing belt. Replacing it is a major front-engine teardown because the chain sits behind the timing cover and is oil-lubricated.
Difficulty Level: Advanced | Estimated Time: 8-12 hours
⚠️ Safety & Precautions
- ⚠️ Work on a cold engine; hot coolant and oil can burn you.
- ⚠️ Support the vehicle with jack stands; never rely on a jack.
- ⚠️ The engine will be supported from above; confirm the support is stable before removing mounts.
- ⚠️ Disconnect the battery to prevent accidental cranking.
- ⚠️ Keep timing components clean; dirt in the timing cover can cause rapid wear.
🔧 Required Tools
You'll need the following tools for this repair:
- Safety glasses
- Nitrile gloves
- Wheel chocks
- Floor jack (rated 3-ton minimum)
- Jack stands (rated 3-ton minimum)
- Drain pan (at least 10-quart)
- Fender cover
- Metric socket set 8mm-21mm
- 1/4" drive ratchet
- 3/8" drive ratchet
- 1/2" drive breaker bar
- Torque wrench 10-100 ft-lbs
- Torque wrench 80-250 ft-lbs
- Metric combination wrench set 8mm-21mm
- Torx bit set T20-T50
- E-Torx socket set E10-E14
- Serpentine belt tool 3/8" drive
- Harmonic balancer puller (specialty)
- Crankshaft damper holding tool (specialty)
- Camshaft locking tool set for 3.6L Pentastar (specialty)
- Engine support bar (specialty)
- Trim clip removal tool
- Pry bar set
- Plastic gasket scraper
- Shop rags
- Brake cleaner spray
- Cooling system funnel kit
🔩 Required Parts
HowToo sells all the parts you need for this repair:
- Timing chain set - Qty: 1
- Timing chain guides - Qty: 1 set
- Timing chain tensioners - Qty: 1 set
- Timing cover gasket set - Qty: 1
- Front crankshaft seal - Qty: 1
- Valve cover gasket set - Qty: 1
- Water pump gasket - Qty: 1
- Engine coolant (Mopar OAT equivalent) - Qty: 2-3 gallons
- Engine oil (SAE 5W-20) - Qty: 6 quarts
- Oil filter - Qty: 1
- RTV silicone sealant (timing cover) - Qty: 1
- Serpentine belt - Qty: 1
📋 Before You Begin
- 🧭 Park on level ground, set the parking brake, and chock the rear wheels.
- 🔋 Disconnect the negative battery cable using a 10mm socket.
- 🧰 Set up an engine support bar across the fenders; this holds the engine up when mounts/brackets come off.
- 🧴 Plan to drain coolant and change the oil; the timing cover area is sensitive to contamination.
🔨 Step-by-Step Instructions
Follow these steps in order:
Step 1: Disconnect battery and raise the front
- Disconnect the negative battery cable using a 10mm socket.
- Lift the front with a floor jack (rated 3-ton minimum) and support it on jack stands (rated 3-ton minimum).
- Place a drain pan (at least 10-quart) under the radiator area.
Step 2: Drain coolant
- Open the cooling system and drain coolant into the drain pan (at least 10-quart).
- Use metric socket set 8mm-21mm as needed to remove splash shields for access.
- Save pets: coolant is toxic.
Step 3: Remove intake ducting and front accessories
- Remove the intake ducting using a metric socket set 8mm-21mm and trim clip removal tool.
- Relieve serpentine belt tension using a serpentine belt tool 3/8" drive, then remove the belt.
- Remove accessory brackets and components as needed using a metric socket set 8mm-21mm and E-Torx socket set E10-E14.
Step 4: Support the engine
- Install the engine support bar (specialty) and take the weight of the engine slightly.
- Use shop rags and a fender cover to protect paint and catch drips.
Step 5: Remove the valve covers for timing access
- Remove wiring/hoses that block access using a trim clip removal tool and metric combination wrench set 8mm-21mm.
- Remove valve cover fasteners using a metric socket set 8mm-21mm and Torx bit set T20-T50.
- Lift off valve covers carefully; clean sealing surfaces with a plastic gasket scraper.
Step 6: Remove the crankshaft damper (harmonic balancer)
- Hold the damper using a crankshaft damper holding tool (specialty).
- Loosen the crank bolt using a 1/2" drive breaker bar and metric socket set 8mm-21mm.
- Pull the damper off using a harmonic balancer puller (specialty).
Step 7: Remove the front timing cover
- Remove all timing cover bolts using a metric socket set 8mm-21mm and E-Torx socket set E10-E14.
- Gently separate the cover using a pry bar set without gouging the mating surfaces.
- Clean old sealant with a plastic gasket scraper and brake cleaner spray.
Step 8: Set engine to correct timing position and lock cams
- Rotate the engine by hand using a 1/2" drive breaker bar on the crank bolt until timing marks align.
- Install the camshaft locking tool set for 3.6L Pentastar (specialty). This tool holds the cams so they don’t move while the chain is off.
- Do not rotate cams with chain removed.
Step 9: Remove timing chain tensioners, guides, and chains
- Remove chain tensioners using a metric socket set 8mm-21mm.
- Remove chain guides using a metric socket set 8mm-21mm.
- Remove the timing chains carefully and keep track of orientation.
Step 10: Install new chains, guides, and tensioners
- Install the new guides using a metric socket set 8mm-21mm and tighten with a torque wrench 10-100 ft-lbs to Torque to OEM specification.
- Install the new chains with timing marks aligned to sprocket marks; use the camshaft locking tool set for 3.6L Pentastar (specialty) to keep alignment.
- Install new tensioners using a metric socket set 8mm-21mm and tighten with a torque wrench 10-100 ft-lbs to Torque to OEM specification.
Step 11: Verify timing and rotate engine by hand
- Remove locking tools and rotate the engine two full revolutions by hand using a 1/2" drive breaker bar.
- Recheck timing mark alignment before closing the cover.
Step 12: Reseal and install the timing cover
- Install a new front crankshaft seal into the cover if applicable, using the metric socket set 8mm-21mm carefully as a driver.
- Apply RTV silicone sealant (timing cover) at specified joints and install the timing cover.
- Tighten timing cover bolts with a torque wrench 10-100 ft-lbs to Torque to OEM specification in an even pattern.
Step 13: Reinstall crank damper and accessories
- Install the crank damper and tighten the crank bolt using a crankshaft damper holding tool (specialty) and torque wrench 80-250 ft-lbs to Torque to OEM specification.
- Reinstall accessory brackets using a metric socket set 8mm-21mm and E-Torx socket set E10-E14.
- Install the new serpentine belt using a serpentine belt tool 3/8" drive.
Step 14: Reinstall valve covers and remaining components
- Install new valve cover gasket set and reinstall valve covers using a metric socket set 8mm-21mm.
- Tighten valve cover fasteners using a torque wrench 10-100 ft-lbs to Torque to OEM specification.
- Reconnect all hoses and electrical connectors you removed.
Step 15: Refill fluids and reconnect battery
- Refill engine oil (and replace filter) using engine oil (SAE 5W-20) and oil filter.
- Refill coolant using a cooling system funnel kit and correct engine coolant (Mopar OAT equivalent).
- Reconnect the negative battery cable using a 10mm socket.
✅ After Repair
- 🧪 Start the engine and listen for abnormal rattles at idle; shut down immediately if loud knocking occurs.
- 🧼 Check for oil leaks around the timing cover and crank seal area.
- 🌡️ Bring the engine to operating temperature and confirm the heater blows hot; top off coolant after it cools.
- 🛠️ Recheck fluid levels after a short test drive.
💰 DIY vs Shop Cost
Shop Cost: $1800-$3500 (parts + labor)
DIY Cost: $350-$900 (parts only)
You Save: $900-$2600 by doing it yourself!
Shop labor rates vary but typically run $100-$150/hour. This repair takes a shop approximately 8-12 hours.
🎯 Ready to get started?
HowToo makes it easy: same-day/2-day shipping on every part, plus all the tools and specialty tools you need! Check out the parts and tools sections below to add everything to your cart.
Guide for replace for these Jeep vehicles
| Year Make Model | Sub Model | Engine | Body Style |
|---|