









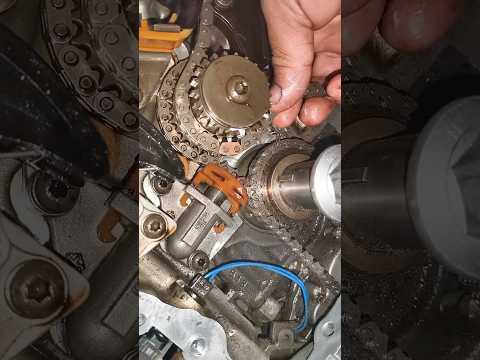






How to Replace the Timing Chain on a 2014-2017 Jeep Grand Cherokee 5.7L HEMI (Trim: Limited | Engine: V6 3.6L | Body: Sport Utility)
Step-by-step guide with timing marks, tools, parts, safety tips, and resealing instructions
How to Replace the Timing Chain on a 2014-2017 Jeep Grand Cherokee 5.7L HEMI (Trim: Limited | Engine: V6 3.6L | Body: Sport Utility)
Step-by-step guide with timing marks, tools, parts, safety tips, and resealing instructions for 2014, 2015, 2017


🔧 Grand Cherokee - Timing Chain Clarification
Your Grand Cherokee with the 5.7L HEMI V8 does not use a timing belt. It uses a timing chain, which is inside the front of the engine and normally lasts much longer than a belt.
Replacing the timing chain is a major engine repair that requires removing the front engine cover, setting exact cam/crank timing, and resealing the engine front cover. This is not a normal maintenance belt service.
Difficulty Level: Advanced | Estimated Time: 8-12 hours
⚠️ Safety & Precautions
- ⚠️ Disconnect the negative battery cable before starting to prevent accidental cranking.
- ⚠️ Let the engine cool completely before draining coolant or working near the radiator and exhaust areas.
- ⚠️ Support the vehicle securely with jack stands if lifting is needed. Never rely on a jack alone.
- ⚠️ Timing must be set exactly. If the crankshaft and camshaft are misaligned, severe engine damage can occur.
- ⚠️ The A/C system does not need to be opened. Do not disconnect refrigerant lines.
- ⚠️ Keep dirt and old gasket material out of the open engine.
🔧 Required Tools
You'll need the following tools for this repair:
- 3/8-inch drive ratchet
- 1/2-inch drive breaker bar
- 1/2-inch drive torque wrench
- 3/8-inch drive torque wrench
- 8mm socket
- 10mm socket
- 13mm socket
- 15mm socket
- 16mm socket
- 18mm socket
- 21mm socket
- 24mm socket
- Short socket extension set
- Long socket extension set
- Serpentine belt tensioner tool
- Harmonic balancer puller (specialty)
- Harmonic balancer installer (specialty)
- Crankshaft holding tool (specialty)
- Plastic trim clip removal tool
- Flat blade screwdriver
- Gasket scraper
- Plastic razor scraper
- Drain pan 3-gallon minimum
- Coolant funnel kit
- Shop towels
- Engine assembly lube
- RTV sealant applicator nozzle
- Floor jack rated 3-ton minimum
- Jack stands rated 3-ton minimum
- Wheel chocks
- Nitrile gloves
- Safety glasses
🔩 Required Parts
HowToo sells all the parts you need for this repair:
- Timing chain kit - Qty: 1
- Timing chain tensioner - Qty: 1
- Timing chain guides - Qty: 1 set
- Camshaft sprocket - Qty: 1
- Crankshaft sprocket - Qty: 1
- Front timing cover gasket set - Qty: 1
- Front crankshaft seal - Qty: 1
- Water pump gasket - Qty: 1
- Oil pan front seal corners - Qty: 1 set
- RTV engine sealant - Qty: 1 tube
- Engine coolant - Qty: 2 gallons
- Engine oil - Qty: 7 quarts
- Oil filter - Qty: 1
- Serpentine belt - Qty: 1
- Crankshaft balancer bolt - Qty: 1
📋 Before You Begin
- 🚗 Park your Grand Cherokee on level ground, shift to Park, and set the parking brake.
- 🧊 Let the engine cool fully before draining coolant.
- 🔋 Use a 10mm socket to disconnect the negative battery cable.
- 🧰 A harmonic balancer is the large pulley on the front of the crankshaft. It must be removed with a puller, not pried off.
- 🧰 A torque wrench tightens bolts to an exact specification. This is required for this repair.
- 🧼 Cleanliness matters. Dirt inside the timing cover can damage the timing chain and oil system.
- 📌 Assumption: This procedure covers the stock 5.7L HEMI V8 timing chain system in your Grand Cherokee.
🔨 Step-by-Step Instructions
Follow these steps in order:
Step 1: Disconnect Power and Drain Coolant
- Use a 10mm socket to remove the negative battery cable from the battery.
- Place a 3-gallon drain pan under the radiator drain area.
- Open the radiator drain and remove the coolant pressure cap slowly after the engine is cold.
- Let the coolant drain completely.
- Cold engine only.
Step 2: Remove the Engine Cover and Air Intake Parts
- Lift off the plastic engine cover by hand.
- Use an 8mm socket or flat blade screwdriver to loosen the intake tube clamps.
- Remove the air intake tube and set it aside.
- Use a plastic trim clip removal tool if any intake fasteners or clips are attached.
Step 3: Remove the Serpentine Belt
- Before removing the belt, take a photo of the belt routing with your phone.
- Use the serpentine belt tensioner tool on the belt tensioner.
- Rotate the tensioner to release belt tension.
- Slide the belt off the pulleys and remove it from the engine bay.
- Photo the belt path first.
Step 4: Remove Fan Shroud and Cooling Fan
- Use a 10mm socket to remove the fan shroud fasteners.
- Disconnect the electric fan connector by pressing the lock tab by hand.
- Lift the fan and shroud assembly upward carefully.
- Use a plastic trim clip removal tool for any wiring retainers attached to the shroud.
Step 5: Remove Accessory Brackets Blocking the Front Cover
- Use 13mm and 15mm sockets to remove front accessory bracket bolts as needed.
- Move brackets aside without stretching wiring or hoses.
- Do not open A/C refrigerant lines.
- If the alternator blocks timing cover access, use a 13mm socket to remove its mounting bolts and position it aside.
Step 6: Remove the Water Pump
- Use a 10mm or 13mm socket to remove the water pump bolts.
- Pull the water pump straight off the front cover.
- Use a gasket scraper and plastic razor scraper to clean the gasket surface.
- Do not gouge the aluminum sealing surface.
Step 7: Set Engine to Top Dead Center
- Use a 24mm socket and breaker bar on the crankshaft bolt.
- Rotate the engine clockwise only.
- Align the crankshaft timing mark to Top Dead Center on cylinder 1.
- Top Dead Center means piston 1 is at the top of its travel and the timing marks are aligned.
- Turn clockwise only.
Step 8: Remove the Harmonic Balancer
- Use the crankshaft holding tool to keep the crankshaft from turning.
- Use a 21mm or 24mm socket with a 1/2-inch breaker bar to loosen the crankshaft balancer bolt.
- Remove the balancer bolt and washer.
- Install the harmonic balancer puller using the correct puller bolts.
- Use the harmonic balancer puller to pull the balancer straight off the crankshaft.
- Do not pry behind the balancer.
Step 9: Remove the Front Timing Cover
- Use 10mm, 13mm, and 15mm sockets to remove the front cover bolts.
- Note bolt locations because lengths may vary.
- Use a plastic trim clip removal tool or plastic scraper to gently break the RTV seal.
- Pull the timing cover forward and off the engine.
- Use shop towels to block exposed oil pan and engine openings.
Step 10: Inspect and Mark the Timing Components
- Use shop towels to clean oil from the visible timing marks.
- Confirm the crankshaft sprocket mark and camshaft sprocket mark are aligned correctly.
- Use a paint marker if needed to highlight the timing marks.
- Do not rotate the crankshaft or camshaft after the chain is removed.
Step 11: Remove the Timing Chain Tensioner and Guides
- Use a 10mm socket to remove the timing chain tensioner bolts.
- Use a 10mm socket to remove timing guide bolts.
- Remove the tensioner and guides.
- The tensioner is spring-loaded and keeps the chain tight during engine operation.
Step 12: Remove the Timing Chain and Sprockets
- Use the correct socket to remove the camshaft sprocket bolt while holding the sprocket steady.
- Slide the camshaft sprocket and timing chain off together.
- Remove the crankshaft sprocket if replacing it.
- Keep the crankshaft and camshaft timing positions unchanged.
Step 13: Install the New Timing Sprockets and Chain
- Apply engine assembly lube to the new sprocket contact surfaces.
- Install the crankshaft sprocket fully seated on the crankshaft.
- Install the timing chain over the camshaft sprocket and crankshaft sprocket.
- Align the colored chain links with the sprocket timing marks if your kit includes marked links.
- Use a torque wrench for the camshaft sprocket bolt and tighten to the service specification supplied with the timing kit.
- If using OEM-style procedure, verify the cam and crank timing marks face each other at alignment.
- Timing marks must match.
Step 14: Install New Guides and Tensioner
- Use a 10mm socket to install the new chain guides.
- Use a 3/8-inch torque wrench to tighten guide bolts to the timing kit or service manual specification.
- Install the new timing chain tensioner with a 10mm socket.
- Release the tensioner only after it is fully bolted in place.
- Rotate the crankshaft clockwise two full turns using a 24mm socket and breaker bar.
- Recheck timing mark alignment after the two full turns.
Step 15: Replace the Front Crankshaft Seal
- Use a seal puller or flat blade screwdriver carefully to remove the old front crankshaft seal from the timing cover.
- Use a seal driver or large matching socket to press the new seal squarely into the cover.
- Lightly coat the seal lip with clean engine oil.
Step 16: Clean and Reseal the Timing Cover
- Use a gasket scraper and plastic razor scraper to clean old RTV from the block, timing cover, and oil pan corners.
- Wipe sealing surfaces clean with shop towels.
- Apply RTV engine sealant to the specified cover joints and oil pan corner areas.
- Install the new front cover gasket set.
- Install the timing cover carefully without smearing the RTV.
Step 17: Tighten the Timing Cover
- Use 10mm, 13mm, and 15mm sockets to install all timing cover bolts finger-tight first.
- Use a 3/8-inch torque wrench to tighten the bolts evenly in stages.
- Torque to the service specification for each bolt size and location.
- Do not overtighten small bolts in the aluminum cover.
Step 18: Reinstall the Harmonic Balancer
- Lightly oil the crankshaft snout with clean engine oil.
- Use the harmonic balancer installer to press the balancer onto the crankshaft.
- Do not hammer the balancer on.
- Install a new crankshaft balancer bolt.
- Use the crankshaft holding tool and 1/2-inch torque wrench to tighten the balancer bolt to the service specification.
Step 19: Reinstall the Water Pump and Accessories
- Install the new water pump gasket.
- Use a 10mm or 13mm socket to install the water pump bolts.
- Use a torque wrench and tighten water pump bolts evenly to the service specification.
- Reinstall any removed accessory brackets using 13mm and 15mm sockets.
- Reconnect any electrical connectors by hand until they click.
Step 20: Reinstall Cooling Fan, Intake, and Belt
- Lower the cooling fan and shroud into place.
- Use a 10mm socket to install the fan shroud fasteners.
- Reconnect the fan electrical connector by hand.
- Route the new serpentine belt using your photo as a guide.
- Use the serpentine belt tensioner tool to rotate the tensioner and slip the belt onto the final pulley.
- Use an 8mm socket or flat blade screwdriver to reinstall the air intake tube clamps.
Step 21: Refill Coolant and Change Oil
- Use a coolant funnel kit to refill the cooling system with the correct engine coolant.
- Use the proper socket or oil filter tool to remove the oil filter.
- Install the new oil filter by hand, then snug it according to the filter instructions.
- Refill the engine with fresh engine oil.
- Reconnect the negative battery cable using a 10mm socket.
Step 22: First Start Check
- Before starting, check that all tools are removed from the engine bay.
- Start the engine and let it idle.
- Watch for oil leaks, coolant leaks, abnormal chain noise, or belt misalignment.
- Shut the engine off immediately if you hear knocking, grinding, or loud rattling.
✅ After Repair
- ✅ Let the engine reach operating temperature while watching the temperature gauge.
- ✅ Top off coolant after air bubbles stop coming through the coolant funnel.
- ✅ Check engine oil level after the engine has been off for 5 minutes.
- ✅ Inspect around the timing cover, water pump, oil pan front edge, and crank seal for leaks.
- ✅ Road test gently for 10-15 minutes, then recheck coolant and oil levels.
- ✅ If the check engine light comes on, scan for diagnostic trouble codes before driving further.
💰 DIY vs Shop Cost
Shop Cost: $1,800-$3,200 USD equivalent (parts + labor)
DIY Cost: $350-$850 USD equivalent (parts only)
You Save: $1,000-$2,350 USD equivalent by doing it yourself!
Shop labor rates vary but typically run $100-$150/hour. This repair takes a shop approximately 8-12 hours.
🎯 Ready to get started?
HowToo makes it easy: same-day/2-day shipping on every part, plus all the tools and specialty tools you need! Check out the parts and tools sections below to add everything to your cart.
Guide for Engine Timing Chain Kit replace for these Jeep vehicles
| Year Make Model | Sub Model | Engine | Body Style |
|---|---|---|---|
| 2017 Jeep Grand Cherokee | Laredo | V6 3.6L | Sport Utility |
| 2017 Jeep Grand Cherokee | Limited | V6 3.0L | Sport Utility |
| 2017 Jeep Grand Cherokee | Limited | V6 3.6L | Sport Utility |
| 2017 Jeep Grand Cherokee | Limited | V8 5.7L | Sport Utility |
| 2015 Jeep Grand Cherokee | Laredo | V6 3.6L | Sport Utility |
| 2015 Jeep Grand Cherokee | Limited | V6 3.0L | Sport Utility |
| 2015 Jeep Grand Cherokee | Limited | V6 3.6L | Sport Utility |
| 2015 Jeep Grand Cherokee | Limited | V8 5.7L | Sport Utility |
| 2014 Jeep Grand Cherokee | Laredo | V6 3.6L | Sport Utility |
| 2014 Jeep Grand Cherokee | Limited | V6 3.0L | Sport Utility |
| 2014 Jeep Grand Cherokee | Limited | V6 3.6L | Sport Utility |
| 2014 Jeep Grand Cherokee | Limited | V8 5.7L | Sport Utility |