









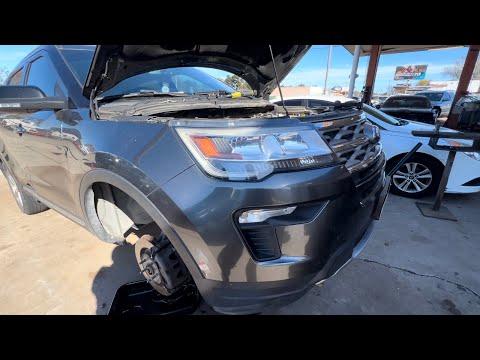






How to Replace the Timing Chain on a 2013-2018 Ford Explorer 2.3L Turbo (Trim: Base | Engine: V6 3.5L)
Step-by-step timing chain guide with tools, parts, torque specs, and safety tips
How to Replace the Timing Chain on a 2013-2018 Ford Explorer 2.3L Turbo (Trim: Base | Engine: V6 3.5L)
Step-by-step timing chain guide with tools, parts, torque specs, and safety tips for 2013, 2014, 2015, 2016, 2017, 2018


🔧 Timing Chain - Replacement
Your Explorer does not use a timing belt on the 2.3L turbo engine. It uses a timing chain, and replacing it is a major engine repair because the front cover, timing components, and related seals must come off. This job is very advanced and timing accuracy is critical to avoid engine damage.
Difficulty Level: Advanced | Estimated Time: 10-16 hours
⚠️ Safety & Precautions
- Disconnect the negative battery cable before starting.
- Support the vehicle safely on jack stands if you need access underneath.
- Do not rotate the crankshaft or camshafts after the timing chain is removed.
- Keep track of all timing marks and chain guides. One mistake can cause severe engine damage.
- If your engine has VCT phasers, handle them carefully and keep them aligned.
- Drain engine oil and coolant before removing the front cover.
🔧 Required Tools
You'll need the following tools for this repair:
- Metric socket set
- Metric wrench set
- Torque wrench
- Breaker bar
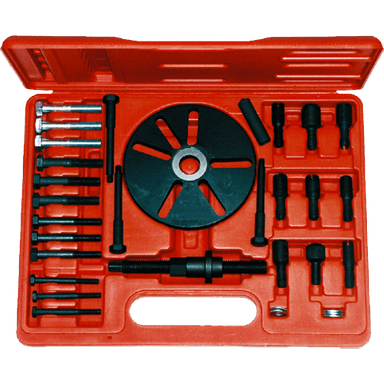
- Harmonic balancer puller (specialty)
- Timing tool set (specialty)
- Crankshaft holding tool (specialty)
- Drain pan
- Floor jack (rated 3-ton minimum)
- Jack stands
- Safety glasses
- Mechanic gloves
- Plastic scraper
- Seal installer tool (specialty)
- Funnel
🔩 Required Parts
HowToo sells all the parts you need for this repair:
- Timing chain kit - Qty: 1
- Timing chain guides - Qty: 1 set
- Timing chain tensioner - Qty: 1
- Crankshaft seal - Qty: 1
- Front cover gasket set - Qty: 1
- Valve cover gasket set - Qty: 1
- Water pump gasket - Qty: 1
- Engine oil - Qty: 6 quarts
- Oil filter - Qty: 1
- Engine coolant - Qty: 1 fill
- RTV sealant - Qty: 1 tube
- Accessory drive belt - Qty: 1
📋 Before You Begin
- Park on level ground and set the parking brake.
- Disconnect the negative battery cable.
- Drain the engine oil and coolant.
- Remove the engine cover and air intake ducting for access.
- If equipped with an electronic throttle body, do not force the throttle plate.
🔨 Step-by-Step Instructions
Follow these steps in order:
Step 1: Remove accessories and front engine components
- Use the metric socket set to remove the air intake parts, serpentine belt, and any brackets blocking the front cover.
- Remove the right front wheel and splash shield if needed for access.
- Use a breaker bar to relieve tension from the accessory drive belt tensioner.
Step 2: Remove the crankshaft pulley
- Use the crankshaft holding tool to keep the engine from turning.
- Use the correct socket and breaker bar to remove the crankshaft pulley bolt.
- Use the harmonic balancer puller to remove the pulley from the crankshaft snout.
Step 3: Remove valve covers and front cover
- Use the metric socket set to remove the valve covers.
- Use a plastic scraper to clean old gasket material from sealing surfaces.
- Use the metric socket set to remove the front cover bolts.
- Carefully break the seal and remove the front cover without damaging the mating surfaces.
Step 4: Set engine to top dead center
- Use the crankshaft holding tool and rotate the engine to top dead center on cylinder 1.
- Install the timing tool set to lock the camshafts and crankshaft in position.
- Do not skip this step.
Step 5: Remove timing components
- Use the metric socket set to remove the timing chain tensioner and guides.
- Remove the timing chain from the camshaft sprockets and crankshaft sprocket.
- If equipped, remove and inspect the variable cam timing phasers.
Step 6: Install new timing components
- Install the new crankshaft sprocket, chain, guides, and tensioner from the timing chain kit.
- Align all colored chain links with the timing marks on the sprockets.
- Install the cam phasers and verify the locking tools still fit correctly.
- Torque to manufacturer specification for each fastener using a torque wrench.
Step 7: Reinstall front cover and seals
- Apply RTV sealant where the service manual specifies.
- Install the new front cover gasket set and crankshaft seal.
- Use the torque wrench to tighten the front cover bolts in sequence.
Step 8: Reassemble engine accessories
- Reinstall the valve covers, crankshaft pulley, belt, brackets, and intake parts.
- Use the torque wrench on all critical fasteners.
- Refill the engine oil and coolant.
Step 9: Verify timing and start engine
- Remove the timing tools only after everything is fully assembled.
- Reconnect the battery.
- Start the engine and listen for abnormal ticking, chain noise, or leaks.
- Torque to factory spec on any items you removed and reinstalled during final checks.
✅ After Repair
- Check engine oil level and coolant level again after warm-up.
- Inspect for oil leaks around the front cover and valve covers.
- Verify smooth idle and no check engine light.
- If any cam/crank codes are present, rescan before driving.
💰 DIY vs Shop Cost
Shop Cost: $1,800-$3,500 (parts + labor)
DIY Cost: $350-$900 (parts only)
You Save: $1,450-$2,600 by doing it yourself!
Shop labor rates vary but typically run $100-$150/hour. This repair takes a shop approximately 10-16 hours.
🎯 Ready to get started?
HowToo makes it easy: same-day/2-day shipping on every part, plus all the tools and specialty tools you need! Check out the parts and tools sections below to add everything to your cart.
Guide for Engine Timing Chain Tensioner replace for these Ford vehicles
| Year Make Model | Sub Model | Engine | Body Style |
|---|---|---|---|
| 2018 Ford Explorer | Sport | V6 3.5L | - |
| 2017 Ford Explorer | Sport | V6 3.5L | - |
| 2016 Ford Explorer | Sport | V6 3.5L | - |
| 2015 Ford Explorer | Sport | V6 3.5L | - |
| 2014 Ford Explorer | Sport | V6 3.5L | - |
| 2013 Ford Explorer | Sport | V6 3.5L | - |