









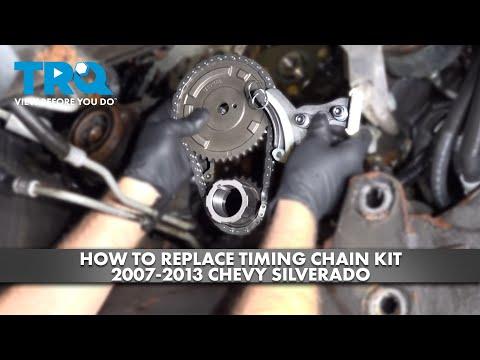






How to Replace the Timing Chain on a 2012 GMC Sierra 1500
Step-by-step timing chain guide with tools, parts, safety tips, and torque specs for 2007, 2008, 2009, 2010, 2011, 2012, 2013
How to Replace the Timing Chain on a 2012 GMC Sierra 1500
Step-by-step timing chain guide with tools, parts, safety tips, and torque specs for 2007, 2008, 2009, 2010, 2011, 2012, 2013


🔧 Timing Chain - Replacement
Your Sierra does not use a timing belt. It uses a timing chain, so there is no belt-service procedure on this engine. Timing chain replacement is an advanced job because the front of the engine must be disassembled and valve timing must be set correctly.
Difficulty Level: Advanced | Estimated Time: 8-12 hours
⚠️ Safety & Precautions
- Disconnect the negative battery cable before starting.
- Work on a completely cool engine.
- Support the truck securely with jack stands if you raise it.
- The timing chain and cam/crank alignment must be exact. Wrong timing can cause severe engine damage.
- Use a harmonic balancer puller only when removing the crank pulley.
- Replace all one-time-use bolts and seals during reassembly.
🔧 Required Tools
You'll need the following tools for this repair:
- Metric socket set
- Metric wrench set
- Torque wrench
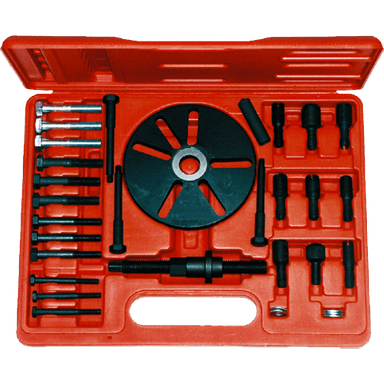
- Harmonic balancer puller (specialty)
- Crankshaft holding tool (specialty)
- Timing chain alignment tools (specialty)
- Seal installer tool (specialty)
- Breaker bar
- Ratchet
- Drain pan
- Floor jack (rated 3-ton minimum)
- Jack stands (rated 3-ton minimum)
- Safety glasses
- Nitrile gloves
- Scraper
- Gasket brush
- Shop towels
🔩 Required Parts
HowToo sells all the parts you need for this repair:
- Timing chain set - Qty: 1
- Timing chain tensioner - Qty: 1
- Timing chain guides - Qty: 1 set
- Front cover gasket - Qty: 1
- Front crankshaft seal - Qty: 1
- Crankshaft balancer bolt - Qty: 1
- Water pump gaskets - Qty: 1 set
- Engine oil - Qty: 1 change
- Engine coolant - Qty: 1 refill
- RTV sealant - Qty: 1 tube
📋 Before You Begin
- Park on level ground and set the parking brake.
- Disconnect the negative battery cable.
- Drain the coolant and engine oil before removing front cover components.
- Label connectors and bolts as you remove them. Take photos as you go.
- Set cylinder No. 1 to top dead center before disassembly.
🔨 Step-by-Step Instructions
Follow these steps in order:
Step 1: Prepare the truck
- Use a floor jack and jack stands if you need under-truck access.
- Disconnect the negative battery cable.
- Drain the engine oil and coolant into a drain pan.
Step 2: Remove front accessories
- Use the correct metric sockets to remove the drive belt, belt tensioner, and front accessories that block the timing cover.
- Remove the water pump if it blocks the front cover on your engine layout.
- Keep bolts in labeled groups.
Step 3: Remove the crank pulley
- Use a crankshaft holding tool (specialty) and breaker bar to loosen the crankshaft balancer bolt.
- Use a harmonic balancer puller (specialty) to remove the crank pulley.
Step 4: Remove the front cover
- Use the metric socket set to remove the front cover bolts.
- Carefully break the seal and remove the cover.
- Remove the old front cover gasket and crank seal.
Step 5: Set engine timing at top dead center
- Rotate the engine by hand using a breaker bar on the crankshaft bolt.
- Align the crank and cam timing marks exactly per the service layout.
- Use timing chain alignment tools (specialty) to hold the parts in place.
Step 6: Remove the old timing components
- Use the metric socket set to remove the chain guides, tensioner, cam sprockets, and timing chain.
- Inspect the sprockets for wear. Replace them if teeth are hooked or damaged.
Step 7: Install the new timing set
- Install the new chain, guides, and tensioner using the timing chain alignment tools (specialty).
- Make sure all timing marks still line up before removing the holding tools.
- Torque to OEM specification. Fastener values vary by bolt and location.
Step 8: Reseal and reinstall the front cover
- Clean all gasket surfaces with a scraper and gasket brush.
- Install the new front cover gasket and apply RTV sealant where required.
- Use the metric socket set to reinstall the front cover.
- Torque to OEM specification.
Step 9: Reinstall crank pulley and accessories
- Install the crank seal and crank pulley using the seal installer tool (specialty).
- Install a new crankshaft balancer bolt and tighten to OEM specification.
- Reinstall the water pump, belt drive parts, and all removed accessories using the metric socket set.
Step 10: Refill fluids and verify timing
- Refill the engine with fresh engine oil and coolant.
- Reconnect the battery.
- Start the engine and listen for abnormal chain noise or ticking.
- Shut it off immediately if it sounds wrong.
✅ After Repair
- Check for oil, coolant, or front cover leaks.
- Verify the engine starts cleanly and idles smoothly.
- Recheck fluid levels after the first heat cycle.
- Scan for diagnostic trouble codes if the check engine light is on.
💰 DIY vs Shop Cost
Shop Cost: $1,500-$3,500 (parts + labor)
DIY Cost: $250-$700 (parts only)
You Save: $1,250-$2,800 by doing it yourself!
Shop labor rates vary but typically run $100-$150/hour. This repair takes a shop approximately 8-12 hours.
🎯 Ready to get started?
HowToo makes it easy: same-day/2-day shipping on every part, plus all the tools and specialty tools you need! Check out the parts and tools sections below to add everything to your cart.