









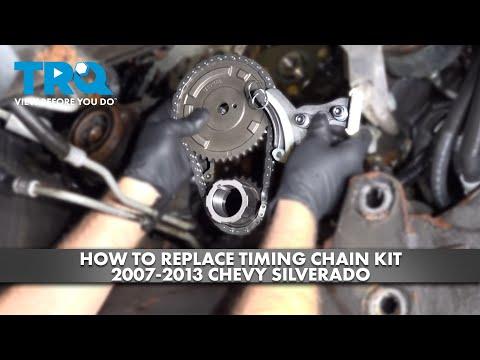






How to Replace the Timing Chain on a 2012 Chevrolet Silverado 1500 4.8L V8
Step-by-step guide with tools, parts, timing marks, torque specs, and safety tips for 2007, 2008, 2009, 2010, 2011, 2012, 2013
How to Replace the Timing Chain on a 2012 Chevrolet Silverado 1500 4.8L V8
Step-by-step guide with tools, parts, timing marks, torque specs, and safety tips for 2007, 2008, 2009, 2010, 2011, 2012, 2013


🔧 Timing Chain - Inspection and Replacement
Your Silverado does not use a timing belt on the 4.8L V8. It uses a timing chain, so the correct service is timing chain inspection or replacement if you have noise, cam/crank correlation codes, or evidence of chain stretch. This is a major front-of-engine repair and requires careful cam/crank timing.
Difficulty Level: Advanced | Estimated Time: 10-14 hours
⚠️ Safety & Precautions
- Disconnect the negative battery cable before starting.
- Let the engine cool fully before working near the radiator, exhaust, or oil.
- Support the truck securely on jack stands before working underneath.
- Keep dirt out of the engine. Open timing components are very sensitive to contamination.
- Do not rotate the crankshaft or camshafts once the timing chain is removed unless the service procedure allows it.
🔧 Required Tools
You'll need the following tools for this repair:
- Metric socket set
- Metric wrench set
- Torque wrench
- Breaker bar
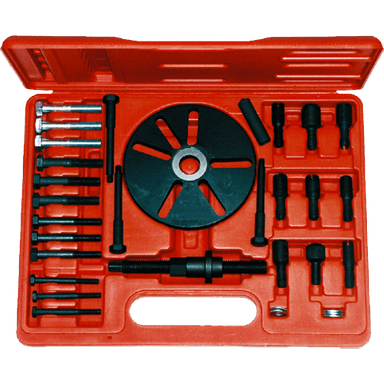
- Harmonic balancer puller (specialty)
- Timing chain holding tool (specialty)
- Gasket scraper
- Drain pan
- Floor jack (rated 3-ton minimum)
- Jack stands
- Safety glasses
- Mechanic gloves
🔩 Required Parts
HowToo sells all the parts you need for this repair:
- Timing chain kit - Qty: 1
- Timing cover gasket set - Qty: 1
- Front crankshaft seal - Qty: 1
- Water pump gasket set - Qty: 1
- Engine oil - Qty: 1 change
- Oil filter - Qty: 1
- Coolant - Qty: 1 refill
- Serpentine belt - Qty: 1
📋 Before You Begin
- Park on level ground and set the parking brake.
- Disconnect the negative battery cable.
- Drain the engine coolant and engine oil.
- Remove the radiator fan shroud and related front accessories for access.
- Take photos before disassembly.
🔨 Step-by-Step Instructions
Follow these steps in order:
Step 1: Remove front accessories
- Use a metric socket set and wrench set to remove the serpentine belt, fan shroud, fan assembly, and any brackets blocking the timing cover.
- If equipped, remove the water pump using the correct metric sockets.
Step 2: Remove the harmonic balancer
- Use a breaker bar to loosen the crankshaft bolt.
- Use a harmonic balancer puller to remove the balancer from the crankshaft.
- Torque on reassembly: Torque to 300 Nm (221 ft-lbs) plus angle per GM procedure.
Step 3: Remove the timing cover
- Use the correct metric socket set to remove all timing cover bolts.
- Carefully pry the timing cover away without damaging the sealing surfaces.
- Remove and discard the old timing cover gasket and crank seal.
Step 4: Set engine timing at top dead center
- Use a socket and breaker bar on the crankshaft bolt to rotate the engine by hand.
- Align the crankshaft and camshaft timing marks exactly as shown in the service layout.
- Rotate only by hand.
Step 5: Remove timing components
- Use the timing chain holding tool to keep the gears stable.
- Remove the timing chain tensioner and guides with the correct metric sockets.
- Remove the timing chain and sprockets if replacement is required.
Step 6: Install the new timing chain kit
- Install the new crankshaft and camshaft sprockets if included.
- Fit the new timing chain and align all timing marks exactly.
- Install the new guides and tensioner.
- Torque to manufacturer specification for each fastener in the kit.
Step 7: Verify timing alignment
- Rotate the engine by hand two full turns using a breaker bar.
- Recheck that all timing marks line up again.
- If they do not line up, do not start the engine.
Step 8: Reassemble the front of the engine
- Clean all gasket surfaces with a gasket scraper.
- Install the new timing cover gasket and crank seal.
- Reinstall the timing cover and torque bolts evenly in sequence.
- Reinstall the harmonic balancer and torque to spec.
- Reinstall the water pump, fan assembly, shroud, and belt.
Step 9: Refill fluids and restore battery connection
- Refill engine oil and coolant with the correct amounts.
- Reconnect the negative battery cable.
✅ After Repair
- Start the engine and listen for abnormal chain noise.
- Check for oil and coolant leaks around the timing cover and water pump.
- Scan for cam/crank correlation codes and clear them if repairs were successful.
- Let the engine reach full operating temperature and recheck fluid levels.
💰 DIY vs Shop Cost
Shop Cost: $1,200-$2,500 (parts + labor)
DIY Cost: $250-$700 (parts only)
You Save: $950-$1,800 by doing it yourself!
Shop labor rates vary but typically run $100-$150/hour. This repair takes a shop approximately 10-14 hours.
🎯 Ready to get started?
HowToo makes it easy: same-day/2-day shipping on every part, plus all the tools and specialty tools you need! Check out the parts and tools sections below to add everything to your cart.