









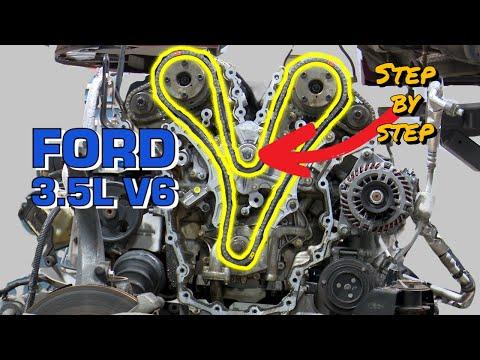






How to Replace the Timing Chain on a 2011-2017 Ford Explorer (Engine: V6 3.5L)
Step-by-step guide with tools, parts, safety tips, and timing specs
How to Replace the Timing Chain on a 2011-2017 Ford Explorer (Engine: V6 3.5L)
Step-by-step guide with tools, parts, safety tips, and timing specs for 2011, 2012, 2013, 2014, 2015, 2016, 2017


🔧 Timing Chain - Replacement
Your Explorer does not use a timing belt; it uses a timing chain. On this engine, replacing the chain is a major front-engine teardown because the chain is inside the timing cover and is driven by the crankshaft and camshafts.
Difficulty Level: Advanced | Estimated Time: 10-14 hours
⚠️ Safety & Precautions
- Disconnect the negative battery cable before starting.
- Support the engine properly before removing the front engine mount.
- Keep the front of the engine clean. Dirt inside the timing cover can cause damage.
- This job requires accurate cam timing. If timing is off, the engine can be damaged.
- Replace all one-time-use seals, gaskets, and torque-to-yield fasteners.
🔧 Required Tools
You'll need the following tools for this repair:
- Metric socket set
- Metric wrench set
- 1/2-inch drive breaker bar
- Torque wrench
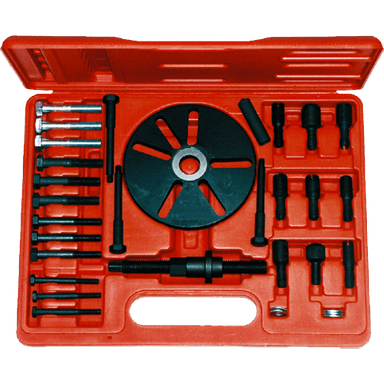
- Harmonic balancer puller (specialty)
- Timing chain holding tool (specialty)
- Camshaft holding tool (specialty)
- Floor jack (rated 3-ton minimum)
- Jack stands
- Drain pan
- Gasket scraper
- Serpentine belt tool
- Flat-blade screwdriver
- Rubber mallet
- Safety glasses
- Nitrile gloves
🔩 Required Parts
HowToo sells all the parts you need for this repair:
- Timing chain set - Qty: 1
- Timing cover gasket set - Qty: 1
- Front crankshaft seal - Qty: 1
- Valve cover gasket set - Qty: 1
- Water pump gasket - Qty: 1
- Serpentine belt - Qty: 1
- Engine coolant - Qty: 1-2 gallons
- Engine oil - Qty: 6 quarts
- Oil filter - Qty: 1
- Front engine mount bolts - Qty: 1 set
📋 Before You Begin
- Park on level ground and set the parking brake.
- Let the engine cool fully before draining coolant.
- Disconnect the negative battery cable.
- Raise the front of the vehicle and support it securely on jack stands.
- Drain the engine oil and coolant before opening the timing cover area.
🔨 Step-by-Step Instructions
Follow these steps in order:
Step 1: Remove underhood components
- Use a metric socket set to remove the engine cover, air intake duct, and any parts blocking access to the front of the engine.
- Use a flat-blade screwdriver to release hose clamps if needed.
Step 2: Drain fluids
- Use a drain pan to catch the engine oil and coolant.
- Remove the oil drain plug with the correct metric socket.
- Open the radiator drain or lower hose to drain coolant.
Step 3: Remove accessory drive components
- Use a serpentine belt tool to unload the belt tensioner and remove the belt.
- Use a metric socket set to remove the belt tensioner, idlers, and front accessory brackets as needed.
Step 4: Support the engine and remove the mount
- Place a floor jack with a wood block under the oil pan to support the engine.
- Use a metric socket set and metric wrench set to remove the front engine mount and related brackets.
- Keep the engine gently supported.
Step 5: Remove the crankshaft pulley
- Use a 1/2-inch drive breaker bar and the correct socket to loosen the crankshaft pulley bolt.
- Use a harmonic balancer puller (specialty) to remove the pulley.
Step 6: Remove timing cover and valve covers
- Use a metric socket set to remove the timing cover bolts.
- Use a gasket scraper to clean the sealing surfaces carefully.
- Use a metric socket set to remove both valve covers for timing access.
Step 7: Set engine to top dead center
- Rotate the engine by hand with a breaker bar until cylinder 1 is at top dead center.
- Install the timing chain holding tool (specialty) and camshaft holding tool (specialty) to lock the timing position.
- Do not force the engine rotation if resistance is felt.
Step 8: Remove the old timing components
- Use a metric socket set to remove the chain guides, tensioners, and timing chains.
- Keep track of each part’s location. The front and rear timing components must go back in the correct spots.
- Take photos before removal.
Step 9: Install the new timing chain set
- Install the new chains, guides, and tensioners in the same positions as removed.
- Align all timing marks exactly with the colored links and sprocket marks.
- Use a metric socket set to tighten the fasteners to specification.
- Torque to manufacturer specification for each timing fastener and follow the service sequence.
Step 10: Reseal the front cover
- Use a gasket scraper to clean all gasket surfaces.
- Install the new timing cover gasket and front crank seal.
- Use a torque wrench and metric socket set to reinstall the timing cover bolts.
- Torque to manufacturer specification in the proper crisscross pattern.
Step 11: Reinstall removed components
- Reinstall the crankshaft pulley with a torque wrench.
- Reinstall the front engine mount using a metric socket set and torque wrench.
- Reinstall the valve covers with new gaskets.
- Reinstall the accessory brackets, belt tensioner, and serpentine belt.
Step 12: Refill fluids and start up
- Refill engine oil and coolant.
- Reconnect the battery.
- Start the engine and listen for abnormal chain noise.
- Check for oil leaks, coolant leaks, and proper running.
✅ After Repair
- Verify there are no warning lights on the dash.
- Check oil level again after the engine runs.
- Bleed the cooling system if air was introduced.
- Road test carefully and recheck for leaks.
💰 DIY vs Shop Cost
Shop Cost: $2,000-$4,000 (parts + labor)
DIY Cost: $350-$900 (parts only)
You Save: $1,650-$3,100 by doing it yourself!
Shop labor rates vary but typically run $100-$150/hour. This repair takes a shop approximately 10-14 hours.
🎯 Ready to get started?
HowToo makes it easy: same-day/2-day shipping on every part, plus all the tools and specialty tools you need! Check out the parts and tools sections below to add everything to your cart.
Guide for Engine Valve Cover Gasket Set replace for these Ford vehicles
| Year Make Model | Sub Model | Engine | Body Style |
|---|---|---|---|
| 2017 Ford Explorer | - | V6 3.5L | - |
| 2016 Ford Explorer | - | V6 3.5L | - |
| 2015 Ford Explorer | - | V6 3.5L | - |
| 2014 Ford Explorer | - | V6 3.5L | - |
| 2013 Ford Explorer | - | V6 3.5L | - |
| 2012 Ford Explorer | - | V6 3.5L | - |
| 2011 Ford Explorer | - | V6 3.5L | - |