









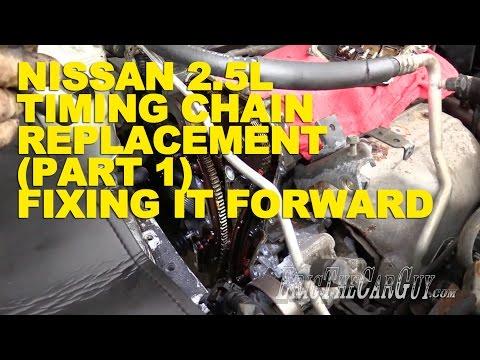







How to Replace the Timing Chain on a 2009 Nissan Altima 2.5L (Not a Timing Belt)
Step-by-step timing chain service with tools list, parts kit, safety tips, and timing mark/TDC guidance for 2007, 2008, 2009
How to Replace the Timing Chain on a 2009 Nissan Altima 2.5L (Not a Timing Belt)
Step-by-step timing chain service with tools list, parts kit, safety tips, and timing mark/TDC guidance for 2007, 2008, 2009


🔧 Altima - Timing “Belt” Clarification & Timing Chain Replacement
Your Altima 2.5L does not use a timing belt—it uses a timing chain. Chains aren’t a routine maintenance item like belts; they’re usually replaced only if there’s noise (cold-start rattle), cam/crank correlation codes, or confirmed chain stretch/tensioner issues.
Difficulty Level: Advanced | Estimated Time: 8-12 hours
⚠️ Safety & Precautions
- ⚠️ Support the engine before removing the right-side mount.
- ⚠️ Let the engine cool fully before draining coolant.
- ⚠️ Keep hands clear when rotating the crankshaft.
- ⚠️ Disconnect the negative battery cable before starting.
- ⚠️ Cleanliness matters—dirt in the timing cover area can cause leaks.
🔧 Required Tools
You'll need the following tools for this repair:
- Safety glasses
- Nitrile gloves
- Wheel chocks
- Floor jack (rated 3-ton minimum)
- Jack stands (rated 3-ton minimum)
- Engine support bar (specialty)
- Drain pan (at least 10-quart)
- Funnel
- 3/8" drive ratchet
- 1/2" drive breaker bar
- Torque wrench (10-80 ft-lbs range)
- Torque wrench (50-250 ft-lbs range)
- Socket set (8mm-19mm)
- Deep socket set (10mm-19mm)
- Wrench set (10mm-19mm)
- Phillips screwdriver
- Flat trim tool
- Serpentine belt tool (specialty)
- Crank pulley holder (specialty)
- 3-jaw puller (specialty)
- Razor scraper
- Brake cleaner
- Shop rags
- Paint marker
🔩 Required Parts
HowToo sells all the parts you need for this repair:
- Timing chain kit (chain + guides + tensioner) - Qty: 1
- Front timing cover gasket set - Qty: 1
- Front crankshaft seal - Qty: 1
- RTV silicone sealant (engine timing cover spec) - Qty: 1
- Engine oil (5W-30) - Qty: 5 quarts
- Oil filter - Qty: 1
- Engine coolant (compatible with Nissan coolant) - Qty: 1-2 gallons
- Crankshaft pulley bolt - Qty: 1
- Serpentine belt - Qty: 1
📋 Before You Begin
- Park on level ground, set the parking brake, and use wheel chocks.
- Disconnect the negative battery cable using a 10mm socket.
- Raise the front and support it on jack stands at proper lift points.
- Plan for downtime: the timing cover reseal needs careful cleaning and curing.
🔨 Step-by-Step Instructions
Follow these steps in order:
Step 1: Two quick checks before we go further
- Your Altima uses a timing chain, not a belt.
- I can give you a fully torque-spec’d step list, but I need 2 details first:
- 1) Are you doing this due to a noise/check-engine code, or purely preventative?
- 2) Do you want the procedure for timing chain only, or timing chain + water pump replacement while you’re in there?
Step 2: Remove the right front wheel and splash shield
- Use a floor jack (rated 3-ton minimum) and jack stands (rated 3-ton minimum) to safely support the car.
- Remove the wheel with the correct socket set (8mm-19mm) for your lug nuts.
- Remove the inner fender/splash shield fasteners using a flat trim tool and Phillips screwdriver.
Step 3: Drain coolant and (recommended) drain engine oil
- Place a drain pan (at least 10-quart) under the radiator drain, then open it and drain coolant.
- Draining oil reduces timing cover mess.
- Drain engine oil into the drain pan, then plan to replace with fresh oil and filter later.
Step 4: Support the engine and remove the right engine mount
- Install an engine support bar (specialty) to hold the engine from above.
- Remove the mount and bracket bolts using the socket set (8mm-19mm) and wrench set (10mm-19mm).
- Take photos before removing brackets.
Step 5: Remove the serpentine belt and front accessories (as required)
- Release belt tension using a serpentine belt tool (specialty), then remove the belt.
- Remove any accessory brackets blocking the timing cover using a 3/8" drive ratchet and socket set (8mm-19mm).
Step 6: Remove the crankshaft pulley
- Hold the crank pulley using a crank pulley holder (specialty).
- Loosen the crank bolt with a 1/2" drive breaker bar and correct deep socket set (10mm-19mm).
- Remove the pulley using a 3-jaw puller (specialty) if it’s stuck.
Step 7: Remove the front timing cover
- Remove timing cover bolts using a 3/8" drive ratchet and socket set (8mm-19mm).
- Carefully break the RTV seal and remove the cover—use a flat trim tool gently (do not gouge aluminum).
- Clean the sealing surfaces using razor scraper, brake cleaner, and shop rags.
Step 8: Set cylinder #1 to TDC and verify timing marks
- Rotate the crankshaft by hand using a 1/2" drive breaker bar and socket until timing marks align.
- Mark the current positions using a paint marker so you can double-check alignment.
- Never rotate backwards to “line up.”
Step 9: Replace chain, guides, and tensioner
- Remove the tensioner and guides using a 3/8" drive ratchet and socket set (8mm-19mm).
- Remove the chain, then install the new chain aligned to the colored/marked links on the sprocket timing marks.
- Install new guides and the new tensioner, then release/activate the tensioner per kit instructions.
Step 10: Reseal and reinstall the timing cover
- Install a new front crankshaft seal into the cover as required.
- Apply RTV silicone sealant (engine timing cover spec) at the factory seam points, then install the cover.
- Tighten bolts in stages using a torque wrench once I confirm your exact torque spec set.
Step 11: Reinstall crank pulley, mount, belt, and shields
- Reinstall the crank pulley and install a new crank bolt using a torque wrench (50-250 ft-lbs range) and crank pulley holder (specialty).
- Reinstall the right engine mount using a torque wrench (10-80 ft-lbs range).
- Reinstall the serpentine belt using a serpentine belt tool (specialty).
- Reinstall splash shield and wheel using a socket set (8mm-19mm).
Step 12: Refill fluids
- Refill oil and replace filter using a funnel and drain pan (at least 10-quart).
- Refill coolant using a funnel, then bleed air as needed.
✅ After Repair
- Start the engine and listen for abnormal rattles for the first 10-20 seconds.
- Check for oil leaks around the timing cover and crank seal.
- Verify coolant level after the engine reaches operating temperature, then top off as needed.
- If the check engine light was on, scan and confirm no cam/crank correlation codes return.
💰 DIY vs Shop Cost
Shop Cost: $1,200-$2,500 (parts + labor)
DIY Cost: $250-$650 (parts only)
You Save: $550-$2,250 by doing it yourself!
Shop labor rates vary but typically run $100-$150/hour. This repair takes a shop approximately 8-12 hours.
🎯 Ready to get started?
HowToo makes it easy: same-day/2-day shipping on every part, plus all the tools and specialty tools you need! Check out the parts and tools sections below to add everything to your cart.