









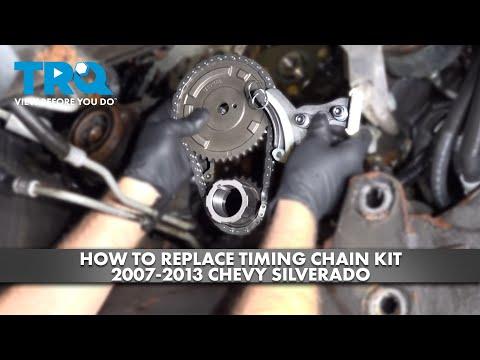







How to Replace the Timing Chain on a 2009-2018 Chevrolet Express 3500 (4.8L V8) (Engine: V8 6.6L)
Step-by-step instructions with required tools, parts list, key torque specs, and leak-prevention tips
How to Replace the Timing Chain on a 2009-2018 Chevrolet Express 3500 (4.8L V8) (Engine: V8 6.6L)
Step-by-step instructions with required tools, parts list, key torque specs, and leak-prevention tips for 2009, 2010, 2011, 2012, 2013, 2014, 2015, 2016, 2017


🔧 Express - Timing Chain Replacement
Your Express’s 4.8L V8 uses a timing chain, not a timing belt. Replacing the timing chain means removing the front of the engine (accessories, water pump, harmonic balancer, and front cover), swapping the chain/sprockets, then resealing everything so it doesn’t leak.
Difficulty Level: Advanced | Estimated Time: 6-10 hours
Assumption: Stock 4.8L V8 with mechanical fan and standard front cover.
⚠️ Safety & Precautions
- 🛑 Disconnect the negative battery cable before working near the starter/alternator.
- 🛑 Let the engine cool fully; you’ll drain coolant and work around hot parts.
- 🛑 Support the van with jack stands on a solid, level surface; never rely on a jack alone.
- 🛑 Keep fingers/clothes away from the fan and belt path.
- 🛑 Use eye protection; coolant and debris can fall when the cover comes off.
- 🛑 The harmonic balancer bolt is torque-to-yield and should be replaced.
🔧 Required Tools
You'll need the following tools for this repair:
- Safety glasses
- Nitrile gloves
- Wheel chocks
- Floor jack (rated 3-ton minimum)
- Jack stands (rated 3-ton minimum)
- Drain pan (at least 3-gallon)
- Shop towels
- Metric socket set (8mm-21mm)
- 3/8" drive ratchet
- 1/2" drive breaker bar
- Extensions set (3", 6", 12")
- Torque wrench (10-150 ft-lbs range)
- Torque angle gauge (specialty)
- Serpentine belt tool (specialty)
- Fan clutch wrench set (36mm) (specialty)
- Harmonic balancer puller (specialty)
- Harmonic balancer installer tool (specialty)
- Seal puller
- Plastic gasket scraper
- RTV silicone gasket maker
- Threadlocker (blue)
- Pry bar
- Flathead screwdriver
- Pick set
- Torque bit socket set (Torx E-sockets)
- Fuel line/clip pliers
- Flashlight
🔩 Required Parts
HowToo sells all the parts you need for this repair:
- Timing chain and sprocket set - Qty: 1
- Timing cover gasket set - Qty: 1
- Front crankshaft seal - Qty: 1
- Harmonic balancer bolt (torque-to-yield) - Qty: 1
- Water pump gasket set - Qty: 1
- Coolant (DEX-COOL compatible) - Qty: 3-4 gallons premix
- Engine oil (5W-30) - Qty: 6 quarts
- Oil filter - Qty: 1
- Serpentine belt - Qty: 1
- RTV silicone gasket maker - Qty: 1
📋 Before You Begin
- Park on level ground, set the parking brake, and place wheel chocks behind the rear wheels.
- Disconnect the battery using a 10mm socket (negative cable first).
- Raise the front and support with a floor jack and jack stands.
- Place a drain pan under the radiator area.
- Take photos as you remove brackets and bolts.
🔨 Step-by-Step Instructions
Follow these steps in order:
Step 1: Drain coolant
- Place a drain pan (at least 3-gallon) under the radiator.
- Open the drain and remove the cap to help it flow (use a flathead screwdriver if needed).
Step 2: Remove the engine cover and intake ducting
- Remove the plastic cover/ducts using a flathead screwdriver and metric socket set (8mm-10mm).
- Move the ducting aside to open up the front of the engine.
Step 3: Remove the fan and shroud
- Remove shroud fasteners using a 10mm socket.
- Use a fan clutch wrench set (36mm) (specialty) to loosen the fan clutch nut and remove the fan/clutch assembly.
- Fan clutch threads can be stubborn—steady, controlled force.
Step 4: Remove the serpentine belt
- Use a serpentine belt tool (specialty) to rotate the tensioner and slip the belt off.
- If you’re reusing the belt (not recommended), mark its rotation direction with a marker.
Step 5: Remove front accessories (as needed for clearance)
- Remove the alternator and brackets using a metric socket set (13mm-15mm) and extensions set.
- If equipped, unbolt the A/C compressor and power steering pump brackets and set them aside without disconnecting lines using a metric socket set (13mm-15mm).
- Support heavy parts so hoses aren’t strained.
Step 6: Remove the water pump
- Remove water pump bolts using a metric socket set.
- Remove the pump and gaskets; clean the mating surfaces using a plastic gasket scraper.
- When reinstalling later: Torque water pump bolts to 30 Nm (22 ft-lbs).
Step 7: Remove the harmonic balancer (crank pulley)
- Remove the balancer bolt using a 1/2" drive breaker bar and metric socket set.
- Use a harmonic balancer puller (specialty) to pull the balancer off.
- A puller prevents crankshaft damage.
Step 8: Remove the timing cover
- Remove timing cover bolts using a metric socket set and extensions set.
- Gently break the seal with a pry bar (light pressure only) and remove the cover.
- Remove the front crank seal from the cover using a seal puller.
Step 9: Set the engine to timing mark alignment
- Rotate the crankshaft by hand using a breaker bar on the crank bolt (temporarily reinstall the old bolt if needed).
- Align timing marks: the crank sprocket mark at 12 o’clock and the cam sprocket mark at 6 o’clock (the two marks point toward each other).
- This is your “reference” before disassembly.
Step 10: Remove timing chain and sprockets
- Remove the cam sprocket bolt using a metric socket set.
- Remove the cam sprocket and chain together.
- Remove the crank sprocket if your kit includes a replacement (use a pry bar gently if needed).
Step 11: Install the new timing set
- Install the new crank sprocket (if applicable), then hang the new chain on the cam sprocket.
- Position the chain and sprockets so timing marks are still aligned (crank at 12 o’clock, cam at 6 o’clock).
- Install cam sprocket bolt with threadlocker (blue).
- Torque cam sprocket bolt to 35 Nm (26 ft-lbs), then Torque angle +50 degrees.
Step 12: Prep and reseal the timing cover
- Clean all gasket surfaces with a plastic gasket scraper and shop towels.
- Install a new crank seal into the timing cover (use the harmonic balancer installer tool (specialty) carefully as a press if needed).
- Apply a small dab of RTV silicone gasket maker at the oil pan to timing cover “corner” seams.
Step 13: Reinstall timing cover
- Install the timing cover and start all bolts by hand.
- Tighten evenly using a torque wrench.
- Torque timing cover bolts to 25 Nm (18 ft-lbs).
Step 14: Reinstall harmonic balancer
- Use a harmonic balancer installer tool (specialty) to press the balancer on straight.
- Install a new harmonic balancer bolt.
- Torque balancer bolt to 50 Nm (37 ft-lbs), then Torque angle +140 degrees using a torque angle gauge.
Step 15: Reinstall water pump and accessories
- Install the water pump with new gaskets using a metric socket set.
- Torque water pump bolts to 30 Nm (22 ft-lbs).
- Reinstall brackets/accessories using a torque wrench and tighten to OEM spec (bracket bolt sizes vary by location).
Step 16: Reinstall belt, fan, and shroud
- Route the new belt and install it using a serpentine belt tool (specialty).
- Reinstall the fan/shroud using a fan clutch wrench set (36mm) (specialty) and 10mm socket.
Step 17: Refill fluids and reconnect battery
- Refill cooling system with DEX-COOL compatible coolant.
- Change the oil and filter using a drain pan and metric socket set.
- Reconnect the negative battery cable using a 10mm socket.
✅ After Repair
- Start the engine and let it idle; watch for oil/coolant leaks around the timing cover and water pump.
- Bring the engine to operating temperature and confirm the heater blows hot (helps purge air).
- Top off coolant after the first full heat cycle and again the next day when cold.
- Listen for abnormal rattling at startup; a quiet, smooth idle is what you want.
💰 DIY vs Shop Cost
Shop Cost: $1,200-$2,200 (parts + labor)
DIY Cost: $250-$650 (parts only)
You Save: $550-$1,950 by doing it yourself!
Shop labor rates vary but typically run $100-$150/hour. This repair takes a shop approximately 6-10 hours.
🎯 Ready to get started?
HowToo makes it easy: same-day/2-day shipping on every part, plus all the tools and specialty tools you need! Check out the parts and tools sections below to add everything to your cart.
Guide for Engine Timing Cover Gasket Set replace for these Chevrolet vehicles
| Year Make Model | Sub Model | Engine | Body Style |
|---|---|---|---|
| 2018 Chevrolet Express 3500 | - | V8 6.0L | - |
| 2018 Chevrolet Express 3500 | - | V6 4.3L | - |
| 2017 Chevrolet Express 3500 | - | V8 4.8L | - |
| 2017 Chevrolet Express 3500 | - | V8 6.0L | - |
| 2016 Chevrolet Express 3500 | - | V8 4.8L | - |
| 2016 Chevrolet Express 3500 | - | V8 6.0L | - |
| 2015 Chevrolet Express 3500 | - | V8 4.8L | - |
| 2015 Chevrolet Express 3500 | - | V8 6.0L | - |
| 2014 Chevrolet Express 3500 | - | V8 4.8L | - |
| 2014 Chevrolet Express 3500 | - | V8 6.0L | - |
| 2013 Chevrolet Express 3500 | - | V8 4.8L | - |
| 2013 Chevrolet Express 3500 | - | V8 6.0L | - |
| 2012 Chevrolet Express 3500 | - | V8 4.8L | - |
| 2012 Chevrolet Express 3500 | - | V8 6.0L | - |
| 2011 Chevrolet Express 3500 | - | V8 4.8L | - |
| 2011 Chevrolet Express 3500 | - | V8 6.0L | - |
| 2010 Chevrolet Express 3500 | - | V8 4.8L | - |
| 2010 Chevrolet Express 3500 | - | V8 6.0L | - |
| 2009 Chevrolet Express 3500 | - | V8 4.8L | - |
| 2009 Chevrolet Express 3500 | - | V8 6.0L | - |