








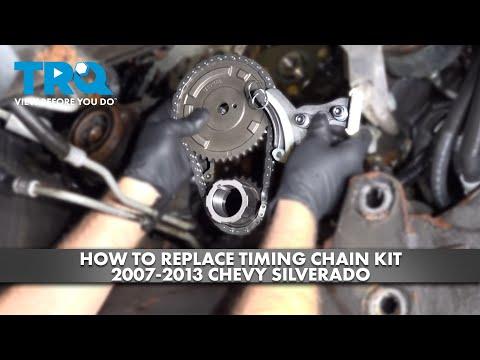







How to Replace the Timing Chain on a 2007 GMC Sierra 1500 5.3L V8
Step-by-step front cover teardown with required tools, parts list, safety tips, and torque spec notes for 2007, 2008, 2009
How to Replace the Timing Chain on a 2007 GMC Sierra 1500 5.3L V8
Step-by-step front cover teardown with required tools, parts list, safety tips, and torque spec notes for 2007, 2008, 2009


🔧 Sierra 1500 - Timing Chain Replacement
Your Sierra 1500 with the 5.3L V8 does not use a timing belt—it uses a timing chain. Replacing the chain is a big front-of-engine job that requires removing the harmonic balancer, front cover, and setting engine timing marks correctly.
Difficulty Level: Advanced | Estimated Time: 6-10 hours
⚠️ Safety & Precautions
- ⚠️ Let the engine cool fully before draining coolant.
- ⚠️ Disconnect the negative battery cable to prevent accidental cranking.
- ⚠️ Support the truck with jack stands if you raise it; never rely on a jack.
- ⚠️ Keep fingers clear of the belt drive and fan area.
- ⚠️ If you rotate the crank, rotate clockwise only.
🔧 Required Tools
You'll need the following tools for this repair:
- Safety glasses
- Nitrile gloves
- Wheel chocks
- Floor jack (rated 3-ton minimum)
- Jack stands (rated 3-ton minimum)
- Drain pan (at least 3-gallon)
- Funnel
- Shop rags
- Trim clip remover
- Flat-blade screwdriver
- Serpentine belt tool (3/8" drive)
- 3/8" drive ratchet
- 1/2" drive breaker bar
- Torque wrench (10-250 ft-lbs range)
- Torque angle gauge
- Socket set: 8mm, 10mm, 13mm, 15mm, 18mm
- Deep socket: 10mm, 13mm, 15mm
- Socket: 24mm
- Extensions: 3", 6", 12"
- Wrench set: 10mm, 13mm, 15mm
- Pry bar (12")
- Gasket scraper (plastic)
- Harmonic balancer puller kit (specialty)
- Harmonic balancer installer tool (specialty)
- Crankshaft holding tool (specialty)
- Seal puller (specialty)
🔩 Required Parts
HowToo sells all the parts you need for this repair:
- Timing chain - Qty: 1
- Timing chain tensioner - Qty: 1
- Timing chain guides - Qty: 2
- Crankshaft sprocket - Qty: 1
- Camshaft sprocket - Qty: 1
- Front timing cover gasket set - Qty: 1
- Front crankshaft seal - Qty: 1
- Water pump gaskets - Qty: 2
- Engine coolant (DEX-COOL compatible) - Qty: 2-3 gallons
- RTV silicone gasket maker (sensor-safe) - Qty: 1
- Engine oil and filter - Qty: 1
- Harmonic balancer bolt (one-time-use) - Qty: 1
📋 Before You Begin
- Park on level ground, set the parking brake, and chock the rear wheels.
- Disconnect the negative battery cable using a 10mm socket.
- Place a drain pan under the radiator and drain coolant (use a flat-blade screwdriver if your drain petcock is slotted).
- Quick question (needed for exact torque specs and bolt callouts): Is your Sierra 1500 the 2007 “Classic” (older body style) or the 2007 “New Body Style”?
🔨 Step-by-Step Instructions
Follow these steps in order:
Step 1: Remove the intake duct and engine cover (if equipped)
- Loosen the clamps with an 8mm socket and remove the intake duct.
- Remove any engine cover fasteners with a 10mm socket.
Step 2: Remove the fan shroud and cooling fan (as equipped)
- Remove shroud fasteners using a 10mm socket.
- Remove the mechanical fan/clutch assembly using the appropriate wrench from your wrench set.
- Take photos before removing hose routing.
Step 3: Remove the serpentine belt and front accessories
- Release belt tension using a serpentine belt tool (3/8" drive) and remove the belt.
- Remove the alternator and accessory brackets as needed using 13mm and 15mm sockets.
Step 4: Remove the water pump
- Remove hoses using pliers (if you need them, add to your tool list) and catch remaining coolant in the drain pan.
- Remove water pump bolts using a 10mm socket and extensions.
- Remove the pump and discard old gaskets using a gasket scraper (plastic).
Step 5: Remove the harmonic balancer
- Hold the crankshaft using a crankshaft holding tool (specialty).
- Remove the crank bolt with a 24mm socket and 1/2" breaker bar.
- Pull the balancer using a harmonic balancer puller kit (specialty).
Step 6: Remove the front timing cover
- Remove all timing cover bolts using a 10mm socket.
- Carefully pry the cover loose with a pry bar (12") (gentle pressure only).
- Remove the old crank seal with a seal puller (specialty).
Step 7: Set the engine to Top Dead Center (TDC) and confirm timing marks
- Rotate the crankshaft clockwise using a 24mm socket and 1/2" breaker bar.
- Align the timing marks on the cam and crank sprockets before removing the chain.
- If marks don’t line up, stop and recheck.
Step 8: Remove and replace the chain, guides, and tensioner
- Remove the tensioner bolts using a 10mm socket.
- Remove the guides using a 10mm socket.
- Remove the cam sprocket bolts using an appropriate socket from your set.
- Install new sprockets/chain with timing marks aligned exactly.
Step 9: Reinstall the timing cover with a new seal
- Clean mating surfaces using a gasket scraper (plastic) and shop rags.
- Apply small beads of RTV silicone gasket maker (sensor-safe) at the required seam corners.
- Install the new crank seal into the cover squarely.
- Reinstall the timing cover bolts using a torque wrench.
- Torque specs vary by 2007 Classic vs New Body Style—reply with which one you have and I’ll give the exact specs.
Step 10: Reinstall harmonic balancer, water pump, and accessories
- Install the balancer using a harmonic balancer installer tool (specialty) (do not hammer it on).
- Install a new harmonic balancer bolt and tighten using a torque wrench and torque angle gauge.
- Reinstall the water pump with new gaskets using a 10mm socket and torque wrench.
- Reinstall brackets and alternator using 13mm and 15mm sockets.
- Reinstall the serpentine belt using the serpentine belt tool (3/8" drive).
✅ After Repair
- Refill coolant using a funnel and the correct coolant.
- Start the engine and check for leaks at the timing cover, water pump, and hoses.
- Verify normal idle and no abnormal rattling from the front cover area.
- Recheck coolant level after the engine reaches operating temp and cools back down.
- Change the engine oil and filter if coolant/oil contamination is suspected.
💰 DIY vs Shop Cost
Shop Cost: $1,200-$2,500 (parts + labor)
DIY Cost: $250-$700 (parts only)
You Save: $950-$1,800 by doing it yourself!
Shop labor rates vary but typically run $100-$150/hour. This repair takes a shop approximately 6-10 hours.
🎯 Ready to get started?
HowToo makes it easy: same-day/2-day shipping on every part, plus all the tools and specialty tools you need! Check out the parts and tools sections below to add everything to your cart.