









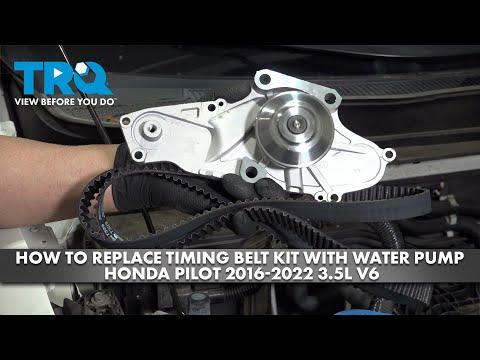







How to Replace the Timing Belt on a 2021 Honda Passport (Tensioner, Idlers & Water Pump)
Step-by-step DIY guide with required tools, parts list, timing mark checks, and key torque specs for 2019, 2020, 2021, 2022, 2023
How to Replace the Timing Belt on a 2021 Honda Passport (Tensioner, Idlers & Water Pump)
Step-by-step DIY guide with required tools, parts list, timing mark checks, and key torque specs for 2019, 2020, 2021, 2022, 2023


🔧 Passport - Timing Belt Replacement
On your Passport, the timing belt keeps the crankshaft and camshafts synchronized. Replacing it on schedule prevents belt failure that can cause severe engine damage. This is a tight-space job that requires locking the crank pulley and carefully aligning timing marks.
Difficulty Level: Advanced | Estimated Time: 5-8 hours
⚠️ Safety & Precautions
- Work on a completely cool engine to avoid burns.
- Disconnect the negative battery cable before starting.
- Support the vehicle with jack stands; never rely on a floor jack alone.
- You must support the engine from below before removing the right-side engine mount.
- Do not rotate the crankshaft/camshafts with the belt removed unless instructed; piston-to-valve contact can occur.
- Keep fingers clear when releasing the hydraulic tensioner; it applies strong force.
🔧 Required Tools
You'll need the following tools for this repair:
- Safety glasses
- Mechanic gloves
- Floor jack (rated 3-ton minimum)
- Jack stands (rated 3-ton minimum)
- Wheel chocks
- Drain pan (2-gallon minimum)
- Fender cover
- 1/2" drive ratchet
- 3/8" drive ratchet
- 1/2" drive breaker bar (24" minimum)
- Torque wrench (10-80 ft-lbs)
- Torque wrench (50-250 ft-lbs)
- Socket set (8mm-19mm)
- 10mm socket
- 12mm socket
- 14mm socket
- 17mm socket
- 19mm socket
- Serpentine belt tool (14mm) (specialty)
- Honda crank pulley holding tool (specialty)
- 19mm impact-rated socket
- Trim clip remover
- Flat-blade screwdriver
- Needle-nose pliers
- Plastic scraper
- Shop towels
- Funnel
🔩 Required Parts
HowToo sells all the parts you need for this repair:
- Timing belt - Qty: 1
- Timing belt tensioner (hydraulic) - Qty: 1
- Timing belt idler pulley - Qty: 1
- Timing belt tensioner pulley - Qty: 1
- Water pump - Qty: 1
- Water pump gasket/O-ring - Qty: 1
- Honda-type coolant (premix) - Qty: 2 gallons
- Serpentine drive belt - Qty: 1
- Crankshaft pulley bolt - Qty: 1
📋 Before You Begin
- Park on level ground, set the parking brake, and chock the rear wheels.
- Disconnect the battery negative cable using a 10mm socket.
- Raise the front-right corner and support it on a jack stand; remove the right-front wheel using a 19mm socket.
- Remove the right-front inner fender/splash shield clips using a trim clip remover to access the crank pulley area.
- Place a floor jack with a wood block under the oil pan area to support the engine (do not lift hard—just support).
🔨 Step-by-Step Instructions
Follow these steps in order:
Step 1: Drain coolant (for water pump replacement)
- Place a drain pan under the radiator drain.
- Open the radiator drain per access available and drain coolant; use pliers if a hose clamp must be moved.
- Close the drain when finished.
Step 2: Remove the serpentine belt
- Relieve tension with the serpentine belt tool (14mm) (specialty) and slip the belt off.
- Snap a photo of belt routing first.
Step 3: Support engine and remove the right engine mount
- Confirm the engine is supported from below using the floor jack (rated 3-ton minimum).
- Remove mount fasteners using a 14mm socket and 17mm socket as equipped.
- Lift the mount/bracket out of the way.
Step 4: Remove the crankshaft pulley
- Install the Honda crank pulley holding tool (specialty) to hold the pulley.
- Remove the crank bolt using a 19mm impact-rated socket and a 1/2" drive breaker bar (24" minimum).
- Remove the crank pulley from the crank snout.
- When reinstalling later: Torque to 245 Nm (181 ft-lbs).
Step 5: Remove timing belt covers
- Remove upper and lower timing covers using a 10mm socket.
- Keep bolts organized by cover location/length.
Step 6: Set cylinder #1 to TDC on compression
- Rotate the crankshaft clockwise using a 19mm socket and 1/2" drive ratchet until the timing marks align.
- Confirm the cam pulley timing marks line up with the reference marks on the rear covers/head.
- Do not rotate counterclockwise.
Step 7: Remove the timing belt tensioner and belt
- Remove the timing belt tensioner mounting bolts using a 12mm socket.
- Remove the tensioner and then slide the timing belt off the pulleys.
Step 8: Replace idler pulleys
- Remove the idler pulley bolt(s) using a 14mm socket.
- Install the new pulley(s) and tighten with a torque wrench (10-80 ft-lbs).
- Torque to 54 Nm (40 ft-lbs).
Step 9: Replace the water pump
- Place a drain pan under the pump area for remaining coolant.
- Remove water pump bolts using a 10mm socket.
- Remove the pump; clean the mating surface with a plastic scraper and shop towels.
- Install the new gasket/O-ring and water pump.
- Tighten bolts evenly using a torque wrench (10-80 ft-lbs): Torque to 12 Nm (9 ft-lbs).
Step 10: Install the new timing belt
- Confirm crank and cam timing marks are still aligned.
- Route the belt in the correct order, keeping the belt tight on the non-tensioned side (usually from crank up and across the cams).
- Install the new hydraulic tensioner using a 12mm socket.
- Tighten tensioner bolts with a torque wrench (10-80 ft-lbs): Torque to 44 Nm (33 ft-lbs).
- Pull the tensioner pin to apply tension.
Step 11: Verify timing
- Rotate the crankshaft clockwise two full turns using a 19mm socket and 1/2" drive ratchet.
- Re-check all timing marks. If any mark is off, remove the belt and correct it before proceeding.
Step 12: Reassemble covers, crank pulley, mount, and belt
- Reinstall timing covers using a 10mm socket.
- Reinstall crank pulley and a new crank bolt using the Honda crank pulley holding tool (specialty) and 19mm socket.
- Final tighten crank bolt using a torque wrench (50-250 ft-lbs): Torque to 245 Nm (181 ft-lbs).
- Reinstall the right engine mount/bracket using a 14mm socket and 17mm socket, then tighten with a torque wrench (10-80 ft-lbs).
- Install the serpentine belt using the serpentine belt tool (14mm) (specialty).
- Reinstall splash shield using a trim clip remover, and reinstall wheel using a 19mm socket.
Step 13: Refill and bleed coolant
- Refill with Honda-type coolant (premix) using a funnel.
- Reconnect the battery negative cable using a 10mm socket.
- Start the engine and let it reach operating temperature while watching for leaks.
- Top off coolant as needed after the thermostat opens and after a full cool-down.
✅ After Repair
- Verify smooth idle and no warning lights.
- Listen for abnormal chirping/whining near the timing cover area.
- Check coolant level again after the first test drive and again the next morning.
- Inspect for coolant leaks around the water pump and for oil leaks around the timing covers.
💰 DIY vs Shop Cost
Shop Cost: $1,400-$2,200 (parts + labor)
DIY Cost: $350-$750 (parts only)
You Save: $650-$1,850 by doing it yourself!
Shop labor rates vary but typically run $100-$150/hour. This repair takes a shop approximately 5-8 hours.
🎯 Ready to get started?
HowToo makes it easy: same-day/2-day shipping on every part, plus all the tools and specialty tools you need! Check out the parts and tools sections below to add everything to your cart.