









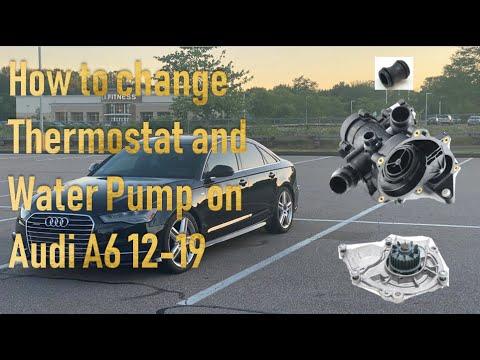







How to Replace the Thermostat/Water Pump Module on a 2016-2018 Audi A6 (Engine: Inline 4 2.0L)
Step-by-step DIY guide with required tools, parts list, coolant refill/bleed tips, and torque specs
How to Replace the Thermostat/Water Pump Module on a 2016-2018 Audi A6 (Engine: Inline 4 2.0L)
Step-by-step DIY guide with required tools, parts list, coolant refill/bleed tips, and torque specs for 2016, 2017, 2018


🔧 A6 - Thermostat Replacement
On your A6, the thermostat is part of the coolant control assembly and helps the engine warm up quickly and then hold a steady operating temperature. If it sticks open you’ll get slow warm-up/poor heat; if it sticks closed you can overheat—either way, replacement is the correct fix.
Difficulty Level: Advanced | Estimated Time: 4-6 hours
Assumption: This procedure matches the common 2.0T EA888 longitudinal layout where the thermostat is integrated with the water pump/thermostat module at the front of the engine; torque specs can vary by fastener—verify with OEM manual for your exact fasteners.
⚠️ Safety & Precautions
- ⚠️ Never open the coolant cap hot; let the engine cool fully.
- ⚠️ Support the car with jack stands; never rely on a floor jack.
- ⚠️ Coolant is toxic—catch it in a drain pan and keep away from kids/pets.
- ⚠️ Expect tight access near the radiator fans and belt drive; keep fingers/tools clear.
- ⚠️ Battery disconnect is not usually required, but keep the key away from the car so the cooling fans can’t run unexpectedly.
🔧 Required Tools
You'll need the following tools for this repair:
- Floor jack (rated 3-ton minimum)
- Jack stands (rated 3-ton minimum)
- Wheel chocks
- Safety glasses
- Nitrile gloves
- Catch pan (10-quart minimum)
- Funnel
- Trim clip remover
- Flat-blade screwdriver
- Pick tool
- Hose clamp pliers
- 1/4" drive ratchet
- 3/8" drive ratchet
- Socket set 8mm-18mm
- Torx bit set T20-T45
- Triple-square bit set M8-M10
- Torque wrench 5-60 Nm (4-44 ft-lbs)
- Torque wrench 40-200 Nm (30-148 ft-lbs)
- Cooling system vacuum fill tool (specialty)
- OBD2 scan tool with live data (specialty)
- Work light
- Shop rags
🔩 Required Parts
HowToo sells all the parts you need for this repair:
- Thermostat assembly (water pump/thermostat module) - Qty: 1
- Thermostat/water pump sealing gasket set - Qty: 1
- Coolant (Audi/VW G13 or superseding OEM-approved coolant) - Qty: 2-3 gallons premix equivalent
- Hose clamp set - Qty: 1
- Serpentine belt - Qty: 1 Optional if belt is worn/cracked
📋 Before You Begin
- Park on level ground, set the parking brake, and chock the rear wheels.
- Let the engine cool completely (coolant hoses should feel cool to the touch).
- Set the cabin heat to maximum temperature before shutdown (helps coolant flow during bleeding later).
- Plan for coolant cleanup: lay cardboard and keep rags ready.
- If using a vacuum fill tool, have an air compressor available and set up before refilling.
🔨 Step-by-Step Instructions
Follow these steps in order:
Step 1: Lift the front and remove the lower splash shield
- Use a floor jack to lift the front, then support with jack stands under the correct jack points.
- Use a Torx T25/T30 bit and trim clip remover to remove the lower engine splash shield (belly pan).
Step 2: Drain the coolant
- Place a catch pan under the radiator lower area.
- Slowly loosen the coolant reservoir cap using your hand (only when cold) to release any residual pressure.
- Use hose clamp pliers to release the lower radiator hose clamp, then carefully pull the hose off and let coolant drain into the pan.
- Tip: Twist the hose to break it loose.
Step 3: Move the front end into “service position” (access step)
- “Service position” means sliding the radiator support forward to create working room without fully disconnecting A/C lines.
- Use Torx T25/T30 and socket set 10mm-13mm to remove the upper cover panels and fasteners at the radiator support.
- Use triple-square bits (M8/M10) as needed for bumper/radiator support hardware.
- Carefully pull the lock carrier/radiator support forward and support it (do not strain hoses/wiring).
Step 4: Remove the intake ducting as needed for access
- Use a flat-blade screwdriver and 7mm/8mm socket (depending on clamp style) to loosen intake hose clamps.
- Unclip/remove any intake snorkel pieces using a trim clip remover.
Step 5: Remove the serpentine belt
- Use the correct size from your socket set on the belt tensioner and rotate to relieve tension.
- Slip the belt off the pulleys and note the routing (take a picture).
Step 6: Disconnect coolant hoses and electrical connectors at the module
- Use hose clamp pliers to open spring clamps and slide them back.
- Remove hoses by twisting gently; use a pick tool carefully if a hose is stuck (do not gouge the plastic fittings).
- Unplug any electrical connector(s) on the assembly by depressing the lock tab using a pick tool.
Step 7: Remove the thermostat/water pump module
- Place rags under the module to catch remaining coolant.
- Use a Torx bit set (commonly T30/T40) and/or 10mm socket to remove the mounting bolts.
- Remove the module straight off; do not pry aggressively on sealing surfaces.
Step 8: Clean the sealing surfaces
- Use shop rags to clean the engine mating surface.
- Use a pick tool only to lift old gasket material if present; do not scratch aluminum.
Step 9: Install the new module and torque fasteners
- Install new seals/gaskets onto the new assembly (match orientation exactly).
- Position the module and hand-start all bolts to prevent cross-threading.
- Tighten evenly in a crisscross pattern using a torque wrench 5-60 Nm.
- Torque to 10 Nm (7 ft-lbs) for typical M6 housing bolts, and 20 Nm (15 ft-lbs) for typical M8 bolts where used. Verify your fastener size before final torque.
Step 10: Reconnect hoses, clamps, and connectors
- Reinstall hoses fully seated, then position clamps back in their original locations using hose clamp pliers.
- Reconnect electrical connectors until they click.
Step 11: Reinstall the serpentine belt and restore the front end
- Route the belt exactly as photographed and release the tensioner using your socket set.
- Slide the lock carrier back from service position and reinstall fasteners using triple-square bits, Torx bits, and a torque wrench.
- Torque to OEM spec for lock carrier/bumper fasteners (fastener types vary by location).
- Reinstall intake ducting using a flat-blade screwdriver and 7mm/8mm socket for clamps.
Step 12: Refill and bleed the cooling system
- Best method: Use a cooling system vacuum fill tool (specialty) to pull vacuum, then fill with Audi/VW-approved coolant.
- Manual method: Use a funnel to fill the reservoir to the MAX line.
- Start the engine and let it idle; keep the heater set to hot.
- Watch the coolant level and top off as needed.
- Use an OBD2 scan tool with live data (specialty) to monitor coolant temperature and confirm it warms up smoothly without overheating.
- Tip: Stop if the temp climbs abnormally fast.
Step 13: Reinstall the belly pan and lower the car
- Reinstall the splash shield using a Torx T25/T30 bit.
- Lower the car using the floor jack and remove jack stands.
✅ After Repair
- With the engine at operating temperature, check for leaks around the module and hoses using a work light.
- After a full cool-down, recheck the reservoir level and top off to the MAX line using a funnel.
- Clear any stored coolant-related faults and re-scan using an OBD2 scan tool with live data (specialty).
- Test drive 10-15 minutes, then recheck for leaks and verify stable cabin heat.
💰 DIY vs Shop Cost
Shop Cost: $900-$1,600 (parts + labor)
DIY Cost: $220-$550 (parts only)
You Save: $680-$1,050 by doing it yourself!
Shop labor rates vary but typically run $100-$150/hour. This repair takes a shop approximately 4-6 hours.
🎯 Ready to get started?
HowToo makes it easy: same-day/2-day shipping on every part, plus all the tools and specialty tools you need! Check out the parts and tools sections below to add everything to your cart.
Guide for Engine Water Pump and Thermostat Assembly replace for these Audi vehicles
| Year Make Model | Sub Model | Engine | Body Style |
|---|---|---|---|
| 2018 Audi A6 | - | Inline 4 2.0L | - |
| 2017 Audi A6 | - | Inline 4 2.0L | - |
| 2016 Audi A6 | - | Inline 4 2.0L | - |