









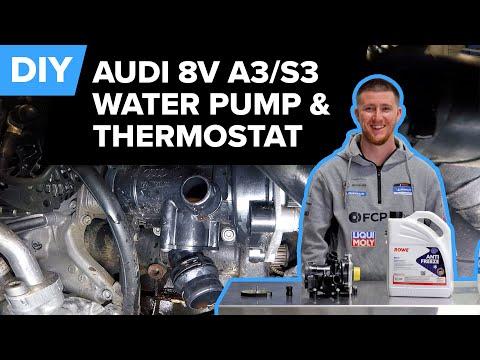







How to Replace the Thermostat & Water Pump Coolant Module on a 2015-2016 Audi A3 (Trim: Premium | Engine: Inline 4 1.8L | Body: Convertible)
Step-by-step DIY instructions with tools, parts list, coolant bleeding steps, and torque specs
How to Replace the Thermostat & Water Pump Coolant Module on a 2015-2016 Audi A3 (Trim: Premium | Engine: Inline 4 1.8L | Body: Convertible)
Step-by-step DIY instructions with tools, parts list, coolant bleeding steps, and torque specs for 2015, 2016


🔧 A3 - Thermostat Replacement
On your A3, the thermostat is built into the coolant module (often serviced with the water pump/thermostat housing as an assembly). Replacing it fixes overheating, slow warm-up, and common coolant leaks from the housing seals.
Difficulty Level: Advanced | Estimated Time: 3-5 hours
Assumption: This uses the common 1.8T integrated thermostat/water pump module layout.
⚠️ Safety & Precautions
- ⚠️ Never open the coolant tank cap on a hot engine; wait until fully cool.
- ⚠️ Support the car with jack stands; never rely on a floor jack.
- ⚠️ Coolant is toxic—wear gloves and clean spills immediately.
- ⚠️ Disconnect the battery negative terminal if you’ll unplug multiple sensors near the alternator/starter area.
🔧 Required Tools
You'll need the following tools for this repair:
- Floor jack (rated 3-ton minimum)
- Jack stands (rated 3-ton minimum)
- Wheel chocks
- Safety glasses
- Nitrile gloves
- Drain pan (10-quart minimum)
- Funnel
- Trim clip removal tool
- Pick set
- Hose clamp pliers
- Ratchet (3/8")
- Extension set (3" to 10")
- Universal swivel joint (3/8")
- Socket set metric 8mm-16mm
- Torx bit set T20-T30
- Triple-square bit set M6-M8
- Torque wrench (5-60 Nm range)
- Work light
🔩 Required Parts
HowToo sells all the parts you need for this repair:
- Thermostat/water pump housing assembly (integrated unit) - Qty: 1
- Thermostat/water pump housing gasket/O-ring set - Qty: 1
- Coolant (Audi/VW-approved G12/G13 equivalent) - Qty: 2 gallons premixed 50/50
- Replacement hose O-rings/clips (as needed) - Qty: 1 set
- Single-use mounting bolts (if supplied/required with module) - Qty: 1 set
📋 Before You Begin
- Park on level ground, set the parking brake, and place wheel chocks behind the rear wheels.
- Let the engine cool completely (radiator hoses should feel cool).
- Open the hood and loosen the coolant reservoir cap only when cool to release any remaining pressure.
- If you plan to disconnect electrical connectors in tight spaces, disconnect the battery negative terminal using a 10mm socket.
🔨 Step-by-Step Instructions
Follow these steps in order:
Step 1: Raise the front and remove the lower splash shield
- Use a floor jack to lift the front, then support with jack stands.
- Remove the lower engine splash shield fasteners using a Torx T25/T30 bit and trim clip removal tool.
Step 2: Drain the coolant
- Place a drain pan under the radiator lower area.
- Release the lower radiator hose clamp using hose clamp pliers, then carefully work the hose off.
- Use a pick set gently if the hose is stuck. Don’t gouge the plastic neck.
Step 3: Remove the intake ducting for access
- Loosen the intake hose clamps with an 8mm socket (or Torx T25, depending on clamp type).
- Remove the intake snorkel/ducts using a Torx T25 and set aside.
Step 4: Unplug connectors and move hoses out of the way
- Unplug any nearby sensors/connectors at the coolant module area using a pick set to lift lock tabs if needed.
- Release coolant hoses from the thermostat module using hose clamp pliers.
- Have rags ready; use the drain pan to catch remaining coolant.
Step 5: Remove components blocking the thermostat module (as needed)
- Remove any brackets/lines blocking access using a 10mm socket and Torx T30 bit.
- If your A3’s layout requires moving the alternator or nearby bracket, remove mounting bolts with a 13mm socket and support it without stressing wiring.
- Take photos before you move anything.
Step 6: Remove the thermostat/water pump module bolts
- Remove the module fasteners using a Torx bit set T30 and/or triple-square bit set M6/M8 (varies by module version).
- Break bolts loose evenly, then remove them by hand to avoid cross-threading on reassembly.
Step 7: Remove the module and clean the sealing surface
- Carefully pull the module off the engine. Use a pick set only on the old seal, not on the aluminum sealing surface.
- Clean the mating surface until it’s smooth and dry (no old O-ring material).
Step 8: Install the new thermostat/water pump module
- Install the new gasket/O-rings onto the new module (lightly wet with fresh coolant using a funnel to pour a small amount into a cup).
- Position the module and start all bolts by hand first.
- Tighten evenly with a ratchet, then final-tighten with a torque wrench:
- Small housing bolts (typical M6): Torque to 9 Nm (80 in-lbs)
- Larger module bolts (typical M8): Torque to 15 Nm (11 ft-lbs)
- If bolts feel “stretchy,” replace them.
Step 9: Reconnect hoses, connectors, and reinstall removed parts
- Reinstall coolant hoses and secure clamps using hose clamp pliers.
- Reconnect all electrical connectors until they click.
- Reinstall brackets/ducting using a 10mm socket and Torx T25/T30.
Step 10: Refill and bleed the cooling system
- Reattach the lower radiator hose if removed, using hose clamp pliers to position the clamp correctly.
- Refill the coolant reservoir using a funnel with the correct Audi/VW-approved coolant mix.
- Start the engine and set the heater to HOT (maximum temperature) and LOW fan speed.
- Let it idle and watch the coolant level; top off as the level drops.
- Once warm, carefully squeeze the upper radiator hose by hand (with nitrile gloves) to help purge air.
- Shut the engine off, let it cool fully, then recheck and top off to the MAX line.
Step 11: Reinstall the splash shield and lower the vehicle
- Reinstall the splash shield using a Torx T25/T30 bit and trim clip removal tool.
- Lower the car safely using the floor jack and remove jack stands.
✅ After Repair
- With the engine fully warm, confirm the cabin heat is steady and the temperature gauge stays normal.
- Check for leaks around the new module and all hose connections using a work light.
- After your first drive, let it cool and recheck coolant level; top off if needed.
- If the check engine light comes on, scan the car (cooling system faults are common if a connector was left unplugged).
💰 DIY vs Shop Cost
Shop Cost: $900-$1,600 (parts + labor)
DIY Cost: $180-$450 (parts only)
You Save: $720-$1,150 by doing it yourself!
Shop labor rates vary but typically run $100-$150/hour. This repair takes a shop approximately 3-5 hours.
🎯 Ready to get started?
HowToo makes it easy: same-day/2-day shipping on every part, plus all the tools and specialty tools you need! Check out the parts and tools sections below to add everything to your cart.
Guide for Engine Water Pump and Thermostat Assembly replace for these Audi vehicles
| Year Make Model | Sub Model | Engine | Body Style |
|---|---|---|---|
| 2016 Audi A3 | Premium | Inline 4 1.8L | Sedan |
| 2016 Audi A3 | Premium Plus | Inline 4 1.8L | Sedan |
| 2016 Audi A3 | Prestige | Inline 4 1.8L | Sedan |
| 2016 Audi A3 | TDI Premium | Inline 4 2.0L | Sedan |
| 2016 Audi A3 | TDI Premium Plus | Inline 4 2.0L | Sedan |
| 2016 Audi A3 | TDI Prestige | Inline 4 2.0L | Sedan |
| 2015 Audi A3 | Premium | Inline 4 1.8L | Sedan |
| 2015 Audi A3 | Premium Plus | Inline 4 1.8L | Sedan |
| 2015 Audi A3 | Prestige | Inline 4 1.8L | Sedan |
| 2015 Audi A3 | TDI Premium | Inline 4 2.0L | Sedan |
| 2015 Audi A3 | TDI Premium Plus | Inline 4 2.0L | Sedan |
| 2015 Audi A3 | TDI Prestige | Inline 4 2.0L | Sedan |