









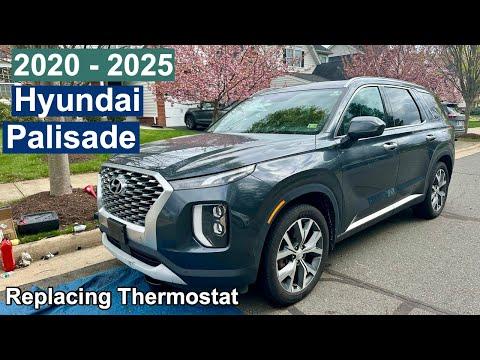







How to Replace the Thermostat on a 2020-2024 Hyundai Palisade (Step-by-Step Repair Guide)
Tools, parts list, coolant drain/refill & bleed steps, and thermostat housing torque specs (10 Nm)
How to Replace the Thermostat on a 2020-2024 Hyundai Palisade (Step-by-Step Repair Guide)
Tools, parts list, coolant drain/refill & bleed steps, and thermostat housing torque specs (10 Nm) for 2020, 2021, 2022, 2023, 2024


🔧 Palisade - Thermostat Replacement
Your Palisade’s thermostat controls engine temperature by opening to let coolant flow to the radiator. If it sticks closed you’ll overheat; if it sticks open you may get slow warm-up and poor heater performance.
Difficulty Level: Intermediate | Estimated Time: 2-4 hours
⚠️ Safety & Precautions
- 🛑 Never open the coolant reservoir/cap when hot; let the engine cool completely.
- 🧤 Coolant is toxic and slippery—wear gloves and clean spills immediately.
- 🛠️ Keep hands clear of the radiator fans; they can turn on by themselves.
- 🔋 Recommended: disconnect the negative battery cable before working near the fan/serpentine belt area.
- ♻️ Catch all coolant in a drain pan and dispose of it properly.
🔧 Required Tools
You'll need the following tools for this repair:
- Safety glasses
- Nitrile gloves
- Floor jack (rated 3-ton minimum)
- Jack stands (rated 3-ton minimum)
- Wheel chocks
- Drain pan (at least 10-quart)
- Funnel
- Trim clip removal tool
- Flat-blade screwdriver
- 10mm socket
- 12mm socket
- 14mm socket
- 3/8" ratchet
- 3/8" torque wrench
- 6" extension
- Pliers
- Hose clamp pliers (specialty)
- Plastic scraper
- Shop towels
🔩 Required Parts
HowToo sells all the parts you need for this repair:
- Engine thermostat - Qty: 1
- Thermostat seal/O-ring - Qty: 1
- Hyundai-compatible long-life coolant (premix) - Qty: 2-3 gallons
- Replacement hose clamps - Qty: 2 If clamps are weak/rusted
📋 Before You Begin
- Park on level ground, set the parking brake, and chock the rear wheels.
- Let the engine cool fully (cold upper radiator hose is a good sign).
- Disconnect the negative battery terminal using a 10mm socket.
- Raise the front safely using a floor jack and support with jack stands.
- Remove any lower splash shield/undercover panels as needed using a trim clip removal tool and 10mm socket.
🔨 Step-by-Step Instructions
Follow these steps in order:
Step 1: Drain enough coolant to get below the thermostat level
- Place a drain pan (at least 10-quart) under the radiator drain area.
- Slowly loosen the coolant reservoir cap by hand to relieve any remaining pressure.
- Open the drain (or remove the lower hose if your setup doesn’t have an easy drain) using pliers or hose clamp pliers (specialty).
- Drain until the flow slows and the level is below the thermostat housing area.
Step 2: Access the thermostat housing/water outlet
- Remove the top engine cover if equipped by pulling upward (it’s held by grommets).
- Work from the front of the engine bay and locate the water outlet/thermostat area (follow the upper radiator hose to where it meets the engine).
- Move any interfering ducting/brackets out of the way using a 10mm socket and 12mm socket.
- Take a quick photo before disconnecting hoses.
Step 3: Remove coolant hoses from the thermostat housing
- Use hose clamp pliers (specialty) to compress the spring clamp and slide it back on the hose.
- Twist the hose gently to break it loose, then pull it off. Use a flat-blade screwdriver carefully only if needed.
- Catch leftover coolant with the drain pan and wipe the area with shop towels.
Step 4: Remove the thermostat housing / water outlet
- Remove the housing bolts using a 10mm socket (some brackets may use 12mm socket).
- Lift the housing off carefully; more coolant may spill—keep the drain pan underneath.
- Remove the old thermostat and seal/O-ring.
Step 5: Clean the sealing surfaces
- Use a plastic scraper and shop towels to clean the mating surfaces.
- Do not gouge the aluminum surface. No sandpaper.
Step 6: Install the new thermostat and seal
- Install the new seal/O-ring in the correct groove (do not pinch it).
- Set the new thermostat in the same orientation as the old one.
- Reinstall the housing and start all bolts by hand first.
- Tighten evenly, then torque using a 3/8" torque wrench: Torque to 10 Nm (7 ft-lbs).
Step 7: Reconnect hoses and reinstall removed parts
- Push hoses fully onto their fittings, then reposition clamps using hose clamp pliers (specialty).
- Reinstall any brackets/ducting using a 10mm socket / 12mm socket.
- Reinstall the splash shield/undercover using a trim clip removal tool and 10mm socket.
Step 8: Refill and bleed the cooling system
- Lower the vehicle from the jack stands.
- Refill with Hyundai-compatible long-life coolant (premix) using a funnel at the reservoir.
- Reconnect the negative battery cable using a 10mm socket.
- Start the engine and set the heater to HOT and fan to medium.
- Let it idle until the engine warms up and the heater blows hot; watch the temp gauge.
- Shut it off, let it cool, then top off the coolant level again.
✅ After Repair
- Check for leaks around the thermostat housing and hose connections with the engine running.
- Test drive 10-15 minutes, then recheck coolant level after a full cool-down.
- If you get overheating, no heat, or gurgling sounds, there is likely trapped air—re-bleed and recheck level.
- Confirm the radiator fans cycle normally while idling warm.
💰 DIY vs Shop Cost
Shop Cost: $350-$750 (parts + labor)
DIY Cost: $60-$180 (parts only)
You Save: $290-$570 by doing it yourself!
Shop labor rates vary but typically run $100-$150/hour. This repair takes a shop approximately 2-4 hours.
🎯 Ready to get started?
HowToo makes it easy: same-day/2-day shipping on every part, plus all the tools and specialty tools you need! Check out the parts and tools sections below to add everything to your cart.
Guide for Engine Coolant Water Outlet replace for these Hyundai vehicles
| Year Make Model | Sub Model | Engine | Body Style |
|---|---|---|---|
| 2024 Hyundai Palisade | - | - | - |
| 2023 Hyundai Palisade | - | - | - |
| 2022 Hyundai Palisade | - | - | - |
| 2021 Hyundai Palisade | - | - | - |
| 2020 Hyundai Palisade | - | - | - |