










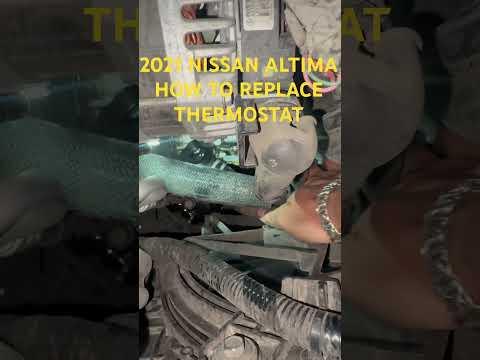







How to Replace the Thermostat on a 2019 Nissan Altima 2.5L
Step-by-step DIY thermostat replacement with tools, parts list, coolant refill, bleeding tips, and cost savings for 2019, 2020, 2021, 2022, 2023, 2024
How to Replace the Thermostat on a 2019 Nissan Altima 2.5L
Step-by-step DIY thermostat replacement with tools, parts list, coolant refill, bleeding tips, and cost savings for 2019, 2020, 2021, 2022, 2023, 2024


🔧 Altima - Thermostat Replacement
You’ll be removing the thermostat housing, swapping in a new thermostat, and refilling/bleeding the coolant. This controls engine temperature and can fix overheating or slow warm-up issues.
Difficulty Level: Intermediate | Estimated Time: 2-3 hours
⚠️ Safety & Precautions
- 🔥 Only work on the cooling system when the engine is completely cool; hot coolant can cause serious burns.
- 🧤 Wear gloves and safety glasses; coolant is toxic and irritating to skin and eyes.
- 🚗 Support the front of the car with jack stands; never rely only on a floor jack.
- 🔌 Turn ignition OFF and keep the key away from the car so the cooling fan cannot start unexpectedly.
- 🌱 Collect drained coolant in a pan; do not let pets or children near it and dispose of it properly.
🔧 Required Tools
You'll need the following tools for this repair:
- Floor jack (rated 3-ton minimum)
- Jack stands (rated 3-ton minimum)
- Wheel chocks
- Ratchet (3/8" drive)
- Extension bar 6"
- 10mm socket
- 12mm socket
- 1/4" drive ratchet
- 1/4" drive 10mm socket
- Torque wrench (3/8" drive, 5–80 ft-lbs range)
- Flathead screwdriver (medium size)
- Phillips screwdriver
- Pliers
- Hose clamp pliers (specialty)
- Plastic trim clip removal tool
- Drain pan (at least 2-gallon capacity)
- Small funnel
- Shop rags or paper towels
- Work light
- Safety glasses
- Mechanic gloves
🔩 Required Parts
HowToo sells all the parts you need for this repair:
- Engine thermostat with seal/gasket (for 2.5L) - Qty: 1
- Thermostat housing O-ring or gasket - Qty: 1 (if not included with thermostat)
- Nissan-compatible premixed coolant (blue, 50/50) - Qty: 2-3 gallons
- Hose clamps - Qty: 2-4 (optional, if old clamps are rusty or damaged)
- Anti-seize compound - Qty: small tube (optional, for bolt threads)
- Coolant-safe RTV sealant - Qty: 1 tube (only if specified by part instructions)
- Shop towels - Qty: 1 pack
📋 Before You Begin
- Park the Altima on a flat surface, set the parking brake, and place wheel chocks behind the rear wheels.
- Let the engine cool fully; it should be cool to the touch (ideally sit for a few hours).
- Open the hood and locate the coolant reservoir and radiator cap. Do not open the cap yet.
- Note: For this job you normally do not need to disconnect the battery.
- Have your drain pan, rags, and new coolant ready before you start opening the cooling system.
🔨 Step-by-Step Instructions
Follow these steps in order:
Step 1: Safely lift and support the front
- Use the floor jack to lift the front of the car at the front jacking point (center front crossmember area).
- Place jack stands under the left and right pinch welds or frame points and slowly lower the car onto them.
- Ensure the car is stable, then remove the floor jack. Leave wheel chocks in place.
- Give the car a gentle shake to confirm stability.
Step 2: Remove lower engine splash shield
- Position the drain pan under the front of the engine area so it’s ready when coolant drains.
- Use the Phillips screwdriver and 10mm socket with ratchet to remove screws and bolts holding the plastic lower engine cover/splash shield.
- Use the plastic trim clip removal tool to pop out any plastic push clips.
- Lower the shield and set it aside.
Step 3: Relieve coolant pressure and partially drain
- Slowly open the radiator cap under the hood by hand. Use a rag, open it a little first to release any remaining pressure.
- Under the radiator, locate the drain plug (petcock). If present, use pliers or your fingers to open it and drain coolant into the drain pan.
- If there is no easy drain plug, you can loosen the lower radiator hose with hose clamp pliers and pull it slightly off to drain into the pan.
- Drain about 1–1.5 gallons; this is usually enough to drop the level below the thermostat.
Step 4: Locate the thermostat housing
- On the 2.5L engine, follow the lower radiator hose from the radiator toward the engine; it connects to a metal or plastic housing on the engine block.
- This housing, where the hose meets the engine, is the thermostat housing.
- Take a photo now to help with reassembly.
Step 5: Remove components blocking access (if needed)
- If access is tight, remove nearby brackets or plastic air guides using a 10mm socket and ratchet.
- Carefully move hoses and wiring aside as needed; do not pull hard on them.
- Note the routing of any moved parts for reassembly.
Step 6: Disconnect the lower radiator hose from thermostat housing
- Use hose clamp pliers or pliers to squeeze the hose clamp on the lower radiator hose where it meets the thermostat housing.
- Slide the clamp back onto the hose, away from the housing.
- Gently twist the hose to break it loose, then pull it off the housing. More coolant will drain; keep the drain pan under it.
Step 7: Remove the thermostat housing
- Use a 10mm socket, extension, and ratchet to remove the bolts securing the thermostat housing to the engine.
- Keep track of bolt locations; some may be different lengths.
- Carefully pull the housing away; you may need to gently pry with a flathead screwdriver if it’s stuck. Do not gouge the metal sealing surface.
- Once loose, lower or move the housing aside so you can see the thermostat.
- Torque on reassembly: tighten housing bolts to factory specification (use service manual values).
Step 8: Remove old thermostat and gasket
- Note the orientation of the old thermostat (which side faces the engine, and the position of any small jiggle valve hole).
- Pull the thermostat out by hand or with pliers if needed.
- Remove the old O-ring or gasket from the housing or engine surface.
- Use a clean rag to wipe the sealing surfaces. If there’s old gasket material, gently scrape it off with a plastic trim tool or the edge of the flathead screwdriver very lightly.
- Do not scratch the metal sealing surface.
Step 9: Install new thermostat and gasket
- Place the new O-ring or gasket into the groove in the housing or onto the engine, as designed.
- Install the new thermostat in the same orientation as the old one. The spring side typically faces the engine.
- If your thermostat has a small jiggle valve hole, position it at the top (12 o’clock) to help air bleed.
- If the instructions for your gasket call for RTV, apply a thin bead of coolant-safe RTV and let it skin as directed on the tube.
Step 10: Reinstall thermostat housing
- Position the housing back onto the engine over the new thermostat, aligning bolt holes.
- Start all bolts by hand (finger tight) to avoid cross-threading.
- Use the 10mm socket, extension, and ratchet to snug the bolts evenly in a crisscross pattern.
- Use a torque wrench with 10mm socket to tighten the bolts to the correct factory torque specification. Torque to manufacturer spec as listed in the service manual.
- Do not overtighten; housing can crack.
Step 11: Reconnect lower hose and any removed parts
- Push the lower radiator hose fully onto the thermostat housing neck.
- Position the clamp over the raised bead on the neck and tighten/lock it using hose clamp pliers or pliers.
- Reinstall any brackets, plastic guides, or other pieces you removed earlier using the 10mm or 12mm socket and ratchet.
Step 12: Close drain and reinstall splash shield
- Under the radiator, close the drain plug by hand or with pliers, being careful not to overtighten.
- Reinstall the lower engine splash shield using the 10mm socket, Phillips screwdriver, and plastic trim clip removal tool (to push clips back in if needed).
Step 13: Refill coolant
- Place a funnel in the radiator filler neck or coolant reservoir, depending on your Altima’s design (many Nissans fill mainly via the reservoir).
- Slowly pour in the correct premixed coolant until the radiator and reservoir reach the recommended levels.
- Squeeze the upper and lower radiator hoses by hand to help burp air out while filling.
Step 14: Bleed the cooling system
- Leave the radiator cap off (or reservoir cap loose) for now.
- Start the engine and let it idle. Turn the cabin heater to HOT and fan on low.
- Watch the coolant level in the radiator or reservoir and keep adding as the level drops.
- As the engine warms up and the new thermostat opens, you’ll see coolant start flowing more strongly and small air bubbles escaping.
- Once bubbles stop and the level stabilizes, top off to the proper level and install the radiator cap securely by hand.
Step 15: Check for leaks and re-lower vehicle
- With the engine still idling, look under the car and around the thermostat housing and hose connection for any leaks.
- Shut the engine off and let it cool for at least 30–45 minutes.
- After it’s cooled, recheck coolant level in the reservoir and top off if needed.
- Use the floor jack to lift the car slightly, remove the jack stands, and lower the car to the ground.
✅ After Repair
- Take the Altima for a short drive (10–15 minutes) while watching the temperature gauge. It should reach normal operating range and stay steady.
- Check for heater performance; you should have good, steady heat on HOT setting.
- After the drive, let the engine cool completely and recheck coolant level; top off the reservoir if it’s below the “COLD” mark.
- Inspect under the car and around the thermostat housing and lower hose again for any signs of leaks.
- Properly dispose of old coolant according to local regulations; do not pour it on the ground or into drains.
💰 DIY vs Shop Cost
Shop Cost: $250-$450 (parts + labor)
DIY Cost: $60-$140 (parts + coolant)
You Save: $190-$310 by doing it yourself!
Shop labor rates typically run $100-$150/hour. This repair takes a shop about 1.5-2.0 hours.
🎯 Ready to get started?
HowToo makes it easy: same-day/2-day shipping on every part, plus all the tools and specialty tools you need! Check out the parts and tools sections above to add everything to your cart.
