













How to Replace the Thermostat on a 2019 Jeep Grand Cherokee 5.7L
Step-by-step DIY thermostat replacement with tools, parts list, torque specs, coolant bleed, safety tips, and cost savings
How to Replace the Thermostat on a 2019 Jeep Grand Cherokee 5.7L
Step-by-step DIY thermostat replacement with tools, parts list, torque specs, coolant bleed, safety tips, and cost savings


🔧 Grand Cherokee - Thermostat Replacement
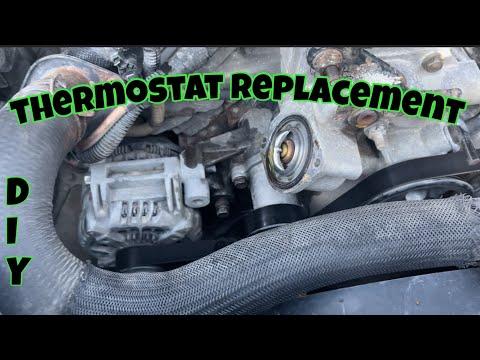
You’ll be removing the thermostat housing at the front of the engine, swapping in a new thermostat and seal, then refilling and bleeding the cooling system. This fixes problems like running too cold, overheating, or uneven heater performance when the thermostat is stuck.
Difficulty Level: Intermediate | Estimated Time: 2–3 hours
⚠️ Safety & Precautions
- ⚠️ Let the engine cool completely (at least 1–2 hours). Hot coolant can cause serious burns.
- ⚠️ Never open the coolant reservoir cap when the engine is hot or under pressure.
- ⚠️ Coolant is poisonous to people and animals. Keep in a closed container and clean spills immediately.
- ⚠️ Support the front of the Grand Cherokee on jack stands if you raise it. Never work under a vehicle held only by a jack.
- ⚠️ Avoid getting coolant on the drive belt or electrical connectors; wipe any spills right away.
- Battery disconnect is not required, but keep the key off and fob away from the vehicle while working.
🔧 Required Tools
You'll need the following tools for this repair:
- Metric socket set (8mm–15mm) with ratchet
- 3/8" drive torque wrench (5–80 ft-lbs range)
- Short extension (3"–6") for 3/8" ratchet
- 10mm socket
- 13mm socket
- Flathead screwdriver (medium size)
- Hose clamp pliers (specialty)
- Needle-nose pliers
- Plastic trim tool set
- Drain pan (at least 10-liter capacity)
- Funnel with long neck
- Small pick or hook tool
- Shop towels or rags
- Floor jack (rated 3-ton minimum)
- Jack stands (rated 3-ton minimum)
- Work light or flashlight
- Safety glasses
- Nitrile or mechanic’s gloves
🔩 Required Parts
HowToo sells all the parts you need for this repair:
- Engine coolant thermostat with housing seal/gasket (5.7L) - Qty: 1
- Lower radiator hose clamp (spring type or screw type, matching original) - Qty: 1–2
- Engine coolant (OAT, HOAT-free, FCA-spec, concentrate) - Qty: 2 gallons
- Distilled water - Qty: 2 gallons
- Coolant-safe RTV sealant (only if specified with non-OEM housing) - Qty: 1
- Shop towels - Qty: 1 pack
📋 Before You Begin
- Park the Grand Cherokee on level ground, engage the parking brake, and shift to P.
- Let the engine cool until the upper radiator hose is cool to the touch.
- Open the hood and remove the engine cover by pulling upward at the corners.
- Turn the heater controls inside the vehicle to full hot; this helps coolant flow through the heater core during bleeding.
- If you need more room under the front, raise the front with the floor jack and support it securely on jack stands under the proper frame points.
🔨 Step-by-Step Instructions
Follow these steps in order:
Step 1: Locate the thermostat housing
- Use the work light or flashlight and look at the front of the 5.7L engine, low and toward the passenger side.
- Find where the lower radiator hose connects to the engine block; that metal piece is the thermostat housing.
- Note the routing of the lower hose and any nearby wiring or brackets.
Step 2: Drain enough coolant
- Place the drain pan under the lower radiator area.
- Slowly loosen the coolant reservoir cap by hand to release pressure, but keep it sitting loosely on top to reduce splashing.
- Use the hose clamp pliers or needle-nose pliers to squeeze the lower radiator hose clamp at the radiator and slide it back along the hose.
- Gently twist the lower radiator hose off the radiator using your hands or a flathead screwdriver as a lever, being careful not to damage the plastic nipple.
- Let coolant drain into the pan until the flow slows to a drip. This usually drains several liters.
- Mark the pan “used coolant” clearly.
Step 3: Access the thermostat housing area
- Follow the lower radiator hose back to the thermostat housing on the engine.
- Use the hose clamp pliers again to slide the clamp away from the housing.
- Carefully twist and pull the hose off the thermostat housing by hand; use the flathead screwdriver gently if stuck.
- Move the hose aside where it won’t drip on you while working.
Step 4: Remove the thermostat housing
- Use the 10mm socket with ratchet and short extension to remove the two bolts securing the thermostat housing to the engine.
- Keep one hand supporting the housing as you remove the last bolt so it doesn’t drop.
- Gently pull the housing away from the engine; a little coolant will spill, so keep the drain pan directly underneath.
- Note the exact position and orientation of the thermostat before removing it. Take a quick photo for reference.
Step 5: Remove the old thermostat and seal
- Pull the old thermostat straight out of the engine by hand.
- Use the small pick or hook tool to carefully remove the old rubber seal or O-ring from the housing or engine groove, depending on design.
- Be gentle with the pick; do not scratch the aluminum surfaces.
- Use shop towels to wipe both mating surfaces (housing and engine) clean and dry.
Step 6: Install the new thermostat and seal
- Compare the new thermostat to the old one to confirm same size and shape.
- Install the new seal or O-ring into the groove on the housing or around the thermostat, matching the original orientation.
- Lightly moisten the O-ring with clean coolant using your finger; this helps it seat correctly.
- Place the new thermostat into the engine with the same orientation as the old one (spring end toward the engine, jiggle pin/vent up if present).
- Orientation matters; refer to your photo.
Step 7: Reinstall the thermostat housing
- Position the housing over the new thermostat, lining up the bolt holes.
- Install the two housing bolts by hand to avoid cross-threading.
- Use the 10mm socket and ratchet to snug both bolts evenly, alternating side to side.
- Use the torque wrench with 10mm socket to tighten the housing bolts to 11 N·m (97 in-lbs, about 8 ft-lbs).
- Do not overtighten; the housing can crack.
Step 8: Reattach the lower radiator hose
- Slide the lower radiator hose fully onto the thermostat housing nipple until it stops.
- Use the hose clamp pliers to move the clamp back to its original position over the nipple ridge.
- Reattach the hose to the radiator end if you removed it there, again positioning the clamp correctly.
- Check that both clamps are centered and tight on the hose.
Step 9: Check and close any coolant bleed screw (if equipped)
- Some 5.7L setups have a small bleed screw on a coolant tube near the thermostat or upper hose.
- If you see a small hex or screw with a boss labeled for bleed, use the flathead screwdriver or appropriate socket to confirm it is gently closed for now (snug only, not over-tightened).
Step 10: Mix and fill new coolant
- In a clean container, mix the OAT coolant concentrate with distilled water at a 50/50 ratio, unless your coolant is premixed.
- Place the funnel into the coolant reservoir opening.
- Slowly pour the 50/50 mix into the reservoir until it reaches the “MAX” or “FULL” mark.
- If you identified a bleed screw earlier, open it slightly now using the flathead screwdriver or small socket until coolant (no air bubbles) starts to come out, then gently tighten it to about 3 N·m (hand snug only).
Step 11: Initial air purge
- Leave the reservoir cap off for the moment.
- Start the engine and let it idle. Keep an eye on the coolant level in the reservoir.
- As the engine warms up, you may see bubbles come up in the reservoir. Add more coolant mix as the level drops, keeping it near the MAX line.
- Lightly squeeze the upper and lower radiator hoses by hand (wear gloves) to help push air pockets out.
- Watch the temperature gauge on the dash to ensure it stays in the normal range.
Step 12: Verify thermostat operation and final bleeding
- After about 10–15 minutes, the thermostat should open. You’ll feel the upper radiator hose get hot and more coolant flow.
- Turn the cabin heater fan on medium and confirm you get good hot air; this shows coolant is circulating through the heater core.
- Once bubbles stop appearing and the level stabilizes near MAX, install the reservoir cap by hand until fully seated.
- Let the engine run another 5–10 minutes, confirming the temperature gauge stays steady at normal mid-range.
Step 13: Clean up and re-check for leaks
- Turn off the engine and let it cool for at least 30–60 minutes.
- Use shop towels to wipe around the thermostat housing and hose connections so any new leaks are easy to spot.
- Check under the Grand Cherokee and around the lower radiator hose, thermostat housing, and drain area for any signs of dripping.
- If you raised the vehicle, use the floor jack to lift slightly, remove the jack stands, and lower it safely.
- Pour the old coolant from the drain pan into sealed containers for proper disposal at a recycling center or shop.
✅ After Repair
- On the first drive, watch the temperature gauge. It should warm up steadily to the normal middle area and stay there.
- After the engine has fully cooled (later the same day or next morning), check the coolant level in the reservoir and top off with the same 50/50 coolant mix if below the MAX line.
- Inspect around the thermostat housing and lower radiator hose after a couple of drives for any dried coolant traces or wet spots.
- If you notice overheating, no cabin heat, or fluctuating temperature gauge, there may still be air in the system; repeat the bleed steps (engine running at idle, heater on hot, top up as needed).
💰 DIY vs Shop Cost
Shop Cost: $350–$550 (parts + labor)
DIY Cost: $90–$180 (thermostat, coolant, small supplies)
You Save: $170–$460 by doing it yourself!
Shop labor rates vary but typically run $100–$150/hour. This repair takes a shop approximately 1.5–2.0 hours.
🎯 Ready to get started?
HowToo makes it easy: same-day/2-day shipping on every part, plus all the tools and specialty tools you need! Check out the parts and tools sections above to add everything to your cart.
Guide for replace for these Jeep vehicles
| Year Make Model | Sub Model | Engine | Body Style |
|---|