









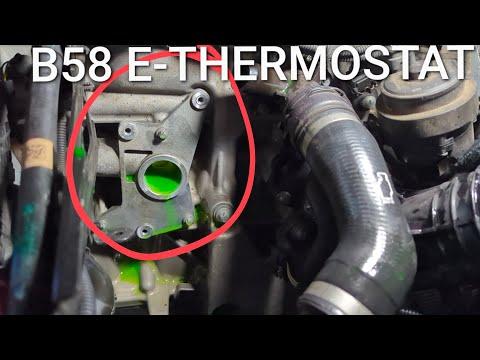







How to Replace the Thermostat on a 2016 BMW 340i (B58 3.0L)
Step-by-step DIY guide with tools, parts list, torque specs, coolant refill, and electric bleed procedure for 2016, 2017, 2018
How to Replace the Thermostat on a 2016 BMW 340i (B58 3.0L)
Step-by-step DIY guide with tools, parts list, torque specs, coolant refill, and electric bleed procedure for 2016, 2017, 2018


🔧 340i - Thermostat Replacement
Your A4— (Correction) your 340i uses a computer-controlled thermostat to help the engine warm up fast and stay at the right temperature. When it sticks or fails electrically, you can get overheating, slow warm-up, or a check engine light, and replacing it restores proper cooling control.
Difficulty Level: Advanced | Estimated Time: 2.5-4.5 hours
⚠️ Safety & Precautions
- ⚠️ Let the engine cool fully before opening the cooling system; hot coolant can cause severe burns.
- ⚠️ Support the car with jack stands; never rely on a floor jack alone.
- ⚠️ Coolant is toxic—keep it away from kids/pets and clean spills immediately.
- ⚠️ Disconnect the negative battery terminal if you’ll unplug multiple electrical connectors near the radiator fan.
- ⚠️ Assumption: This is the B58 3.0L with an electric water pump; access and fasteners can vary slightly by production date.
🔧 Required Tools
You'll need the following tools for this repair:
- Floor jack (rated 3-ton minimum)
- Jack stands (rated 3-ton minimum)
- Wheel chocks
- Safety glasses
- Nitrile gloves
- Drain pan (at least 3-gallon)
- Funnel
- Trim clip removal tool
- Flathead screwdriver
- Pick tool
- Hose clamp pliers
- 1/4" drive ratchet
- 3/8" drive ratchet
- Extensions (3" and 6")
- 8mm socket
- 10mm socket
- 13mm socket
- Torx T20 bit
- Torx T25 bit
- Torx T30 bit
- E10 E-Torx socket
- E12 E-Torx socket
- Torque wrench (5–60 Nm range)
- OBD-II scan tool (BMW-capable) (specialty)
🔩 Required Parts
HowToo sells all the parts you need for this repair:
- Engine thermostat assembly (B58) - Qty: 1
- Thermostat seal / O-ring (if not included) - Qty: 1
- Thermostat mounting bolts (single-use, if equipped) - Qty: 1 set
- BMW-compatible coolant concentrate (HT-12 type) - Qty: 1 gallon
- Distilled water - Qty: 1 gallon
- Hose clamp(s) (optional, if originals are weak) - Qty: 1-3
- Shop towels / absorbent pads - Qty: 1
📋 Before You Begin
- Park on level ground, set the parking brake, and chock the rear wheels.
- Let the engine cool completely (ideally overnight).
- Plan to capture and dispose of old coolant properly.
- If you disconnect the battery: use a 10mm socket to remove the negative terminal and isolate it so it can’t spring back.
- Know your bleed method: your 340i uses an electric water pump that can run a self-bleed routine (explained below).
🔨 Step-by-Step Instructions
Follow these steps in order:
Step 1: Raise the front and remove the lower splash shield
- Use a floor jack to lift the front and place the car on jack stands.
- Remove the underbody panels using a Torx T25 bit, Torx T30 bit, and 8mm socket (fasteners vary by panel).
- Keep screws grouped by panel.
Step 2: Drain the coolant
- Place a drain pan under the radiator/low front area.
- Slowly loosen the coolant expansion tank cap to release any residual pressure.
- Open the radiator drain (if equipped) using a flathead screwdriver or remove the lower radiator hose clamp using hose clamp pliers and carefully pull the hose free.
- Use shop towels to control spills.
Step 3: Remove intake ducting for access (top-side space)
- Remove the engine cover by pulling upward firmly (no tools).
- Loosen intake clamps using an 8mm socket and remove the intake snorkel/airbox ducting as needed.
- If the charge/boost pipe blocks access, loosen clamps with an 8mm socket and release clips using a pick tool (a pick tool is a small hook used to lift clips without breaking them).
Step 4: Locate the thermostat and disconnect electrical connector
- Find the thermostat housing at the front/passenger-side area of the engine, near the water pump and coolant hoses.
- Press the connector lock and unplug the thermostat electrical connector by hand; use a pick tool gently if the lock is stubborn.
Step 5: Remove coolant hoses from the thermostat
- Use hose clamp pliers to compress spring clamps and slide them back on the hose.
- Twist the hose to break it free, then pull it off the thermostat.
- Catch remaining coolant with the drain pan.
- Twist first—don’t pry hard on plastic.
Step 6: Unbolt and remove the thermostat
- Remove thermostat mounting fasteners using an E10 E-Torx socket or E12 E-Torx socket (varies by fastener location).
- Support the thermostat as the last bolt comes out, then remove it from the engine.
- Remove and discard the old seal/O-ring.
Step 7: Clean the sealing surface and install the new thermostat
- Wipe the mating surface clean with shop towels (no gouging/scraping).
- Install the new seal/O-ring (lightly wet it with fresh coolant using your finger so it seats smoothly).
- Position the new thermostat and hand-thread all bolts first to prevent cross-threading.
- Tighten bolts evenly using a torque wrench: Torque to 10 Nm (7 ft-lbs).
- Even tightening helps prevent leaks.
Step 8: Reconnect hoses and electrical connector
- Reinstall hoses fully to their stops and return clamps to their original positions using hose clamp pliers.
- Reconnect the electrical connector until it clicks.
Step 9: Reinstall intake parts and underbody panels
- Reinstall intake ducting/charge pipe using an 8mm socket and any clips you removed with a trim clip removal tool.
- Reinstall underbody panels using Torx T25, Torx T30, and 8mm socket fasteners.
Step 10: Refill coolant (50/50 mix) and run the electric bleed procedure
- Mix BMW-compatible coolant concentrate (HT-12 type) with distilled water at a 50/50 ratio unless your coolant label specifies otherwise.
- Fill the expansion tank slowly using a funnel to the MAX line.
- Bleed routine (common BMW electric pump method):
- Set cabin heat to maximum temperature and set the fan to the lowest speed.
- Turn ignition on without starting the engine (press Start/Stop without pressing the brake).
- Press the accelerator pedal to the floor for about 10 seconds to start the bleed cycle.
- Let the bleed routine run (you may hear the pump); keep the tank topped up as the level drops.
- If the pedal method doesn’t start the routine, use an OBD-II scan tool (BMW-capable) (specialty) to run the coolant bleed/vent function.
✅ After Repair
- Start the engine and let it idle while you inspect for leaks around the thermostat and hose connections.
- Bring the engine to operating temperature and verify the heater blows hot air.
- Shut the engine off, let it cool, then recheck and top off coolant to the correct level.
- Use a OBD-II scan tool (BMW-capable) (specialty) to clear any thermostat/coolant temp codes and confirm they do not return.
- Recheck for leaks after your first short drive.
💰 DIY vs Shop Cost
Shop Cost: $600-$1,100 (parts + labor)
DIY Cost: $120-$280 (parts only)
You Save: $480-$820 by doing it yourself!
Shop labor rates vary but typically run $100-$150/hour. This repair takes a shop approximately 2.5-4.5 hours.
🎯 Ready to get started?
HowToo makes it easy: same-day/2-day shipping on every part, plus all the tools and specialty tools you need! Check out the parts and tools sections below to add everything to your cart.