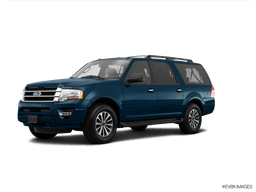
















How to Replace the Thermostat on a 2015-2021 Ford Expedition (Step-by-Step Guide) (Engine: V6 3.5L)
Tools, parts, coolant refill/bleed steps, safety tips, and thermostat housing torque specs
How to Replace the Thermostat on a 2015-2021 Ford Expedition (Step-by-Step Guide) (Engine: V6 3.5L)
Tools, parts, coolant refill/bleed steps, safety tips, and thermostat housing torque specs for 2015, 2016, 2017, 2018, 2019, 2020, 2021


🔧 Expedition - Thermostat Replacement
Your Expedition’s thermostat controls coolant flow so the engine warms up correctly and doesn’t overheat. Replacing it involves draining some coolant, removing the thermostat housing, installing the new thermostat and seal, then refilling and bleeding air from the cooling system.
Difficulty Level: Intermediate | Estimated Time: 2-4 hours
⚠️ Safety & Precautions
- ⚠️ Only work on a fully cool engine; hot coolant can spray and burn.
- ⚠️ Wear gloves and safety glasses; coolant is toxic and slippery.
- ⚠️ Disconnect the negative battery cable to prevent the electric cooling fan from turning on unexpectedly.
- ⚠️ Capture all drained coolant in a drain pan; keep away from kids and pets.
- ⚠️ Support the SUV with jack stands; never rely on a floor jack alone.
🔧 Required Tools
You'll need the following tools for this repair:
- Safety glasses
- Nitrile gloves
- Floor jack (rated 3-ton minimum)
- Jack stands (rated 3-ton minimum)
- Wheel chocks
- Drain pan (at least 3-gallon)
- Funnel
- 8mm socket
- 10mm socket
- 13mm socket
- 1/4" drive ratchet
- 3/8" drive ratchet
- 6" extension (3/8" drive)
- Trim clip removal tool
- Hose clamp pliers
- Pick tool
- Torque wrench (in-lb)
- Torque wrench (ft-lb)
- Shop rags
🔩 Required Parts
HowToo sells all the parts you need for this repair:
- Engine thermostat with seal/O-ring - Qty: 1
- Coolant (Motorcraft Yellow prediluted 50/50 equivalent) - Qty: 2-3 gallons
- Hose clamp (worm gear or OEM-style) - Qty: 1-2
📋 Before You Begin
- Park on level ground, set the parking brake, and place wheel chocks behind the rear tires.
- Let the engine cool completely (ideally sit overnight).
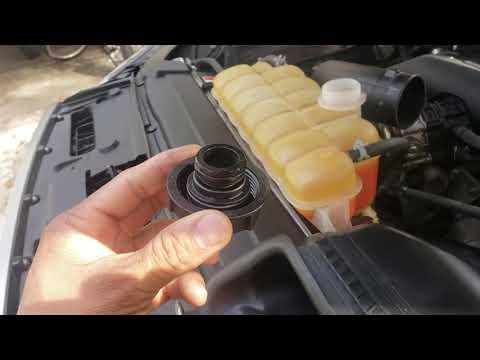
- Slowly loosen the coolant reservoir (degas bottle) cap to release any remaining pressure.
- Disconnect the battery negative cable using a 10mm socket.
- Take a photo of hose routing first.
🔨 Step-by-Step Instructions
Follow these steps in order:
Step 1: Raise the front and remove the lower splash shield (if equipped)
- Raise the front with a floor jack (rated 3-ton minimum) and support with jack stands (rated 3-ton minimum).
- Remove the lower splash shield fasteners using an 8mm socket and a trim clip removal tool.
Step 2: Drain coolant to below thermostat level
- Place a drain pan (at least 3-gallon) under the radiator drain area.
- Open the radiator drain (petcock) carefully by hand; use a pick tool only if needed to start it moving.
- If your drain is hard to access, you can instead loosen the lower radiator hose at the radiator using hose clamp pliers and drain into the pan.
- Close the drain once flow slows to a drip.
Step 3: Remove the engine cover and air intake ducting
- Pull up on the engine cover to release it (it’s held by grommets).
- Loosen the intake duct clamps using an 8mm socket.
- Remove the ducting enough to create working room at the front of the engine.
Step 4: Locate the thermostat housing
- Follow the lower radiator hose to the front of the engine; it connects to the thermostat/coolant outlet housing.
- Clean the area with shop rags so dirt doesn’t fall into the open housing.
Step 5: Disconnect the hose and any connectors at the housing
- Use hose clamp pliers to slide the clamp back on the lower radiator hose.
- Twist the hose gently to break it loose, then pull it off. Use a pick tool carefully around the hose edge if it’s stuck. Don’t gouge the plastic fitting.
- If there is an electrical connector on the housing (sensor), release the tab and unplug it by hand.
Step 6: Remove the thermostat housing
- Remove the housing bolts using a 10mm socket with a 1/4" drive ratchet and extension as needed.
- Pull the housing straight off and keep track of the thermostat orientation.
- Remove the old thermostat and seal/O-ring.
Step 7: Install the new thermostat and seal
- Clean the mating surface using shop rags. Do not scrape aluminum aggressively.
- Install the new thermostat in the same orientation as removed.
- Install the new seal/O-ring (do not reuse the old one).
- Reinstall the housing and hand-start all bolts.
- Tighten the bolts evenly using a torque wrench (in-lb): Torque to 89 in-lb (10 Nm).
Step 8: Reconnect hoses, reinstall intake parts, and reconnect battery
- Reinstall the lower radiator hose and position the clamp using hose clamp pliers.
- Reinstall the intake ducting and tighten clamps using an 8mm socket.
- Reinstall the engine cover by pressing it down into the grommets.
- Reconnect the battery negative cable using a 10mm socket: Torque to 62 in-lb (7 Nm).
Step 9: Refill and bleed the cooling system
- Fill the degas bottle using a funnel with Coolant (Motorcraft Yellow prediluted 50/50 equivalent) up to the MAX line.
- Start the engine and let it idle with the heater set to HOT and fan on LOW.
- Watch the coolant level; add as needed as air purges.
- Once warm, check for leaks at the housing and hose connection using a light and shop rags.
- Shut off the engine, let it cool fully, then recheck level and top off to the MAX line.
✅ After Repair
- Verify the temperature gauge stays normal on a 10-15 minute drive.
- Recheck for leaks after the test drive and again the next morning (cold).
- Confirm the cabin heater is hot (a common sign air is fully bled).
- If the check engine light appears (common code is P0128), recheck coolant level and thermostat seal.
💰 DIY vs Shop Cost
Shop Cost: $450-$850 (parts + labor)
DIY Cost: $60-$180 (parts only)
You Save: $270-$790 by doing it yourself!
Shop labor rates vary but typically run $100-$150/hour. This repair takes a shop approximately 2-3 hours.
🎯 Ready to get started?
HowToo makes it easy: same-day/2-day shipping on every part, plus all the tools and specialty tools you need! Check out the parts and tools sections below to add everything to your cart.
Guide for Engine Coolant Thermostat replace for these Ford vehicles
| Year Make Model | Sub Model | Engine | Body Style |
|---|---|---|---|
| 2021 Ford Expedition | - | V6 3.5L | - |
| 2020 Ford Expedition | - | V6 3.5L | - |
| 2019 Ford Expedition | - | V6 3.5L | - |
| 2018 Ford Expedition | - | V6 3.5L | - |
| 2017 Ford Expedition | - | V6 3.5L | - |
| 2016 Ford Expedition | - | V6 3.5L | - |
| 2015 Ford Expedition | - | V6 3.5L | - |