









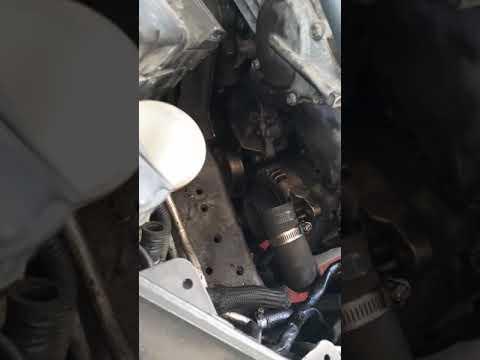







How to Replace the Thermostat on a 2013 Nissan Altima (Coolant Drain & Bleed Guide)
Step-by-step thermostat housing removal, required tools/parts, coolant refill, and torque specs (12 N·m / 106 in-lb)
How to Replace the Thermostat on a 2013 Nissan Altima (Coolant Drain & Bleed Guide)
Step-by-step thermostat housing removal, required tools/parts, coolant refill, and torque specs (12 N·m / 106 in-lb)


🔧 Altima - Thermostat Replacement
The thermostat controls coolant flow to keep your Altima at the correct operating temperature. If it sticks closed you can overheat; if it sticks open you can run cool and get weak heat and poor fuel economy.
Difficulty Level: Intermediate | Estimated Time: 2-4 hours
⚠️ Safety & Precautions
- ⚠️ Never open the radiator/coolant cap on a hot engine—hot coolant can spray and burn you.
- ⚠️ Support the car with jack stands before going underneath; don’t rely on the jack.
- ⚠️ Keep coolant off paint and away from kids/pets; it’s toxic and attracts animals.
- ⚠️ Let the cooling fans stop; they can turn on by themselves.
- Disconnecting the battery is not required for this job, but keep hands clear of moving parts while running the engine for bleeding.
🔧 Required Tools
You'll need the following tools for this repair:
- Floor jack (rated 2-ton minimum)
- Jack stands (rated 2-ton minimum)
- Wheel chocks
- Safety glasses
- Nitrile gloves
- Drain pan (at least 2-gallon)
- 3/8" ratchet
- 3/8" torque wrench (inch-pound)
- 10mm socket
- 12mm socket
- 3/8" extension (6")
- Flat-blade screwdriver
- Hose clamp pliers
- Trim clip remover
- Plastic gasket scraper
- Shop towels
- Funnel
- Spill-free coolant funnel kit (specialty)
🔩 Required Parts
HowToo sells all the parts you need for this repair:
- Engine thermostat - Qty: 1
- Thermostat gasket / O-ring - Qty: 1
- Engine coolant (Nissan Long Life, blue, 50/50 premix) - Qty: 2-3 gallons
- Hose clamp assortment - Qty: 1 Optional if clamps are weak
📋 Before You Begin
- Park on level ground, set the parking brake, and chock the rear wheels.
- Let the engine cool fully (radiator hoses should feel cool).
- Set the heater to full HOT later during the bleeding step so coolant can flow through the heater core (the small radiator for cabin heat).
- Plan to capture and properly dispose of old coolant.
🔨 Step-by-Step Instructions
Follow these steps in order:
Step 1: Raise the front and remove the lower splash shield
- Use floor jack (rated 2-ton minimum) at the front center jack point and lift the front.
- Set the car onto jack stands (rated 2-ton minimum).
- Remove the lower engine cover/splash shield using a trim clip remover and 10mm socket.
Step 2: Drain the coolant
- Place a drain pan (at least 2-gallon) under the radiator drain area.
- Slowly loosen the coolant cap (only if the engine is fully cool).
- Open the radiator drain (if equipped) using a flat-blade screwdriver and drain into the pan.
- Tip: Aim coolant with a short piece of hose.
Step 3: Access the thermostat housing (water inlet)
- Locate the lower radiator hose and follow it to the engine side (this typically leads to the thermostat housing).
- Move the hose clamp back using hose clamp pliers.
- Twist and pull the hose off the housing by hand; catch remaining coolant with the drain pan (at least 2-gallon).
Step 4: Remove the thermostat housing
- Remove the thermostat housing bolts using a 10mm socket with a 3/8" extension (6") and 3/8" ratchet.
- Carefully separate the housing and remove the thermostat.
- Clean the mating surfaces using a plastic gasket scraper and shop towels.
Step 5: Install the new thermostat and gasket
- Install the new thermostat in the same orientation as the old one.
- If your thermostat has a small “jiggle valve”/air bleed pin, position it at the top (12 o’clock) unless the part instructions say otherwise.
- Install the new gasket/O-ring (do not reuse the old one).
- Reinstall the housing bolts and tighten evenly using a 10mm socket.
- Final-tighten with a 3/8" torque wrench (inch-pound): Torque to 12 N·m (106 in-lb).
Step 6: Reconnect the hose and reinstall the splash shield
- Push the hose fully onto the housing, then reposition the clamp using hose clamp pliers.
- Reinstall the splash shield using a trim clip remover and 10mm socket.
- Lower the vehicle using the floor jack (rated 2-ton minimum).
Step 7: Refill and bleed air from the cooling system
- Fill the radiator/expansion tank with engine coolant (Nissan Long Life, blue, 50/50 premix) using a funnel or spill-free coolant funnel kit (specialty).
- Start the engine and set the HVAC to HOT with the fan on low.
- Let the engine idle and warm up while watching the coolant level; add coolant as it drops.
- When the upper radiator hose gets hot, the thermostat has opened; continue idling and topping off as needed.
- Shut the engine off, let it cool, then recheck and top off again.
- Tip: Squeeze hoses gently to burp air.
✅ After Repair
- Check for leaks around the thermostat housing and hose connection with the engine running.
- Verify the temperature gauge stays normal on a 10-15 minute drive.
- Confirm you have strong cabin heat (helps confirm air is bled out).
- After the next full cool-down, recheck coolant level and top off if needed.
💰 DIY vs Shop Cost
Shop Cost: $350-$650 (parts + labor)
DIY Cost: $40-$120 (parts only)
You Save: $230-$610 by doing it yourself!
Shop labor rates vary but typically run $100-$150/hour. This repair takes a shop approximately 2-4 hours.
🎯 Ready to get started?
HowToo makes it easy: same-day/2-day shipping on every part, plus all the tools and specialty tools you need! Check out the parts and tools sections below to add everything to your cart.