









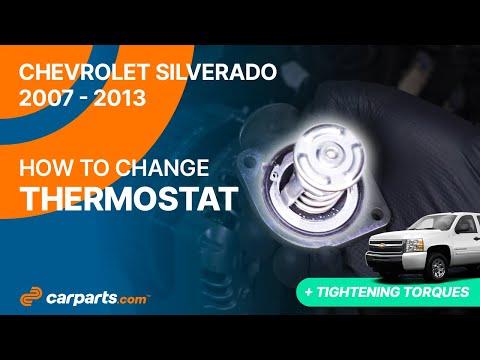





How to Replace the Thermostat on a 2012 Chevrolet Silverado 1500
Step-by-step thermostat replacement with tools, parts, torque specs, and cooling system bleed tips for 2007, 2008, 2009, 2010, 2011, 2012, 2013
How to Replace the Thermostat on a 2012 Chevrolet Silverado 1500
Step-by-step thermostat replacement with tools, parts, torque specs, and cooling system bleed tips for 2007, 2008, 2009, 2010, 2011, 2012, 2013


🔧 Thermostat - Replacement
Your thermostat controls engine warm-up and keeps coolant flow regulated once the engine reaches operating temperature. If it is stuck open or closed, your Silverado can run too cold, overheat, or set a check engine light.
Difficulty Level: Intermediate | Estimated Time: 1.5-3 hours
⚠️ Safety & Precautions
- Never open the cooling system when the engine is hot. Hot coolant can spray out under pressure.
- Coolant is toxic. Keep it away from children, pets, and painted surfaces.
- Use jack stands if you raise the front of the truck. Never rely on a floor jack alone.
- Battery disconnect is not required for this repair.
- Make sure the cooling system is fully bled after service to avoid overheating.
🔧 Required Tools
You'll need the following tools for this repair:
- 8mm socket
- 10mm socket
- 1/4-inch ratchet
- 3/8-inch ratchet
- Short extension
- Drain pan
- Pliers
- Flat-blade screwdriver
- Gasket scraper
- Torque wrench
- Safety glasses
- Nitrile gloves
- Funnel
- Jack stands
- Floor jack (rated 3-ton minimum)
🔩 Required Parts
HowToo sells all the parts you need for this repair:
- Thermostat - Qty: 1
- Thermostat housing gasket - Qty: 1
- Engine coolant (DEX-COOL, 50/50 premix or equivalent) - Qty: 2-3 gallons
- Hose clamp - Qty: 1 if damaged
📋 Before You Begin
- Park on level ground and let the engine cool completely.
- Set the parking brake and place the transmission in Park.
- If you lift the front end, support it securely with jack stands.
- Have a drain pan ready before opening the cooling system.
🔨 Step-by-Step Instructions
Follow these steps in order:
Step 1: Drain the coolant
- Place a drain pan under the radiator drain area.
- Use pliers to loosen the lower radiator hose clamp, or open the radiator drain if equipped.
- Drain enough coolant to drop the level below the thermostat housing.
- Catch and reuse only clean coolant.
Step 2: Remove intake parts for access
- Use a flat-blade screwdriver or 8mm socket to loosen the air intake duct clamps.
- Remove the intake duct and any intake resonator pieces blocking access to the thermostat area.
- Set the parts aside in order so they go back the same way.
Step 3: Remove the thermostat housing
- Locate the thermostat housing at the engine coolant outlet on the front of the engine.
- Use a 10mm socket and ratchet to remove the housing bolts.
- Pull the housing straight off carefully.
- Expect a small amount of coolant to spill.
Step 4: Remove the old thermostat
- Lift the thermostat out of the housing or engine outlet, depending on how it sits.
- Note the direction of the thermostat before removal. The spring side must go back in the same direction.
- Remove the old gasket and clean the sealing surface with a gasket scraper.
- Do not scratch the aluminum surface.
Step 5: Install the new thermostat
- Install the new thermostat in the same orientation as the old one.
- Install the new thermostat housing gasket.
- Reinstall the housing by hand first.
- Use a torque wrench with a 10mm socket to tighten the housing bolts evenly.
- Torque to 10 Nm (89 in-lbs)
Step 6: Reinstall intake components
- Reinstall the air intake duct and any removed resonator pieces.
- Use a flat-blade screwdriver or 8mm socket to tighten the clamps.
- Make sure all hoses and connectors are secure.
Step 7: Refill and bleed the cooling system
- Use a funnel to refill the radiator and coolant reservoir with DEX-COOL coolant.
- Start the engine and let it idle with the radiator cap off if applicable.
- Turn the heater to full hot and the fan to low.
- Watch the coolant level and add as needed as air escapes.
- Install the cap once the coolant level stabilizes and no more bubbles appear.
Step 8: Check for leaks and proper operation
- Inspect the thermostat housing area for leaks.
- Let the engine reach operating temperature and verify the upper radiator hose gets hot.
- Confirm the temperature gauge stays normal.
- Top off the coolant reservoir after the engine cools again.
✅ After Repair
- Drive the truck and recheck coolant level after one complete heat cycle.
- Look for seepage around the housing and hose connections.
- If the temperature gauge still runs too hot or too cold, scan for cooling system codes.
💰 DIY vs Shop Cost
Shop Cost: $250-$500 (parts + labor)
DIY Cost: $40-$110 (parts only)
You Save: $210-$390 by doing it yourself!
Shop labor rates vary but typically run $100-$150/hour. This repair takes a shop approximately 1.5-3 hours.
🎯 Ready to get started?
HowToo makes it easy: same-day/2-day shipping on every part, plus all the tools and specialty tools you need! Check out the parts and tools sections below to add everything to your cart.