









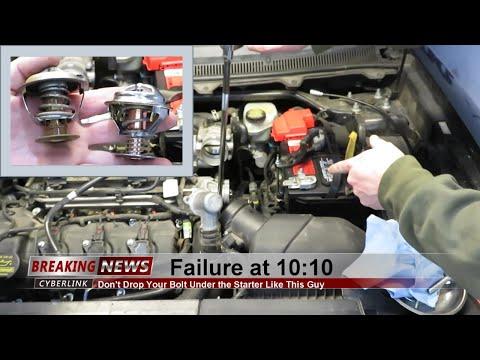







How to Replace the Thermostat on a 2009-2019 Ford Flex 3.5L (Cyclone) (Engine: V6 3.5L)
Step-by-step DIY instructions with required tools, parts list, coolant refill/bleeding tips, and torque specs
How to Replace the Thermostat on a 2009-2019 Ford Flex 3.5L (Cyclone) (Engine: V6 3.5L)
Step-by-step DIY instructions with required tools, parts list, coolant refill/bleeding tips, and torque specs for 2009, 2010, 2011, 2012, 2013, 2014, 2015, 2016, 2017, 2018, 2019


🔧 Flex - Thermostat Replacement
The thermostat controls coolant flow so the engine warms up correctly and doesn’t overheat. On your Flex, replacing it means draining some coolant, removing the thermostat housing, and installing a new thermostat with a fresh seal.
Assumption: This is the 3.5L NA “Cyclone” layout where the thermostat sits in the front water outlet near the alternator.
Difficulty Level: Intermediate | Estimated Time: 2-4 hours
⚠️ Safety & Precautions
- ⚠️ Never open the coolant reservoir when hot; severe burns risk.
- ⚠️ Electric cooling fan can turn on with key off; keep hands/tools clear.
- ⚠️ Support the Flex on jack stands before going underneath.
- ⚠️ Clean spills immediately; coolant is toxic to people and pets.
- Battery disconnect is not required, but is recommended if you’ll be working close to the alternator wiring.
🔧 Required Tools
You'll need the following tools for this repair:
- Safety glasses
- Nitrile gloves
- Floor jack (rated 3-ton minimum)
- Jack stands (rated 3-ton minimum)
- Wheel chocks
- Drain pan (10-quart minimum)
- Funnel
- Shop rags
- 3/8" drive ratchet
- 3/8" drive extension set (3" and 6")
- 8mm socket
- 10mm socket
- 13mm socket
- 15mm socket
- Torx T30 bit
- Flat-blade screwdriver
- Pliers (hose-clamp pliers preferred)
- Serpentine belt tool (specialty)
- Torque wrench (5–80 Nm range)
- Trim clip remover
🔩 Required Parts
HowToo sells all the parts you need for this repair:
- Engine thermostat - Qty: 1
- Thermostat housing seal/O-ring - Qty: 1
- Engine coolant (Motorcraft Orange or equivalent, 50/50 premix) - Qty: 1-2 gallons
- Distilled water - Qty: 1 gallon
- Hose clamps (assorted, worm-gear style) - Qty: 1 kit
📋 Before You Begin
- Park on level ground, set the parking brake, and use wheel chocks behind the rear wheels.
- Let the engine cool fully (ideally overnight).
- Raise the front with a floor jack and set it securely on jack stands.
- Place a drain pan under the radiator drain area before opening anything.
🔨 Step-by-Step Instructions
Follow these steps in order:
Step 1: Relieve coolant pressure (cold engine only)
- Slowly loosen the coolant reservoir cap by hand. If you hear pressure, stop and let it cool more.
- Remove the cap once there is no pressure.
Step 2: Remove the lower splash shield (if equipped)
- Use a trim clip remover and 8mm socket to remove the fasteners.
- Set the shield and fasteners aside in a small pile so nothing gets lost.
Step 3: Drain enough coolant to get below thermostat level
- Position the drain pan under the radiator.
- Open the radiator drain (petcock) using a flat-blade screwdriver (some are hand-turn style).
- Drain about 1–2 gallons, then close the drain snugly (do not overtighten; it’s plastic).
Step 4: Remove the air intake ducting for access
- Use an 8mm socket or flat-blade screwdriver to loosen the hose clamps on the intake tube.
- Unplug the MAF sensor connector (press the tab, then pull straight back).
- Remove the intake tube/air duct and set it aside.
- Tip: Take a quick photo before unplugging things.
Step 5: Remove the serpentine belt
- Make a belt routing sketch (or take a photo) before removal.
- Use a serpentine belt tool (specialty) with a 15mm socket on the tensioner and rotate to relieve tension. (A serpentine belt tool is a long, thin handle that fits in tight spaces.)
- Slip the belt off one pulley and slowly release the tensioner.
- Remove the belt from the front of the engine bay.
Step 6: Remove the alternator (to reach the thermostat housing)
- Unplug the alternator electrical connector by pressing the tab and pulling it off.
- Remove the alternator main power nut using a 10mm socket (then lift the cable off). Keep the nut safe.
- Remove the alternator mounting bolts using a 13mm socket and 3/8" drive extension.
- Lift the alternator out and set it aside carefully.
- On reassembly: Torque alternator bolts to 35 Nm (26 ft-lbs).
Step 7: Remove the thermostat housing/water outlet
- Place shop rags under the housing to catch spills.
- Use pliers to slide the hose clamps back, then twist and pull the coolant hose(s) off the housing.
- Remove the housing bolts using a 10mm socket and 3/8" drive extension.
- Pull the housing straight off. More coolant will drain—catch it with the drain pan.
Step 8: Replace the thermostat and seal
- Note the thermostat orientation before removal (spring end typically faces the engine).
- Remove the old thermostat and O-ring/seal.
- Clean the mating surfaces using shop rags. Do not gouge aluminum surfaces.
- Install the new thermostat and new seal in the same orientation.
Step 9: Reinstall the housing
- Position the housing and start all bolts by hand to avoid cross-threading.
- Tighten housing bolts evenly using a 10mm socket.
- Torque thermostat housing bolts to 10 Nm (89 in-lbs).
- Reinstall coolant hose(s) and position clamps back in place using pliers.
Step 10: Reinstall alternator and serpentine belt
- Reinstall the alternator and bolts using a 13mm socket.
- Torque alternator bolts to 35 Nm (26 ft-lbs).
- Reconnect the alternator electrical connector and main power cable nut using a 10mm socket (snug, do not overtighten).
- Route the belt according to your photo/sketch.
- Use the serpentine belt tool (specialty) with a 15mm socket to rotate the tensioner and slip the belt on.
- Double-check the belt is fully seated in every pulley groove.
Step 11: Reinstall intake ducting and splash shield
- Reinstall the intake tube and tighten clamps using an 8mm socket or flat-blade screwdriver.
- Reconnect the MAF sensor connector.
- Reinstall the lower splash shield using a trim clip remover and 8mm socket.
Step 12: Refill coolant
- Use a funnel to fill the coolant reservoir with 50/50 premix coolant (or mix coolant concentrate with distilled water).
- Fill to the “MAX” line.
✅ After Repair
- Start the engine and set HVAC to MAX heat with the blower on medium. This helps move coolant through the heater core.
- Let it idle and watch the temperature gauge. Check for leaks around the thermostat housing and hoses.
- As the engine warms up, the coolant level may drop—top off as needed.
- When the radiator fan cycles on/off at least once, shut the engine off and let it cool completely.
- Recheck coolant level after cool-down and top off to the “MAX” line.
- Test drive 10–15 minutes, then recheck for leaks and recheck level again after cooling.
💰 DIY vs Shop Cost
Shop Cost: $450-$850 (parts + labor)
DIY Cost: $45-$130 (parts only)
You Save: $320-$805 by doing it yourself!
Shop labor rates vary but typically run $100-$150/hour. This repair takes a shop approximately 2-4 hours.
🎯 Ready to get started?
HowToo makes it easy: same-day/2-day shipping on every part, plus all the tools and specialty tools you need! Check out the parts and tools sections below to add everything to your cart.
Guide for Engine Coolant Thermostat replace for these Ford vehicles
| Year Make Model | Sub Model | Engine | Body Style |
|---|---|---|---|
| 2019 Ford Flex | - | V6 3.5L | - |
| 2018 Ford Flex | - | V6 3.5L | - |
| 2017 Ford Flex | - | V6 3.5L | - |
| 2016 Ford Flex | - | V6 3.5L | - |
| 2015 Ford Flex | - | V6 3.5L | - |
| 2014 Ford Flex | - | V6 3.5L | - |
| 2013 Ford Flex | - | V6 3.5L | - |
| 2012 Ford Flex | - | V6 3.5L | - |
| 2011 Ford Flex | - | V6 3.5L | - |
| 2010 Ford Flex | - | V6 3.5L | - |
| 2009 Ford Flex | - | V6 3.5L | - |