









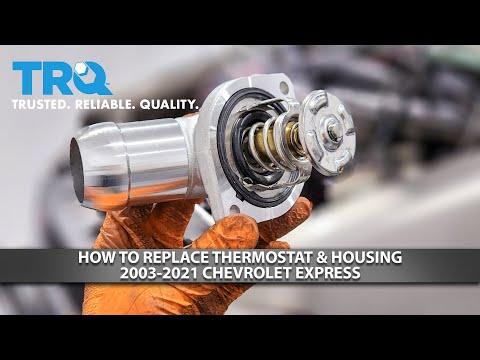







How to Replace the Thermostat on a 2007-2022 Chevrolet Express 3500 (Engine: V8 6.6L)
Step-by-step thermostat housing removal, coolant refill/bleeding, tools, parts, and torque specs
How to Replace the Thermostat on a 2007-2022 Chevrolet Express 3500 (Engine: V8 6.6L)
Step-by-step thermostat housing removal, coolant refill/bleeding, tools, parts, and torque specs for 2007, 2008, 2009, 2010, 2011, 2012, 2013, 2014, 2015, 2016, 2017


🔧 Express - Thermostat Replacement
The thermostat controls coolant flow to keep your Express at the correct operating temperature. If it sticks open you may get low heat and a P0128 code; if it sticks closed it can cause overheating.
Difficulty Level: Intermediate | Estimated Time: 1.0-2.0 hours
⚠️ Safety & Precautions
- ⚠️ Never open the radiator cap on a hot engine—hot coolant can spray out and burn you.
- ⚠️ Keep hands and tools away from the cooling fan and belt drive.
- ⚠️ Clean spilled coolant immediately—it's slippery and toxic to pets.
- ⚠️ Support the van securely if you raise it; never rely on a jack alone.
🔧 Required Tools
You'll need the following tools for this repair:
- Safety glasses
- Nitrile gloves
- Drain pan (at least 3-gallon)
- Floor jack (rated 3-ton minimum)
- Jack stands (rated 3-ton minimum)
- Wheel chocks
- 3/8" drive ratchet
- 3/8" drive extension set
- 10mm socket
- Flat-blade screwdriver
- Hose clamp pliers
- Plastic trim tool
- Torque wrench (inch-pound)
- Gasket scraper (plastic)
- Shop rags
- Funnel
🔩 Required Parts
HowToo sells all the parts you need for this repair:
- Engine thermostat (195°F / OEM temperature) - Qty: 1
- Thermostat seal / O-ring (if not included with thermostat) - Qty: 1
- Dex-Cool coolant (50/50 premix) - Qty: 2-3 gallons
- Distilled water (if using concentrate coolant) - Qty: 2-3 gallons
- Upper radiator hose clamp (optional if original is weak) - Qty: 1
📋 Before You Begin
- Park on level ground, set the parking brake, and chock the rear wheels.
- Let the engine cool fully (cold to the touch).
- Set the HVAC to heat (full hot) during refill later so coolant can flow through the heater core.
- Tip: Take a quick photo of hose routing first.
🔨 Step-by-Step Instructions
Follow these steps in order:
Step 1: Relieve pressure safely
- Put on safety glasses and nitrile gloves.
- Slowly loosen the radiator cap only when the engine is cold (a cap holds pressure in the cooling system).
Step 2: Drain enough coolant to get below the thermostat
- Place a drain pan (at least 3-gallon) under the radiator drain area.
- If you need more room, raise the front using a floor jack (rated 3-ton minimum) and support with jack stands (rated 3-ton minimum).
- Open the radiator drain (petcock) and drain about 1–2 gallons, then close it. Use a flat-blade screwdriver only if your petcock design requires it.
- Tip: You don’t need to drain the whole system.
Step 3: Locate the thermostat housing (water outlet)
- Follow the upper radiator hose to the engine—where it connects is the thermostat housing (also called the water outlet).
- Remove the engine cover if equipped using a plastic trim tool as needed.
Step 4: Remove the upper radiator hose from the housing
- Use hose clamp pliers to compress the hose clamp and slide it back on the hose.
- Twist the hose gently to break it free, then pull it off the housing.
- Catch any leftover coolant with the drain pan and shop rags.
Step 5: Remove the thermostat housing
- Use a 10mm socket with a 3/8" drive ratchet and 3/8" drive extension to remove the thermostat housing bolts.
- Pull the housing straight off. If it’s stuck, tap gently by hand—do not pry hard on aluminum sealing surfaces.
Step 6: Remove thermostat and clean the sealing surfaces
- Remove the thermostat and the old seal/O-ring (note how it sits).
- Use a gasket scraper (plastic) and shop rags to clean any residue from the housing and engine mating surface.
- Tip: Keep debris out of the opening.
Step 7: Install the new thermostat and seal
- Install the new thermostat in the same orientation as the old one.
- Install the new seal/O-ring (most OEM-style setups do not use RTV).
- Reinstall the housing by hand-starting bolts to avoid cross-threading.
- Tighten housing bolts evenly using a 10mm socket.
- Final tighten using a torque wrench (inch-pound): Torque to 10 Nm (89 in-lbs).
Step 8: Reinstall the upper radiator hose
- Slide the hose fully onto the housing.
- Use hose clamp pliers to position the clamp back in its original spot.
Step 9: Refill coolant
- Use a funnel to refill the radiator with Dex-Cool coolant (50/50 premix) until full.
- Fill the coolant overflow reservoir to the “COLD” mark.
Step 10: Bleed air and verify operation
- Leave the radiator cap off and start the engine.
- Let it idle while watching the coolant level; add coolant as the level drops using the funnel.
- Turn the cabin heat on full hot and verify you get steady warm air.
- When the thermostat opens, you should feel the upper radiator hose get hot and coolant may begin to flow visibly.
- Once bubbling calms down and the level stabilizes, install the radiator cap.
- Tip: Squeeze upper hose gently to burp air.
✅ After Repair
- Test drive 10–15 minutes and confirm the temperature gauge stays normal.
- Park, let it cool completely, then recheck the radiator level and overflow reservoir; top off if needed.
- Inspect for leaks around the thermostat housing and upper radiator hose connection.
- If you had a check-engine light (like P0128), it may clear after a few drive cycles once temperature behavior is correct.
💰 DIY vs Shop Cost
Shop Cost: $250-$500 (parts + labor)
DIY Cost: $40-$120 (parts only)
You Save: $210-$380 by doing it yourself!
Shop labor rates vary but typically run $100-$150/hour. This repair takes a shop approximately 1.0-2.0 hours.
🎯 Ready to get started?
HowToo makes it easy: same-day/2-day shipping on every part, plus all the tools and specialty tools you need! Check out the parts and tools sections below to add everything to your cart.
Guide for Engine Coolant Thermostat replace for these Chevrolet vehicles
| Year Make Model | Sub Model | Engine | Body Style |
|---|---|---|---|
| 2022 Chevrolet Express 3500 | - | V6 4.3L | - |
| 2022 Chevrolet Express 3500 | - | V8 6.6L | - |
| 2021 Chevrolet Express 3500 | - | V6 4.3L | - |
| 2021 Chevrolet Express 3500 | - | V8 6.6L | - |
| 2020 Chevrolet Express 3500 | - | V8 6.0L | - |
| 2020 Chevrolet Express 3500 | - | V6 4.3L | - |
| 2019 Chevrolet Express 3500 | - | V8 6.0L | - |
| 2019 Chevrolet Express 3500 | - | V6 4.3L | - |
| 2018 Chevrolet Express 3500 | - | V8 6.0L | - |
| 2018 Chevrolet Express 3500 | - | V6 4.3L | - |
| 2017 Chevrolet Express 3500 | - | V8 4.8L | - |
| 2017 Chevrolet Express 3500 | - | V8 6.0L | - |
| 2016 Chevrolet Express 3500 | - | V8 4.8L | - |
| 2016 Chevrolet Express 3500 | - | V8 6.0L | - |
| 2015 Chevrolet Express 3500 | - | V8 4.8L | - |
| 2015 Chevrolet Express 3500 | - | V8 6.0L | - |
| 2014 Chevrolet Express 3500 | - | V8 4.8L | - |
| 2014 Chevrolet Express 3500 | - | V8 6.0L | - |
| 2013 Chevrolet Express 3500 | - | V8 4.8L | - |
| 2013 Chevrolet Express 3500 | - | V8 6.0L | - |
| 2012 Chevrolet Express 3500 | - | V8 4.8L | - |
| 2012 Chevrolet Express 3500 | - | V8 6.0L | - |
| 2011 Chevrolet Express 3500 | - | V8 4.8L | - |
| 2011 Chevrolet Express 3500 | - | V8 6.0L | - |
| 2010 Chevrolet Express 3500 | - | V8 4.8L | - |
| 2010 Chevrolet Express 3500 | - | V8 6.0L | - |
| 2009 Chevrolet Express 3500 | - | V8 4.8L | - |
| 2009 Chevrolet Express 3500 | - | V8 6.0L | - |
| 2008 Chevrolet Express 3500 | - | V8 4.8L | - |
| 2008 Chevrolet Express 3500 | - | V8 6.0L | - |
| 2007 Chevrolet Express 3500 | - | V8 4.8L | - |
| 2007 Chevrolet Express 3500 | - | V8 6.0L | - |