








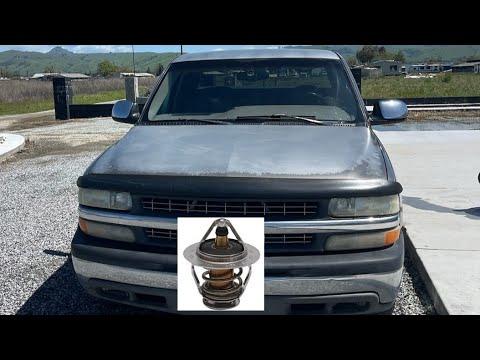






How to Replace the Thermostat on a 1999-2013 GMC Sierra 1500 (Engine: V8 5.3L)
Step-by-step instructions with tools, parts, torque specs, and cooling system bleeding tips
How to Replace the Thermostat on a 1999-2013 GMC Sierra 1500 (Engine: V8 5.3L)
Step-by-step instructions with tools, parts, torque specs, and cooling system bleeding tips for 1999, 2000, 2001, 2002, 2003, 2004, 2005, 2006, 2007, 2008, 2009, 2010, 2011, 2012, 2013


🔧 Thermostat - Replacement
The thermostat on your Sierra controls engine coolant flow so the engine warms up properly and stays at the right temperature. Replacing it usually means draining some coolant, removing the thermostat housing, installing the new thermostat and seal, then refilling and bleeding the cooling system.
Difficulty Level: Intermediate | Estimated Time: 1.5-2.5 hours
⚠️ Safety & Precautions
- Let the engine cool completely before opening the cooling system. Hot coolant can spray out and cause serious burns.
- Use caution around the serpentine belt, fan, and moving pulleys if the engine is accidentally started.
- Coolant is toxic. Keep it off the ground and away from pets and children.
- Disconnect the negative battery cable if you will be working near wiring or want extra safety while moving around the front of the engine bay.
- Your Sierra uses a pressurized cooling system, so never remove the radiator cap or surge tank cap on a hot engine.
🔧 Required Tools
You'll need the following tools for this repair:
- Ratchet
- 10mm socket
- 13mm socket
- Extension bar
- Flat-blade screwdriver
- Drain pan
- Pick tool
- Torque wrench
- Hose clamp pliers (specialty)
- Shop towels
- Safety glasses
- Gloves
🔩 Required Parts
HowToo sells all the parts you need for this repair:
- Thermostat - Qty: 1
- Thermostat housing gasket or seal - Qty: 1
- Engine coolant - Qty: 1-2 gallons
- Distilled water - Qty: 1 gallon
📋 Before You Begin
- Park on level ground and set the parking brake.
- Let the engine cool fully before starting.
- Place a drain pan under the front of the vehicle before opening the cooling system.
- If your coolant is old or contaminated, plan to replace more of it instead of just topping off.
🔨 Step-by-Step Instructions
Follow these steps in order:
Step 1: Drain enough coolant to lower the level
- Use a drain pan under the radiator drain area or lower hose area.
- Open the cooling system only when the engine is cold.
- Drain enough coolant so the level falls below the thermostat housing.
- Catch every drop you can.
Step 2: Remove any intake duct or cover in the way
- If access is tight, use a flat-blade screwdriver or 10mm socket to remove the intake duct or upper cover blocking the thermostat area.
- Set the parts aside in order so they go back in the same place.
Step 3: Disconnect the upper radiator hose from the thermostat housing
- Use hose clamp pliers, or a flat-blade screwdriver if needed, to move the clamp back.
- Twist the hose gently to break it loose, then pull it off the housing.
- Have shop towels ready for leftover coolant.
Step 4: Remove the thermostat housing
- Use a 13mm socket with a ratchet and extension bar to remove the housing bolts.
- Lift the housing straight off.
- If the housing sticks, tap it gently by hand; do not pry hard against the sealing surface.
- Do not scratch the sealing face.
Step 5: Remove the old thermostat
- Pull the thermostat out of the engine side or housing side, depending on how it sits in place.
- Use a pick tool only if the seal is stuck, and be careful not to damage the aluminum housing or engine surface.
- Note the thermostat orientation before removal so the new one goes in the same way.
Step 6: Install the new thermostat and seal
- Install the new thermostat in the same orientation as the old one.
- Install the new thermostat housing gasket or seal.
- Make sure the seal sits flat and fully in its groove.
- Clean mating surfaces matter.
Step 7: Reinstall the thermostat housing
- Set the housing in place by hand first.
- Use a 13mm socket to start both bolts by hand so the threads do not cross.
- Torque the housing bolts to 12 Nm (106 in-lbs).
Step 8: Reconnect the upper radiator hose and removed parts
- Push the hose fully onto the housing.
- Move the clamp back into position with hose clamp pliers or a flat-blade screwdriver.
- Reinstall any intake duct or cover using the 10mm socket if it was removed.
Step 9: Refill the cooling system
- Fill the system with the correct engine coolant mixed to specification, if using concentrate.
- Add coolant slowly to the surge tank.
- Fill to the proper mark on the tank.
Step 10: Bleed air from the cooling system
- Start the engine and let it idle with the radiator cap/surge tank cap installed as designed for your truck.
- Turn the heater to hot and the fan to low.
- Watch the temperature gauge and coolant level.
- Top off coolant as the level drops and air escapes.
- Let the engine reach operating temperature and confirm the upper radiator hose gets hot.
✅ After Repair
- Check for coolant leaks at the thermostat housing and hose connection.
- Confirm the engine reaches normal operating temperature and does not overheat.
- Recheck coolant level after the engine cools down fully.
- Drive a short test route, then look for leaks again.
💰 DIY vs Shop Cost
Shop Cost: $220-$420 (parts + labor)
DIY Cost: $35-$95 (parts only)
You Save: $185-$325 by doing it yourself!
Shop labor rates vary but typically run $100-$150/hour. This repair takes a shop approximately 1.5-2.5 hours.
🎯 Ready to get started?
HowToo makes it easy: same-day/2-day shipping on every part, plus all the tools and specialty tools you need! Check out the parts and tools sections below to add everything to your cart.
Guide for Engine Coolant / Antifreeze replace for these GMC vehicles
| Year Make Model | Sub Model | Engine | Body Style |
|---|---|---|---|
| 2013 GMC Sierra 1500 | - | V6 4.3L | - |
| 2012 GMC Sierra 1500 | - | V6 4.3L | - |
| 2011 GMC Sierra 1500 | - | V6 4.3L | - |
| 2010 GMC Sierra 1500 | - | V6 4.3L | - |
| 2009 GMC Sierra 1500 | - | V6 4.3L | - |
| 2008 GMC Sierra 1500 | - | V6 4.3L | - |
| 2007 GMC Sierra 1500 | - | V6 4.3L | - |
| 2006 GMC Sierra 1500 | - | V6 4.3L | - |
| 2005 GMC Sierra 1500 | - | V6 4.3L | - |
| 2004 GMC Sierra 1500 | - | V6 4.3L | - |
| 2003 GMC Sierra 1500 | - | V6 4.3L | - |
| 2002 GMC Sierra 1500 | - | V6 4.3L | - |
| 2001 GMC Sierra 1500 | - | V6 4.3L | - |
| 2000 GMC Sierra 1500 | - | V6 4.3L | - |
| 1999 GMC Sierra 1500 | - | V6 4.3L | - |