









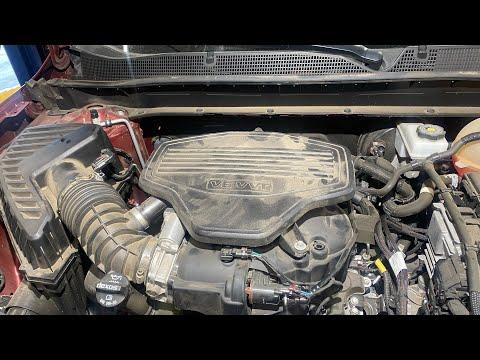







How to Replace the Thermostat Housing Assembly on a 2019-2021 Chevrolet Blazer (Engine: V6 3.6L)
Step-by-step DIY instructions with required tools, parts list, coolant refill/bleed tips, and torque specs
How to Replace the Thermostat Housing Assembly on a 2019-2021 Chevrolet Blazer (Engine: V6 3.6L)
Step-by-step DIY instructions with required tools, parts list, coolant refill/bleed tips, and torque specs for 2019, 2020, 2021


🔧 Blazer - Thermostat Replacement
On your Blazer, the thermostat is part of the engine coolant outlet/thermostat housing assembly. Replacing it typically requires draining some coolant, removing the air intake ducting, and accessing the thermostat housing on the engine so you can swap the seal/assembly and refill/bleed the cooling system.
Difficulty Level: Intermediate | Estimated Time: 2-4 hours
⚠️ Safety & Precautions
- 🧤 Only work on a fully cool engine; hot coolant can cause severe burns.
- 🧴 Coolant is toxic—catch all coolant in a drain pan and keep away from pets/kids.
- 🔋 If you’ll unplug the throttle body or nearby sensors, disconnect the negative battery cable first.
- 🛑 Never remove the coolant cap when hot/pressurized.
🔧 Required Tools
You'll need the following tools for this repair:
- Safety glasses
- Nitrile gloves
- Drain pan (at least 2-gallon)
- Floor jack (rated 3-ton minimum)
- Jack stands (rated 3-ton minimum)
- Wheel chocks
- 1/4" drive ratchet
- 3/8" drive ratchet
- Socket set (metric)
- Torx bit set (metric)
- Extension set (3" and 6")
- Trim clip removal tool
- Hose clamp pliers
- Pick tool
- Shop towels
- Funnel
- Torque wrench (in-lb and ft-lb)
- Cooling system vacuum fill tool (specialty)
🔩 Required Parts
HowToo sells all the parts you need for this repair:
- Thermostat housing/thermostat assembly - Qty: 1
- Thermostat housing seal/O-ring - Qty: 1
- Coolant (DEX-COOL 50/50 premix) - Qty: 2-3 gallons
- Throttle body gasket - Qty: 1
- Upper intake manifold gasket set - Qty: 1
- Replacement hose clamps - Qty: 1-2
📋 Before You Begin
- Park on level ground, set the parking brake, and chock the rear wheels.
- Let the engine cool completely (overnight is best).
- If you plan to unplug the throttle body, use a 10mm socket to disconnect the negative battery cable and isolate it.
- A vacuum fill tool prevents air pockets. (It pulls vacuum and refills coolant without trapped air.)
🔨 Step-by-Step Instructions
Follow these steps in order:
Step 1: Relieve pressure and prep for draining
- Remove the coolant reservoir cap slowly by hand (engine fully cool).
- Position a drain pan (at least 2-gallon) under the radiator area.
Step 2: Raise and support the front (if needed for access)
- Lift the front with a floor jack (rated 3-ton minimum).
- Support with jack stands (rated 3-ton minimum) under the proper lift points.
Step 3: Drain coolant
- Remove any lower splash shield/undertray fasteners using a trim clip removal tool and your socket set (metric) as needed.
- Open the radiator drain (petcock) by hand (or with the appropriate tool if equipped) and drain into the pan.
- Close the drain once flow slows to a drip.
Step 4: Remove the air intake ducting
- Loosen the intake clamps using your socket set (metric) and 3/8" drive ratchet.
- Disconnect any intake tube sensors/connectors by releasing their locks by hand.
- Remove the intake duct and set it aside.
Step 5: Create access to the thermostat housing
- If access is tight, remove the throttle body:
- Unplug the throttle body connector by hand.
- Remove throttle body fasteners using the correct socket from your socket set (metric) and a 1/4" drive ratchet.
- Remove and replace the throttle body gasket.
- Reinstall throttle body and Torque to 89 in-lb (10 N·m).
- If your Blazer’s thermostat housing is under the upper intake manifold, remove the upper intake manifold:
- Label and disconnect the necessary vacuum lines/electrical connectors by hand.
- Remove the upper intake fasteners using your socket set (metric) and 3/8" drive ratchet.
- Lift the upper intake off carefully and discard old gaskets.
- During reassembly, install new gaskets and Torque to 18 ft-lb (25 N·m).
Step 6: Remove the thermostat housing
- Place shop towels under the housing to catch remaining coolant.
- Release the hose clamp with hose clamp pliers and slide the clamp back on the hose.
- Twist and pull the hose off the housing. Use a pick tool carefully if the hose is stuck. (A pick tool is a small hooked tool used to lift an edge or break a seal.)
- Remove the thermostat housing bolts using the appropriate socket from your socket set (metric) and a 3/8" drive ratchet.
- Remove the housing/thermostat assembly.
Step 7: Clean the sealing surface and install the new thermostat assembly
- Clean the mating surface with shop towels (no gouging).
- Install the new thermostat housing seal/O-ring (lightly wet with fresh coolant).
- Install the new thermostat housing/assembly and start bolts by hand.
- Tighten evenly and Torque to 89 in-lb (10 N·m).
- Reinstall the coolant hose and position the clamp using hose clamp pliers.
Step 8: Reinstall removed components
- Reinstall the upper intake manifold (if removed) using your socket set (metric) and 3/8" drive ratchet, then Torque to 18 ft-lb (25 N·m).
- Reinstall the throttle body (if removed) using your 1/4" drive ratchet, then Torque to 89 in-lb (10 N·m).
- Reinstall the air intake ducting and tighten clamps using your socket set (metric).
- Reconnect all electrical connectors and vacuum lines by hand (confirm each lock clicks).
Step 9: Refill and bleed the cooling system
- If using a cooling system vacuum fill tool (specialty), follow the tool instructions to pull vacuum and refill with DEX-COOL 50/50 premix.
- If filling normally:
- Fill the reservoir slowly using a funnel.
- Start the engine and set HVAC to HOT with fan on low.
- Let the engine idle and watch the coolant level; top off as needed.
- Once warm, carefully check for leaks around the thermostat housing and hose connection.
- Install the reservoir cap once the level stabilizes.
Step 10: Reinstall splash shield and lower vehicle
- Reinstall the undertray/splash shield using the trim clip removal tool and your socket set (metric).
- Lower the vehicle safely using the floor jack (rated 3-ton minimum).
✅ After Repair
- Warm up the engine fully and confirm the cabin heat is strong (helps confirm coolant flow).
- Check for leaks at the thermostat housing, hoses, and under the vehicle.
- After a complete cool-down, recheck coolant level and top off with DEX-COOL 50/50 premix.
- If you had a check engine light for thermostat performance, clear codes with a scan tool and verify it does not return.
💰 DIY vs Shop Cost
Shop Cost: $450-$900 (parts + labor)
DIY Cost: $60-$220 (parts only)
You Save: $230-$840 by doing it yourself!
Shop labor rates vary but typically run $100-$150/hour. This repair takes a shop approximately 2-4 hours.
🎯 Ready to get started?
HowToo makes it easy: same-day/2-day shipping on every part, plus all the tools and specialty tools you need! Check out the parts and tools sections below to add everything to your cart.
Guide for Engine Coolant Thermostat Housing Assembly replace for these Chevrolet vehicles
| Year Make Model | Sub Model | Engine | Body Style |
|---|---|---|---|
| 2021 Chevrolet Blazer | - | V6 3.6L | - |
| 2020 Chevrolet Blazer | - | V6 3.6L | - |
| 2019 Chevrolet Blazer | - | V6 3.6L | - |