









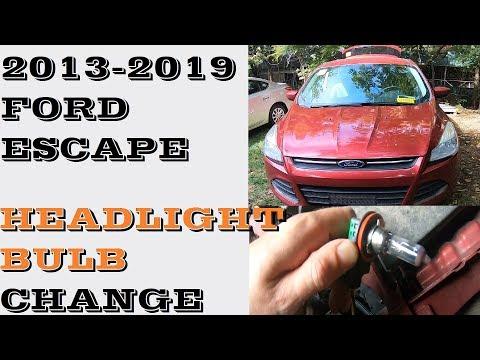






How to Replace the Thermostat and Headlight Bulbs on a 2013-2021 Ford Escape (Trim: SE)
Step-by-step DIY guide with tools, parts, coolant bleeding, torque specs, and safety tips
How to Replace the Thermostat and Headlight Bulbs on a 2013-2021 Ford Escape (Trim: SE)
Step-by-step DIY guide with tools, parts, coolant bleeding, torque specs, and safety tips for 2013, 2014, 2015, 2016, 2017, 2018, 2019, 2021


🔧 Escape - Thermostat Replacement
Replacing the thermostat on your Escape means draining some coolant, removing the thermostat housing, installing the new thermostat/seal, and refilling the cooling system. The thermostat controls engine temperature, so a stuck thermostat can cause overheating, slow warm-up, or poor heater performance.
Difficulty Level: Intermediate | Estimated Time: 2-3 hours
⚠️ Safety & Precautions
- ⚠️ Only work on a completely cold engine. Hot coolant can spray out and cause serious burns.
- ⚠️ Keep coolant away from pets and children. It is toxic and often smells sweet.
- ⚠️ Disconnect the negative battery cable before working near the starter, alternator, or wiring connectors.
- ⚠️ Support the vehicle securely if raising the front. Never rely on a jack alone.
- ⚠️ Dispose of used coolant properly. Do not pour it on the ground or into a drain.
🔧 Required Tools
You'll need the following tools for this repair:
- 8mm socket
- 10mm socket
- 13mm socket
- 1/4-inch drive ratchet
- 3/8-inch drive ratchet
- 6-inch extension
- Flat-blade screwdriver
- Hose clamp pliers
- Plastic trim clip remover
- Coolant drain pan
- Funnel
- Torque wrench inch-pound range
- Floor jack rated 2-ton minimum
- Jack stands rated 2-ton minimum
- Nitrile gloves
- Safety glasses
- Shop towels
🔩 Required Parts
HowToo sells all the parts you need for this repair:
- Engine coolant thermostat - Qty: 1
- Thermostat housing seal/O-ring - Qty: 1
- Motorcraft Orange-compatible coolant concentrate or premixed coolant - Qty: 1-2 gallons
- Distilled water - Qty: 1 gallon if using concentrate
- Replacement coolant hose clamp - Qty: 1-2 if original clamp is damaged
📋 Before You Begin
- 🅿️ Park your Escape on level ground, shift to Park, and set the parking brake.
- ❄️ Let the engine cool fully. A safe rule is to wait several hours after driving.
- 🔋 Use a 10mm socket to disconnect the negative battery cable and move it aside so it cannot touch the battery post.
- 🧰 A thermostat housing is the small coolant outlet assembly where the upper radiator hose connects near the engine.
- 💧 A drain pan is a wide container used to catch coolant so it can be reused or recycled safely.
- 🧼 Keep the work area clean. Dirt inside the cooling system can cause future problems.
🔨 Step-by-Step Instructions
Follow these steps in order:
Step 1: Raise and Secure the Front
- Use a floor jack rated 2-ton minimum to lift the front of your Escape at the front jacking point.
- Place jack stands rated 2-ton minimum under the proper support points.
- Gently lower the vehicle onto the jack stands and shake the vehicle lightly to confirm it is stable.
- Never work under only a jack.
Step 2: Remove the Lower Splash Shield
- Put on safety glasses and nitrile gloves.
- Use a 8mm socket to remove the lower splash shield fasteners.
- Use a plastic trim clip remover to release any plastic clips.
- Set the splash shield and fasteners aside in order.
Step 3: Drain the Coolant
- Place a coolant drain pan under the radiator drain area.
- Slowly loosen the coolant reservoir cap by hand to release any leftover pressure.
- If equipped with a radiator drain valve, open it carefully using a flat-blade screwdriver.
- If access to the drain valve is poor, use hose clamp pliers to loosen the lower radiator hose clamp and carefully pull the hose back just enough to drain coolant.
- Allow enough coolant to drain so the thermostat housing area will not spill heavily when opened.
- Open hoses slowly to reduce mess.
Step 4: Locate the Thermostat Housing
- Follow the large upper radiator hose from the radiator toward the engine.
- The hose connects to the thermostat housing on the engine side.
- Use shop towels to clean the area around the housing before opening it.
Step 5: Move Intake or Access Components if Needed
- If the air intake tube blocks access, use an 8mm socket or flat-blade screwdriver to loosen the intake hose clamps.
- Disconnect any small attached breather hose by hand if needed.
- Lift the intake tube out of the way and place it somewhere clean.
- Take a photo before removing hoses.
Step 6: Remove the Upper Radiator Hose from the Housing
- Use hose clamp pliers to squeeze the spring clamp on the upper radiator hose.
- Slide the clamp back on the hose.
- Twist the hose gently by hand to break it loose.
- Pull the hose off the thermostat housing and aim it toward the coolant drain pan.
- If the hose is stuck, use a flat-blade screwdriver carefully around the edge only. Do not cut or gouge the hose.
Step 7: Remove the Thermostat Housing
- Use a 10mm socket, ratchet, and 6-inch extension to remove the thermostat housing bolts.
- Support the housing with one hand as the last bolt comes out.
- Pull the housing straight away from the engine.
- Watch for more coolant to spill into the drain pan.
Step 8: Remove the Old Thermostat and Seal
- Remove the old thermostat from the housing or engine opening by hand.
- Remove the old thermostat housing seal/O-ring by hand.
- Use shop towels to wipe the sealing surface clean.
- Do not scrape with metal tools. A scratched sealing surface can cause leaks.
- Clean sealing surfaces are critical.
Step 9: Install the New Thermostat
- Compare the new engine coolant thermostat to the old one before installation.
- Install the new thermostat in the same direction as the old thermostat.
- Install the new thermostat housing seal/O-ring into its groove.
- Lightly wet the O-ring with clean coolant using your gloved finger to help it seat without pinching.
Step 10: Reinstall the Thermostat Housing
- Position the thermostat housing squarely against the engine.
- Start all housing bolts by hand first to avoid cross-threading.
- Use a 10mm socket and ratchet to snug the bolts evenly.
- Use a torque wrench inch-pound range to tighten the thermostat housing bolts to Torque to 10 Nm (89 in-lbs).
- Snug evenly, not one bolt fully first.
Step 11: Reconnect the Radiator Hose
- Push the upper radiator hose fully onto the thermostat housing neck by hand.
- Use hose clamp pliers to move the spring clamp back to its original position.
- Make sure the clamp sits behind the raised bead on the housing neck.
Step 12: Reinstall Removed Access Parts
- Reinstall the air intake tube if removed.
- Use an 8mm socket or flat-blade screwdriver to tighten the intake hose clamps.
- Reconnect any breather hose by hand.
- Make sure no tools or towels are left in the engine bay.
Step 13: Refill the Cooling System
- Close the radiator drain valve using a flat-blade screwdriver if it was opened.
- Reconnect the lower radiator hose using hose clamp pliers if it was removed.
- Place a funnel into the coolant reservoir.
- Fill with the correct Motorcraft Orange-compatible coolant mixture until the level reaches the MAX line.
- If using concentrate, mix coolant and distilled water to a 50/50 mixture before filling.
Step 14: Reconnect the Battery
- Use a 10mm socket to reconnect the negative battery cable.
- Tighten the terminal nut securely. Do not overtighten.
Step 15: Bleed Air from the Cooling System
- Leave the coolant reservoir cap off.
- Start the engine and set the heater to full hot with the blower on low using the climate controls.
- Let the engine idle while watching the coolant level in the reservoir.
- Add coolant with the funnel as the level drops.
- When the upper radiator hose becomes warm and the heater blows hot air, the thermostat has opened.
- Install the coolant reservoir cap by hand.
- Check around the thermostat housing and hose connections for leaks using a flashlight if needed.
Step 16: Reinstall the Lower Splash Shield
- Shut the engine off and let it cool enough to work safely.
- Use a plastic trim clip remover to reinstall any push clips.
- Use an 8mm socket to reinstall the lower splash shield fasteners.
- Raise the vehicle slightly with the floor jack, remove the jack stands, and lower your Escape to the ground.
✅ After Repair
- ✅ Take a short test drive while watching the temperature gauge. It should stay in the normal range.
- ✅ After the engine cools completely, recheck the coolant level and top off to the MAX line if needed.
- ✅ Inspect the thermostat housing, upper radiator hose, lower radiator hose, and splash shield area for leaks.
- ✅ If the heater blows cold, the temperature rises too high, or the coolant level keeps dropping, stop driving and recheck for trapped air or leaks.
- ✅ Some idle relearn may occur after battery disconnect. Let the engine idle normally for a few minutes with accessories off.
💰 DIY vs Shop Cost
Shop Cost: $300-$550 USD equivalent (parts + labor)
DIY Cost: $45-$120 USD equivalent (parts only)
You Save: $180-$430 by doing it yourself!
Shop labor rates vary but typically run $100-$150/hour. This repair takes a shop approximately 1.5-2.5 hours.
🎯 Ready to get started?
HowToo makes it easy: same-day/2-day shipping on every part, plus all the tools and specialty tools you need! Check out the parts and tools sections below to add everything to your cart.
🔧 Escape - Headlight Bulb Replacement
Replacing both headlight bulbs on your Escape is a beginner-friendly repair. You’ll access the bulbs from behind each headlamp assembly, twist the bulb out, unplug it, then install the new bulb without touching the glass.
Difficulty Level: Beginner | Estimated Time: 20-45 minutes
⚠️ Safety & Precautions
- ⚠️ Turn the headlights off and remove the key before starting.
- ⚠️ Let the bulbs cool before touching the back of the headlamp area.
- ⚠️ Do not touch the glass part of a halogen bulb. Skin oil can create a hot spot and shorten bulb life.
- ⚠️ Replace both bulbs as a pair so brightness and color match side to side.
- ⚠️ Battery disconnect is not normally required for this bulb replacement.
🔧 Required Tools
You'll need the following tools for this repair:
- Nitrile gloves
- Safety glasses
- Clean microfiber towel
- Small flashlight
🔩 Required Parts
HowToo sells all the parts you need for this repair:
- Low beam headlight bulbs H11 - Qty: 2 - Replace in pairs
📋 Before You Begin
- 🅿️ Park your Escape on level ground, shift to Park, and set the parking brake.
- 💡 Switch the headlight control to OFF.
- 🧤 Put on nitrile gloves before handling the new bulbs.
- 🔦 Use a small flashlight to look behind each headlamp housing before reaching in.
- 📝 This procedure is for replacing both standard low beam headlight bulbs. The high beam/DRL bulb is a different bulb.
🔨 Step-by-Step Instructions
Follow these steps in order:
Step 1: Open the Hood
- Pull the hood release inside your Escape.
- Lift the hood and secure it with the hood prop rod if equipped.
- Use a small flashlight to locate the rear of the headlamp assemblies.
Step 2: Locate the Driver-Side Low Beam Bulb
- Stand at the front of your Escape and look behind the driver-side headlamp.
- Find the low beam bulb connector on the rear of the headlamp housing.
- The connector is the small plastic plug attached to the back of the bulb.
Step 3: Remove the Driver-Side Bulb
- Use your gloved hand to press the electrical connector release tab.
- Pull the connector straight back from the bulb.
- Use your gloved hand to rotate the bulb counterclockwise about a quarter turn.
- Pull the bulb straight out of the headlamp housing.
- Do not force the plastic tabs.
Step 4: Install the New Driver-Side Bulb
- Use nitrile gloves to hold the new H11 bulb by the plastic base only.
- If the glass is touched, wipe it clean with a clean microfiber towel.
- Insert the bulb into the headlamp housing with the tabs aligned.
- Rotate the bulb clockwise until it locks in place.
- Push the electrical connector onto the bulb until it clicks.
Step 5: Locate the Passenger-Side Low Beam Bulb
- Move to the passenger side of the engine bay.
- Use a small flashlight to look behind the passenger-side headlamp assembly.
- Find the low beam bulb connector on the rear of the housing.
Step 6: Remove the Passenger-Side Bulb
- Use your gloved hand to press the electrical connector release tab.
- Pull the connector straight back from the bulb.
- Use your gloved hand to rotate the bulb counterclockwise about a quarter turn.
- Pull the bulb straight out of the headlamp housing.
- Keep the old bulb for comparison.
Step 7: Install the New Passenger-Side Bulb
- Use nitrile gloves to hold the new H11 bulb by the plastic base only.
- Compare it to the old bulb to confirm the tab pattern matches.
- Insert the bulb into the headlamp housing with the tabs aligned.
- Rotate the bulb clockwise until it locks in place.
- Push the electrical connector onto the bulb until it clicks.
Step 8: Test Both Headlights
- Turn the headlight switch to ON.
- Walk to the front of your Escape and confirm both low beam bulbs are working.
- Switch between low beam and high beam to confirm you replaced the intended bulbs.
- Turn the headlight switch back to OFF.
Step 9: Close the Hood
- Use your hand to make sure no tools or towels are left in the engine bay.
- Lower the hood and latch it securely.
✅ After Repair
- ✅ Check headlight aim against a wall at night. Both beams should sit at similar height.
- ✅ If one bulb does not work, turn the lights off and recheck that the connector is fully clicked in.
- ✅ If a new bulb fails immediately, inspect the connector for heat damage or corrosion.
- ✅ Dispose of old bulbs safely. Do not leave broken glass in the work area.
💰 DIY vs Shop Cost
Shop Cost: $90-$180 USD equivalent (parts + labor)
DIY Cost: $25-$70 USD equivalent (parts only)
You Save: $65-$110 by doing it yourself!
Shop labor rates vary but typically run $100-$150/hour. This repair takes a shop approximately 0.3-0.6 hours.
🎯 Ready to get started?
HowToo makes it easy: same-day/2-day shipping on every part, plus all the tools and specialty tools you need! Check out the parts and tools sections below to add everything to your cart.
Guide for Headlight Bulb replace for these Ford vehicles
| Year Make Model | Sub Model | Engine | Body Style |
|---|---|---|---|
| 2021 Ford Escape | S | - | - |
| 2021 Ford Escape | SE | - | - |
| 2021 Ford Escape | SEL | - | - |
| 2021 Ford Escape | Titanium | - | - |
| 2019 Ford Escape | S | - | - |
| 2019 Ford Escape | SE | - | - |
| 2019 Ford Escape | SEL | - | - |
| 2019 Ford Escape | Titanium | - | - |
| 2018 Ford Escape | S | - | - |
| 2018 Ford Escape | SE | - | - |
| 2018 Ford Escape | SEL | - | - |
| 2018 Ford Escape | Titanium | - | - |
| 2017 Ford Escape | S | - | - |
| 2017 Ford Escape | SE | - | - |
| 2017 Ford Escape | Titanium | - | - |
| 2016 Ford Escape | S | - | - |
| 2016 Ford Escape | SE | - | - |
| 2016 Ford Escape | Titanium | - | - |
| 2015 Ford Escape | S | - | - |
| 2015 Ford Escape | SE | - | - |
| 2015 Ford Escape | Titanium | - | - |
| 2014 Ford Escape | S | - | - |
| 2014 Ford Escape | SE | - | - |
| 2014 Ford Escape | Titanium | - | - |
| 2013 Ford Escape | S | - | - |
| 2013 Ford Escape | SE | - | - |
| 2013 Ford Escape | SEL | - | - |
| 2013 Ford Escape | Titanium | - | - |