










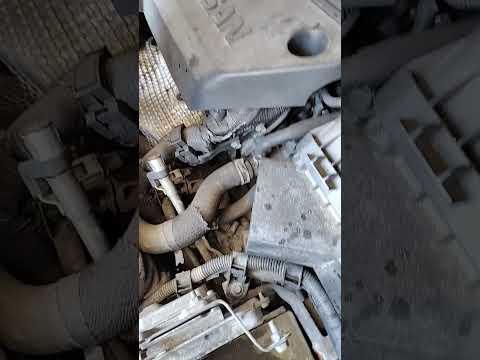







How to Replace the Starter Motor on a 2019 Nissan Altima 2.5L
Step-by-step DIY starter motor replacement with tools, parts list, torque specs, safety tips, and cost savings for 2019, 2020, 2021, 2022
How to Replace the Starter Motor on a 2019 Nissan Altima 2.5L
Step-by-step DIY starter motor replacement with tools, parts list, torque specs, safety tips, and cost savings for 2019, 2020, 2021, 2022


🔧 Altima - Starter Motor Replacement
You’ll remove the old starter motor from the front of the engine/transmission area and install a new one. This restores proper engine cranking when you press the start button.
Difficulty Level: Intermediate | Estimated Time: 2–3 hours
⚠️ Safety & Precautions
- ⚠️ Disconnect the negative battery cable before touching the starter; it is directly connected to the battery and can cause severe sparks or burns.
- ⚠️ Always support the Altima with jack stands, never only a floor jack. A jack stand is a solid support that holds the car safely in the air.
- ⚠️ Work on level ground with the transmission in Park and parking brake fully set.
- ⚠️ Let the exhaust and engine cool completely before working underneath.
- ⚠️ Keep fingers, hair, and clothing away from moving parts when you reconnect the battery and test.
🔧 Required Tools
You'll need the following tools for this repair:
- 🧰 Floor jack (rated 3-ton minimum)
- 🧰 Jack stands (rated 3-ton minimum), Qty: 2
- 🧰 Wheel chocks
- 🧰 Ratchet handle 3/8"
- 🧰 Socket set metric 8mm–19mm
- 🧰 10mm socket
- 🧰 12mm socket
- 🧰 14mm socket
- 🧰 3/8" drive extensions (3" and 6")
- 🧰 Torque wrench 3/8" drive (5–80 ft-lbs range)
- 🧰 Flathead screwdriver medium
- 🧰 Trim clip removal tool
- 🧰 Small wire brush
- 🧰 Work light or flashlight
- 🧰 Mechanic’s gloves
- 🧰 Safety glasses
- 🧰 Knee pad or small creeper
🔩 Required Parts
HowToo sells all the parts you need for this repair:
- 🔩 Starter motor assembly (for 2.5L) - Qty: 1
- 🔩 Starter mounting bolts (optional new hardware) - Qty: 2
- 🔩 Battery terminal cleaning pads - Qty: 1 set
- 🔩 Dielectric grease - Qty: 1 small tube
- 🔩 Anti-seize compound - Qty: 1 small tube
- 🔩 Underbody splash shield clips (replacement) - Qty: 6–10
📋 Before You Begin
- Park the Altima on level ground, shift to Park, set the parking brake, and place wheel chocks behind the rear wheels.
- Open the hood using the inside release, then the safety latch at the front edge.
- Turn off all electrical accessories (lights, radio, blower fan) and remove the key fob from the car.
- Wait at least 2–3 minutes after turning the car off before disconnecting the battery so control modules go to sleep.
🔨 Step-by-Step Instructions
Follow these steps in order:
Step 1: Disconnect the battery
- Lift off the plastic battery cover if equipped by hand or with the flathead screwdriver to release tabs.
- Use a 10mm socket and ratchet to loosen the nut on the negative (-) battery terminal.
- Twist and lift the negative cable off the battery post and move it aside so it cannot spring back.
- Torque on reassembly: Tighten the terminal nut to 6 Nm (53 in-lbs) later.
- Always remove negative cable first, reconnect it last.
Step 2: Raise and support the front of the Altima
- Place the floor jack under the front center jacking point (reinforced area behind the front bumper crossmember).
- Pump the jack until the front wheels are off the ground high enough for you to work underneath.
- Position jack stands under the factory pinch welds or designated support points on each side, then slowly lower the car onto the stands.
- Give the car a gentle shake to confirm it is stable on the stands.
- Never work under a car supported only by a jack.
Step 3: Remove the lower engine splash shield
- Slide under the front of the Altima with your work light.
- Use a 10mm socket and ratchet to remove the bolts holding the front lower splash shield.
- Use the trim clip removal tool to gently pry out any plastic push clips. A trim clip tool is a fork-shaped lever for removing plastic fasteners.
- Lower the splash shield and set it aside, keeping track of bolts and clips.
Step 4: Locate the starter motor
- From underneath at the front of the engine, look at the area where the engine meets the transmission.
- The starter is a cylindrical motor bolted to the transmission bellhousing, with a thick cable coming from the battery and a small electrical plug.
- Position your light so you can clearly see both mounting bolts and the wiring connections.
Step 5: Disconnect starter wiring
- Locate the small electrical connector (solenoid plug) on the starter.
- Press the tab on the connector and pull it straight off by hand; if tight, gently help it with the flathead screwdriver.
- Locate the large battery cable attached to a stud on the starter with a nut.
- Use a 12mm socket and ratchet to remove the nut from this stud, then pull the cable eyelet off and set the cable aside.
- Torque on reassembly: Tighten this nut to 12 Nm (9 ft-lbs) later.
- Do not let the cable twist or hang by the wire only.
Step 6: Remove starter mounting bolts
- Find the two starter mounting bolts that hold the starter to the transmission housing.
- Use a 14mm socket, 3/8" ratchet, and suitable extension to loosen and remove the lower bolt first.
- Support the starter body with one hand while you remove the upper bolt using the same 14mm socket and extension.
- Carefully lower the starter out of its opening and remove it from under the car.
- Note bolt length and position as you remove them.
Step 7: Prepare the mounting surface
- Inspect the starter mounting area on the transmission for dirt or corrosion.
- Use the small wire brush to gently clean the contact surfaces where the starter flange sits.
- Wipe the area with a clean rag.
- Apply a very thin film of anti-seize compound on the starter flange where it contacts the transmission (avoid the teeth and openings).
- Thin coating only; too much attracts dirt.
Step 8: Install the new starter motor
- Position the new starter in place, aligning the nose into the opening on the transmission.
- Install the upper mounting bolt by hand first to hold the starter in place.
- Install the lower mounting bolt by hand, making sure both start easily without cross-threading.
- Use a 14mm socket, ratchet, and extension to snug both bolts evenly.
- Set your torque wrench with a 14mm socket and tighten both starter mounting bolts to 50 Nm (37 ft-lbs).
- Tighten bolts evenly to keep starter seated flat.
Step 9: Reconnect starter wiring
- Slide the large battery cable eyelet onto the starter stud.
- Thread the nut on by hand to avoid cross-threading.
- Use a 12mm socket and torque wrench to tighten the nut to 12 Nm (9 ft-lbs).
- Apply a small dab of dielectric grease to the small connector terminal, then firmly push the connector back onto the starter until it clicks.
- Connector should feel locked, not loose.
Step 10: Reinstall the lower splash shield
- Lift the splash shield back into position under the front of the car.
- Install the bolts by hand first in their original locations.
- Use a 10mm socket and ratchet to snug the bolts—just firm, not over-tightened.
- Reinstall any plastic clips using your fingers or the trim clip removal tool to press them fully into place.
Step 11: Lower the Altima
- Use the floor jack to lift the front of the car slightly to take weight off the jack stands.
- Remove the jack stands from both sides.
- Slowly lower the car to the ground with the jack.
- Remove the wheel chocks.
Step 12: Reconnect the battery
- If the battery posts or terminal clamps are corroded, clean them with battery terminal cleaning pads or the wire brush.
- Place the negative (-) cable clamp back on the battery post.
- Use a 10mm socket and torque wrench to tighten the clamp nut to 6 Nm (53 in-lbs), just snug enough that the clamp does not move.
- Reinstall the battery cover by hand.
✅ After Repair
- Get in the Altima, press the brake pedal, and press the start button. The engine should crank strongly and start quickly.
- Listen for abnormal noises from the starter area (grinding, whine, or repeated clicks). Turn off immediately if you hear anything unusual and recheck mounting and wiring.
- Check the instrument cluster for warning lights. A brief battery or steering light after reconnecting the battery is normal and should clear after driving.
- Inspect under the car for any loose splash shield areas or hanging wires.
- Keep an ear out over next few starts.
💰 DIY vs Shop Cost
Shop Cost: $550–$800 (parts + labor)
DIY Cost: $150–$280 (parts only)
You Save: $400–$520 by doing it yourself!
Shop labor rates vary but typically run $100–$150/hour. This repair takes a shop approximately 2–3 hours.
🎯 Ready to get started?
HowToo makes it easy: same-day/2-day shipping on every part, plus all the tools and specialty tools you need! Check out the parts and tools sections above to add everything to your cart.
