









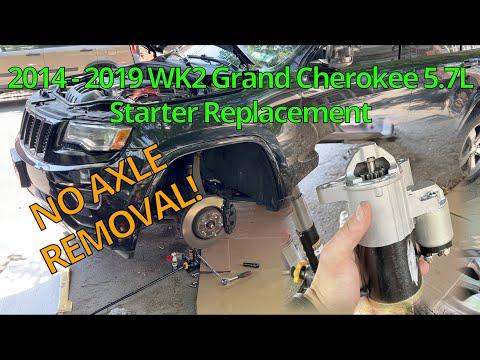






How to Replace the Starter Motor on a 2019 Jeep Grand Cherokee 5.7L
Step-by-step DIY starter replacement with tools, parts list, torque specs, safety tips, and cost-saving advice for 2009, 2010, 2011, 2012, 2013, 2014, 2015, 2016, 2017, 2018, 2019, 2020, 2021
How to Replace the Starter Motor on a 2019 Jeep Grand Cherokee 5.7L
Step-by-step DIY starter replacement with tools, parts list, torque specs, safety tips, and cost-saving advice for 2009, 2010, 2011, 2012, 2013, 2014, 2015, 2016, 2017, 2018, 2019, 2020, 2021


🔧 Grand Cherokee - Starter Motor Replacement
You’ll be removing the old starter motor from the side of the engine and installing a new one. This restores proper cranking speed and fixes no-crank or slow-crank problems.
Difficulty Level: Intermediate | Estimated Time: 2-3 hours
⚠️ Safety & Precautions
- ⚠️ Always disconnect the negative battery terminal before working on the starter to avoid sparks and accidental cranking.
- ⚠️ You’ll be working under the Grand Cherokee. Use a strong floor jack and solid jack stands, never rely on the jack alone.
- ⚠️ Let the exhaust cool fully before you start; it runs close to the starter and can be very hot.
- ⚠️ Keep the key and any key fobs away from the vehicle while the battery is disconnected to prevent accidental electronics wake-up.
- ⚠️ Wear safety glasses; dirt and rust often fall when loosening underbody bolts.
🔧 Required Tools
You'll need the following tools for this repair:
- 🛠️ Floor jack (rated 3-ton minimum)
- 🛠️ Jack stands (rated 3-ton minimum, Qty: 2-4)
- 🛠️ Wheel chocks
- 🛠️ Socket set (metric, 8mm-19mm)
- 🛠️ 8mm socket
- 🛠️ 10mm socket
- 🛠️ 13mm socket
- 🛠️ 15mm socket
- 🛠️ 3/8" drive ratchet
- 🛠️ 1/2" drive ratchet
- 🛠️ 3/8" drive socket extension (6")
- 🛠️ 1/2" drive socket extension (6"-10")
- 🛠️ Torque wrench 3/8" drive (5-80 ft-lbs range)
- 🛠️ Torque wrench 1/2" drive (20-150 ft-lbs range)
- 🛠️ Flathead screwdriver (medium)
- 🛠️ Trim clip removal tool
- 🛠️ Small wire brush
- 🛠️ Work light or headlamp
- 🛠️ Mechanic’s creeper or cardboard mat
- 🛠️ Nitrile gloves
- 🛠️ Safety glasses
🔩 Required Parts
HowToo sells all the parts you need for this repair:
- 🔩 Starter motor (5.7L HEMI, Summit trim compatible) - Qty: 1
- 🔩 Starter mounting bolts - Qty: 2 (recommended new)
- 🔩 Battery terminal cleaning brush - Qty: 1
- 🔩 Dielectric grease - Qty: small tube
- 🔩 Anti-seize compound - Qty: small tube
- 🔩 Replacement splash shield clips / skid plate bolts - Qty: as needed
📋 Before You Begin
- Park the Grand Cherokee on a flat, solid surface, shift to PARK, and set the parking brake.
- Turn off all electrical loads (lights, HVAC, radio) and remove the key fob from the vehicle.
- Open the hood and locate the battery. On many Grand Cherokees the main battery is in the engine bay on the passenger side.
- Disconnect the negative battery cable first using a 10mm socket, and secure the cable so it cannot spring back to the terminal.
- Chock the rear wheels to prevent any movement when you raise the front.
🔨 Step-by-Step Instructions
Follow these steps in order:
Step 1: Raise and support the front
- Position the floor jack (rated 3-ton minimum) under the front crossmember or factory jacking point indicated in your owner’s manual.
- Lift the front of the Grand Cherokee high enough to comfortably work underneath.
- Place jack stands (rated 3-ton minimum) under the approved frame or pinch-weld points on both sides, then slowly lower the vehicle onto the stands.
- Give the vehicle a firm shake to confirm it is stable before going underneath.
Step 2: Remove lower splash shield or skid plate (if equipped)
- Use a 10mm socket and 3/8" drive ratchet to remove the bolts holding the plastic splash shield or metal skid plate under the engine area.
- If there are plastic clips, use the trim clip removal tool or a flathead screwdriver (medium) to gently pry them out.
- Lower the shield/plate and set it aside. Lay bolts out in removal order.
Step 3: Locate the starter
- From underneath, look at the passenger side of the engine where it meets the transmission bellhousing.
- The starter is a cylindrical motor with a smaller cylinder (solenoid) attached and thick battery cable connected to it.
- Use the work light or headlamp to clearly see its mounting bolts and wiring.
Step 4: Disconnect starter wiring (with battery still disconnected)
- On the back of the starter solenoid, locate the thick battery cable attached with a nut and the smaller control wire attached with a plug or a smaller nut.
- Use a 13mm socket and 3/8" drive ratchet to loosen and remove the nut for the thick battery cable (B+ terminal).
- Gently pull the thick cable off and set it aside; do not let it hang by the wire if it’s tight—support it as needed.
- If the small control wire uses a nut, use a 10mm socket to remove it; if it’s a plug-style connector, press the tab and pull it off by hand.
- Take a clear photo of wiring before removal.
Step 5: Remove the starter mounting bolts
- Locate the two starter mounting bolts that go horizontally into the transmission bellhousing.
- Use a 15mm socket, 3/8" drive ratchet, and a 3/8" drive socket extension (6") if needed to reach the bolts.
- Break each bolt loose, then remove them fully while supporting the starter body with your other hand.
- Once the bolts are out, carefully lower the starter out of its opening. It may need a slight twist or wiggle to clear nearby parts.
Step 6: Prepare the mounting surface and wiring
- Inspect the opening in the bellhousing and the mounting pad on the engine for dirt or corrosion.
- Use the small wire brush to clean the contact area where the starter mounts; a clean surface helps proper alignment and grounding.
- Lightly clean the ring terminal ends of the battery and control wires using the small wire brush.
- Apply a very thin layer of anti-seize compound to the shanks of the new starter mounting bolts (avoid the threads contacting aluminum if possible).
- Apply a light coat of dielectric grease to the wire terminals to help prevent corrosion.
Step 7: Install the new starter
- Position the new starter into the bellhousing opening, aligning the nose of the starter with the opening and the bolt holes with the engine block.
- Hand-thread both starter mounting bolts using your fingers to avoid cross-threading.
- Once hand-tight, use the 15mm socket and 3/8" drive ratchet to snug the bolts evenly.
- Then use the torque wrench 3/8" drive (5-80 ft-lbs range) with the 15mm socket to torque both bolts to 54 Nm (40 ft-lbs).
- Tighten bolts evenly to seat starter flat.
Step 8: Reconnect starter wiring
- Install the small control wire first: push the connector on until it clicks, or place the ring terminal on its stud and install the nut.
- If using a nut, tighten it with a 10mm socket and 3/8" drive ratchet, then torque to 9 Nm (80 in-lbs) using the torque wrench 3/8" drive (5-80 ft-lbs range).
- Install the thick battery cable ring terminal onto the B+ stud on the solenoid.
- Install the nut and tighten with a 13mm socket and 3/8" drive ratchet, then torque to 15 Nm (11 ft-lbs) with the torque wrench 3/8" drive (5-80 ft-lbs range).
- Ensure both wires are routed away from any moving parts or sharp edges.
Step 9: Reinstall splash shield or skid plate
- Lift the splash shield or skid plate back into position under the engine.
- Start all bolts by hand to avoid cross-threading.
- Use the 10mm socket and 3/8" drive ratchet to tighten the bolts snugly. If torque is specified, set the torque wrench 3/8" drive (5-80 ft-lbs range) to 9-12 Nm (80-105 in-lbs) for small shield bolts.
- Reinstall any plastic clips using your hands or the trim clip removal tool to press them back in.
Step 10: Lower the vehicle
- Position the floor jack (rated 3-ton minimum) under the front crossmember again and gently raise the vehicle enough to remove the jack stands.
- Remove the jack stands (rated 3-ton minimum) and slowly lower the Grand Cherokee to the ground.
- Remove the wheel chocks.
Step 11: Reconnect the battery
- At the battery, inspect the negative terminal for corrosion; clean with the battery terminal cleaning brush if needed.
- Reconnect the negative battery cable and tighten the clamp using a 10mm socket and 3/8" drive ratchet. Do not over-tighten; just snug enough that it cannot twist by hand.
- Reconnect negative last to reduce spark risk.
Step 12: Initial test
- Sit in the driver’s seat, make sure the transmission is in PARK and the parking brake is on.
- Turn the key or press the start button and listen: the engine should crank strongly and smoothly with no grinding or clicking from the starter area.
- If you hear grinding, shut it off immediately and recheck that the starter is mounted flush and bolts are torqued properly.
✅ After Repair
- Let the engine idle for a few minutes and watch the instrument cluster for any warning lights related to charging or battery.
- Turn the engine off and restart it several times to confirm consistent starting performance.
- Check under the Grand Cherokee for any loose wiring or hardware you might have missed.
- Over the next few days, pay attention to any unusual noises during start-up and recheck starter mounting bolts if you suspect movement.
💰 DIY vs Shop Cost
Shop Cost: $650-$900 (parts + labor)
DIY Cost: $220-$400 (parts only)
You Save: $430-$500 by doing it yourself!
Shop labor rates vary but typically run $100-$150/hour. This repair takes a shop approximately 1.5-2.0 hours.
🎯 Ready to get started?
HowToo makes it easy: same-day/2-day shipping on every part, plus all the tools and specialty tools you need! Check out the parts and tools sections above to add everything to your cart.