


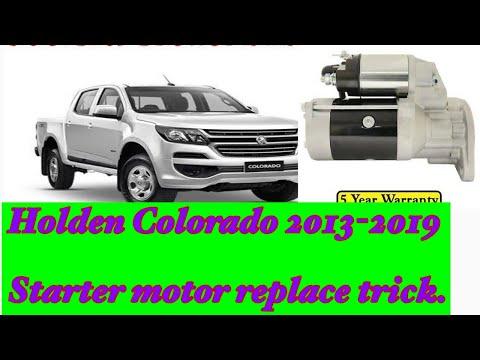


How to Replace the Starter Motor on a 2018 Chevrolet Colorado 2.5L
Step-by-step DIY starter replacement with tools, parts list, torque specs, and safety tips for your 2018 Chevy Colorado
How to Replace the Starter Motor on a 2018 Chevrolet Colorado 2.5L
Step-by-step DIY starter replacement with tools, parts list, torque specs, and safety tips for your 2018 Chevy Colorado


Colorado - Starter Motor Replacement 🔧
Nice project. I’ll walk you through this like a first-time DIYer. Read everything once before starting.
Safety First ⚠️
- 🧯 Disconnect the battery before touching the starter. The starter cable is “always hot” and can spark badly if shorted.
- 🧱 Support the truck with jack stands, never only a jack. A jack stand is a solid metal support that holds the vehicle safely.
- 🧤 Let the exhaust cool completely before working underneath.
Colorado - Parts & Specs 📦
- 📌 Replacement starter motor (for 2.5L, manual, RWD)
- 📌 New starter mounting bolts (recommended; GM class 10.9 bolts)
- 📌 Battery terminal cleaning brush (small tool to clean corrosion from battery posts)
Key torque specs (approx GM data for your 2.5L):
- 🔩 Starter mounting bolts: 37 lb-ft (50 N·m)
- 🔩 Battery terminal clamp nuts: 44 in-lb (5 N·m) – just snug, do not overtighten
- 🔩 Starter main cable nut: 80–106 in-lb (9–12 N·m) – firm but not “gorilla tight”
Tools You’ll Need 🛠️
- 🧰 Floor jack and 2 jack stands
- 🧰 Wheel chocks (blocks behind wheels so the truck can’t roll)
- 🧰 Socket set:
- 3/8" drive ratchet
- Metric sockets: 10mm, 13mm, 15mm (starter bolts and wiring nuts)
- Short extension (3"–6")
- 🧰 Wrenches: 10mm, 13mm, 15mm combination wrenches
- 🧰 Torque wrench (3/8" drive, capable of 10–60 lb-ft)
- 🧰 Flat screwdriver or trim tool (to release any plastic clips or covers)
- 🧰 Work light or headlamp
- 🧰 Gloves and safety glasses
Colorado - Starter Location 🔍
- 📍 On your 2.5L, the starter is mounted low on the passenger side of the engine, where it meets the transmission bellhousing.
- 📍 You access it best from underneath the truck, behind the front passenger wheel area.
Step 1 – Prepare the Truck 🧱
- 🛑 Park on a flat, solid surface. Put the transmission in 1st gear and set the parking brake.
- 🧱 Place wheel chocks behind the rear wheels.
- 🔌 Open the hood and disconnect the negative (-) battery cable:
- Use a 10mm wrench to loosen the clamp nut.
- Lift the cable off and tuck it aside so it cannot spring back.
Step 2 – Raise and Support the Front 🚗
- 🧰 Place the floor jack under the front crossmember (sturdy metal beam under the engine).
- ⬆️ Lift the front of the truck enough to crawl under comfortably.
- 🧱 Place jack stands under the frame rails on both sides and lower the truck onto them.
- 🧪 Gently shake the truck to confirm it’s stable.
Step 3 – Access the Starter 🔦
- 🔍 Slide under from the passenger side, behind the front wheel.
- 🔍 Look at the area where the engine meets the transmission. The starter is a cylindrical motor with a smaller cylinder (solenoid) attached and thick cables going to it.
- 🧰 If there is a plastic splash shield in the way:
- Remove the plastic push-pins or small bolts (usually 10mm).
- Drop the shield down and set it aside.
Step 4 – Disconnect Starter Wiring 🔌
Battery must be disconnected before this step.
- 🔍 On the starter solenoid you’ll see:
- One large cable from the battery (on a big stud with a nut).
- One small wire (the “S” or signal wire) on a smaller stud or plug.
- 🔧 Use a 13mm socket or wrench (size may vary slightly) to remove the nut on the large cable. Pull the cable off and set it aside.
- 🔧 For the small wire:
- If it has a nut, use a small socket (often 8–10mm) to remove it and slide the wire off.
- If it has a plug connector, press the tab with your thumb or a small screwdriver and pull it straight off.
- 🧠 Remember the positions of each wire; take a photo with your phone before removing them.
Step 5 – Remove the Starter 🔩
- 🔍 The starter is held to the engine/transmission by two main bolts (sometimes three, but typically two on your 2.5L).
- 🔧 Use a 15mm socket with a short extension and ratchet to remove the lower mounting bolt first.
- 🔧 Then remove the upper mounting bolt. Support the starter with your other hand as you loosen it so it doesn’t drop.
- 📦 Once the bolts are out, wiggle the starter rearward and down. You may need to rotate it slightly to clear the bellhousing and exhaust.
Step 6 – Compare Old and New Starter 🧾
- 🔍 Place the old and new starters side by side.
- ✅ Check:
- Mounting holes line up.
- Electrical studs and connectors are in the same positions.
- Gear (pinion) size and length look the same.
- 🧠 If anything looks different, stop and verify part number before installing.
Step 7 – Install the New Starter 🔧
- 📦 Lift the new starter into place, aligning the nose into the opening in the bellhousing.
- 🔩 Start the upper bolt by hand first. Turn it several threads so it doesn’t cross-thread.
- 🔩 Start the lower bolt by hand.
- 🔧 Snug both bolts with the ratchet, then use the torque wrench:
- Torque each starter mounting bolt to 37 lb-ft (50 N·m).
Step 8 – Reconnect Starter Wiring 🔌
- 🔧 Install the large battery cable onto the big stud on the solenoid.
- 🔩 Install the nut and tighten to about 80–106 in-lb (9–12 N·m) – firm but do not overtighten or twist the stud.
- 🔧 Reconnect the small signal wire:
- If it uses a nut, snug it gently (small stud can break if overtightened).
- If it’s a plug, push until it clicks.
- 🧠 Make sure the cables are routed so they don’t touch the exhaust or moving parts.
Step 9 – Reinstall Shields & Lower the Truck 🧱
- 🧰 Reinstall any plastic splash shield you removed, using the original clips/bolts.
- ⬇️ Use the jack to lift the truck slightly, remove the jack stands, and lower the truck to the ground.
Step 10 – Reconnect Battery & Test 🔋
- 🔌 Clean the battery posts if they’re dirty using the battery terminal brush.
- 🔧 Reconnect the negative (-) battery cable and tighten the 10mm nut snugly (about 44 in-lb – just tight enough that the clamp doesn’t move).
- 🚗 Sit in the truck, depress the clutch, and turn the key:
- The engine should crank strongly and start.
- Listen for any grinding or strange noises from the starter area.
Common Beginner Tips & Mistakes 💡
- 🧠 Always disconnect the battery first. This is the most important step.
- 🧠 If a bolt feels like it’s binding when you start it, back it out and start again by hand to avoid cross-threading.
- 🧠 Take photos before removing wires so you can match them later.
- 🧠 If the starter just “clicks” after install, double-check:
- Battery connections are tight.
- Both starter wires are fully seated.
Need Parts & Tools? 🛒
HowToo makes it easy: below this answer you’ll see starter options, bolts, and all the tools you need. You can add them to your cart directly from the parts section, with fast shipping.
If you’d like, tell me what tools you already have, and I can simplify the list even more for you.
