









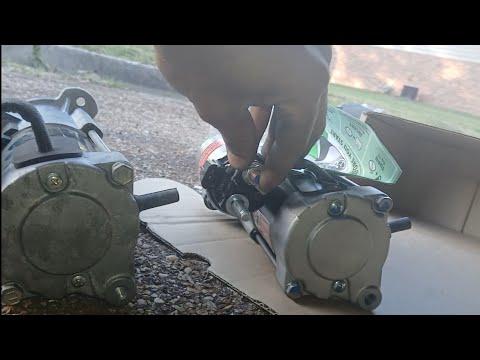





How to Replace the Starter Motor on a 2018-2020 Chevrolet Equinox (Trim: Premier | Engine: Inline 4 2.0L | Body: Sport Utility)
Step-by-step instructions with tools, parts, safety tips, and torque specs
How to Replace the Starter Motor on a 2018-2020 Chevrolet Equinox (Trim: Premier | Engine: Inline 4 2.0L | Body: Sport Utility)
Step-by-step instructions with tools, parts, safety tips, and torque specs for 2018, 2019, 2020


🔧 Starter Motor - Replacement
The starter on your Equinox sits low on the engine near the transmission bellhousing, so access is tight and usually requires removing the air intake ducting and nearby components for room. The battery must be disconnected first because the starter cable is always hot and can arc badly if touched by a tool.
Difficulty Level: Intermediate | Estimated Time: 2-4 hours
⚠️ Safety & Precautions
- Disconnect the negative battery cable before starting. The starter has direct battery power at all times.
- Support the vehicle securely if you raise it. Use jack stands, not just a jack.
- Let the engine cool fully before working around the turbo area and exhaust side of the engine.
- Keep metal tools away from the starter terminal after the battery is disconnected, since stored power can still spark if the cable is not isolated.
- If the starter is mounted near wiring clips or heat shields, do not force the unit out. Breakage is common with tight clearance.
🔧 Required Tools
You'll need the following tools for this repair:
- 10mm socket
- 13mm socket
- 15mm socket
- Ratchet
- Short extension
- Long extension
- Torque wrench
- Flat-blade screwdriver
- Trim tool
- Floor jack (rated 3-ton minimum)
- Jack stands
- Wheel chocks
- Safety glasses
- Mechanic gloves
🔩 Required Parts
HowToo sells all the parts you need for this repair:
- Starter motor - Qty: 1
- Starter mounting bolts - Qty: 2
- Battery terminal cleaner - Qty: 1
📋 Before You Begin
- Park on level ground and set the parking brake.
- Move the shift lever to Park.
- Turn the ignition off and remove the key or keep the key fob away from the vehicle.
- Disconnect the negative battery terminal first. If the battery is under a cover, remove the cover with a 10mm socket.
- Wait a few minutes after disconnecting the battery before touching starter wiring.
🔨 Step-by-Step Instructions
Follow these steps in order:
Step 1: Disconnect the battery
- Use a 10mm socket to loosen the negative battery cable.
- Remove the negative cable and isolate it so it cannot spring back and touch the terminal.
- Keep the cable away from the post.
Step 2: Remove the intake ducting
- Use a flat-blade screwdriver or trim tool to loosen the intake hose clamp.
- Remove any air duct or resonator pieces blocking access to the starter area.
- If needed, disconnect any small breather or sensor connector attached to the intake tube.
Step 3: Raise and secure the vehicle if needed for access
- If the starter is easier to reach from below, raise the front of the vehicle with a floor jack (rated 3-ton minimum).
- Place jack stands under the proper support points.
- Chock the rear wheels.
Step 4: Remove starter electrical connections
- Locate the starter on the transmission side of the engine.
- Use a 13mm socket or 10mm socket to remove the nut from the main battery cable at the starter, depending on the terminal style.
- Remove the smaller control wire connector if equipped.
- Move the wires aside so they cannot catch when the starter comes out.
Step 5: Remove the starter mounting bolts
- Use a 15mm socket, ratchet, and extensions to remove the starter mounting bolts.
- Support the starter with one hand as the last bolt comes out.
- Remove the starter from the engine bay.
- Wiggle it gently; do not pry on wiring.
Step 6: Install the new starter
- Position the new starter in place by hand.
- Start both mounting bolts by hand first to avoid cross-threading.
- Tighten the bolts with a 15mm socket and torque wrench.
- Torque to factory specification.
Step 7: Reconnect the starter wiring
- Reconnect the control wire and the main battery cable at the starter.
- Use the correct socket for the cable nut and tighten it firmly.
- Torque to factory specification.
- Make sure the cable boots and connectors are fully seated.
Step 8: Reinstall the intake parts and lower the vehicle
- Reinstall the intake ducting and tighten the clamp with a flat-blade screwdriver.
- Reconnect any hoses or connectors removed earlier.
- Lower the vehicle if it was raised.
Step 9: Reconnect the battery
- Reconnect the negative battery cable with a 10mm socket.
- Tighten it snugly.
- Make sure the terminal is clean and secure.
✅ After Repair
- Turn the key or press the start button and confirm the engine cranks normally.
- Listen for grinding, clicking, or slow cranking.
- Check that no warning lights appear for low voltage or charging issues.
- If the engine does not crank, recheck the battery connections and starter cable tightness.
- Make sure intake clamps and hoses are fully reinstalled so there are no air leaks.
💰 DIY vs Shop Cost
Shop Cost: $550-$950 (parts + labor)
DIY Cost: $150-$350 (parts only)
You Save: $400-$600 by doing it yourself!
Shop labor rates vary but typically run $100-$150/hour. This repair takes a shop approximately 2-4 hours.
🎯 Ready to get started?
HowToo makes it easy: same-day/2-day shipping on every part, plus all the tools and specialty tools you need! Check out the parts and tools sections below to add everything to your cart.
Guide for Starter Motor replace for these Chevrolet vehicles
| Year Make Model | Sub Model | Engine | Body Style |
|---|---|---|---|
| 2020 Chevrolet Equinox | LT | Inline 4 2.0L | Sport Utility |
| 2020 Chevrolet Equinox | Premier | Inline 4 2.0L | Sport Utility |
| 2019 Chevrolet Equinox | LT | Inline 4 2.0L | Sport Utility |
| 2019 Chevrolet Equinox | Premier | Inline 4 2.0L | Sport Utility |
| 2018 Chevrolet Equinox | LT | Inline 4 2.0L | Sport Utility |
| 2018 Chevrolet Equinox | Premier | Inline 4 2.0L | Sport Utility |