


How to Replace the Starter Motor on a 2016 Mitsubishi Outlander Sport (2.0L)
Step-by-step DIY instructions with required tools, parts list, wiring tips, and torque specs for 2011, 2012, 2013, 2014, 2015, 2016
How to Replace the Starter Motor on a 2016 Mitsubishi Outlander Sport (2.0L)
Step-by-step DIY instructions with required tools, parts list, wiring tips, and torque specs for 2011, 2012, 2013, 2014, 2015, 2016
🔧 Outlander Sport - Starter Motor Replacement
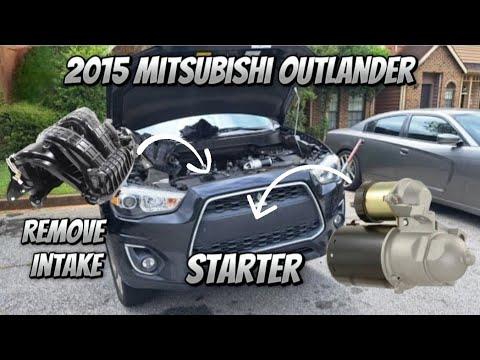
The starter motor spins your engine fast enough to start. On your Outlander Sport, it’s mounted to the transmission bellhousing and is reached from the top (after removing the air intake/air box) and/or from underneath.
Difficulty Level: Intermediate | Estimated Time: 1.5-3.0 hours
Assumption: Stock 2.0L layout; bolt sizes/torques can vary—verify as you work.
⚠️ Safety & Precautions
- Disconnect the battery negative cable first to prevent a short (the starter cable is always “hot”).
- Let the engine cool before working near the exhaust/manifold area.
- If lifting the vehicle, support it with jack stands on solid ground; never rely on a floor jack alone.
- Keep tools away from the battery positive terminal and starter B+ stud at all times.
🔧 Required Tools
You'll need the following tools for this repair:
- Safety glasses
- Mechanic gloves
- Wheel chocks
- Floor jack (rated 2-ton minimum)
- Jack stands (rated 2-ton minimum)
- 10mm socket
- 12mm socket
- 14mm socket
- 3/8" ratchet
- 3/8" torque wrench
- 6" extension (3/8")
- 12" extension (3/8")
- Universal joint swivel adapter (3/8")
- Flat trim tool
- Phillips screwdriver
- Pliers
- Work light
- Battery terminal brush
🔩 Required Parts
HowToo sells all the parts you need for this repair:
- Starter motor assembly - Qty: 1
- Dielectric grease - Qty: 1
- Anti-seize compound - Qty: 1
- Air intake hose clamp (optional, if damaged) - Qty: 1
📋 Before You Begin
- Park on level ground, put the transmission in neutral, and set the parking brake.
- Open the hood and keep the key away from the vehicle while you work.
- If you plan to work from underneath, chock the rear wheels, then lift the front and place it securely on jack stands.
- Lay out bolts in order as you remove them so reassembly is easy.
🔨 Step-by-Step Instructions
Follow these steps in order:
Step 1: Disconnect the battery
- Use a 10mm socket to loosen the negative battery terminal and remove it from the battery post.
- Move the cable aside so it cannot spring back onto the terminal.
- Torque to 5 Nm (44 in-lbs) when reinstalling the battery terminal clamp.
Step 2: Remove the intake duct and air cleaner box (top access)
- Use pliers to release any breather hose clamps, then slide hoses off carefully.
- Use a Phillips screwdriver to loosen the intake duct clamp(s) and remove the duct.
- Use a 10mm socket to remove the air box fasteners and lift the air box out.
Step 3: Create access from underneath (if needed)
- If you need more room, raise the front and set it on jack stands using a floor jack (rated 2-ton minimum).
- Use a flat trim tool and 10mm socket to remove the lower splash shield/under cover fasteners.
Step 4: Locate the starter and identify the connections
- The starter sits where the engine meets the transmission (bellhousing area).
- You’ll see a thick battery cable on a stud (B+) and a smaller solenoid connector (signal wire).
- Take a quick photo before disconnecting wires.
Step 5: Disconnect the starter wiring
- Use a 10mm socket to remove the small nut/retainer (if equipped) and disconnect the solenoid signal wire connector.
- Use a 12mm socket to remove the nut on the main battery cable at the starter B+ stud, then lift the cable off.
- Apply a small amount of dielectric grease to the electrical connector seal during reassembly.
Step 6: Remove the starter mounting bolts
- Use a 14mm socket, 3/8" ratchet, and a 6" extension (3/8") to remove the starter mounting bolts (commonly 2 bolts).
- If access is tight, use a universal joint swivel adapter (3/8") (a “swivel” lets the socket bend to reach awkward angles).
- Support the starter with one hand while removing the last bolt so it doesn’t drop.
Step 7: Remove the starter from the vehicle
- Work the starter out of the bellhousing area by wiggling and rotating it.
- If removing from below, guide it down carefully around hoses/wiring and the subframe.
Step 8: Install the new starter
- Compare the new starter to the old one (same mounting ears, same electrical connections).
- Position the starter and hand-thread the mounting bolts to avoid cross-threading.
- Use a 14mm socket and 3/8" torque wrench to tighten the starter mounting bolts: Torque to 44 Nm (32 ft-lbs).
- Apply a light dab of anti-seize compound to the bolt threads only if the bolts were corroded; keep it off the starter nose/mating surface.
Step 9: Reconnect the starter wiring
- Install the main battery cable onto the B+ stud and tighten with a 12mm socket: Torque to 12 Nm (106 in-lbs).
- Reconnect the solenoid signal connector and secure it with a 10mm socket if it uses a small nut: Torque to 5 Nm (44 in-lbs).
- Make sure the rubber boot covers the B+ stud so it can’t short to metal.
Step 10: Reinstall the air box and under cover
- Reinstall the air box using a 10mm socket and tighten snugly.
- Reinstall the intake duct and tighten clamps with a Phillips screwdriver.
- Reconnect any breather hoses using pliers for the clamps.
- If removed, reinstall the splash shield fasteners using a flat trim tool and 10mm socket.
Step 11: Reconnect the battery and test
- Clean the battery terminal if needed using a battery terminal brush.
- Reconnect the negative terminal using a 10mm socket: Torque to 5 Nm (44 in-lbs).
✅ After Repair
- Start your Outlander Sport. You should hear a strong, consistent crank with no clicking.
- Check that no wires are touching hot or moving parts.
- Verify the intake duct is fully seated (a loose duct can cause a rough idle).
- If the starter spins but the engine doesn’t crank, recheck the starter alignment and wiring connections.
💰 DIY vs Shop Cost
Shop Cost: $450-$850 (parts + labor)
DIY Cost: $180-$450 (parts only)
You Save: $270-$400 by doing it yourself!
Shop labor rates vary but typically run $100-$150/hour. This repair takes a shop approximately 1.5-3.0 hours.
🎯 Ready to get started?
HowToo makes it easy: same-day/2-day shipping on every part, plus all the tools and specialty tools you need! Check out the parts and tools sections below to add everything to your cart.
