


How to Replace the Starter Motor on a 2016 Honda Pilot 3.5L V6 (Intake Manifold Removal)
Step-by-step DIY guide with required tools, new gasket parts list, wiring tips, and torque specs
How to Replace the Starter Motor on a 2016 Honda Pilot 3.5L V6 (Intake Manifold Removal)
Step-by-step DIY guide with required tools, new gasket parts list, wiring tips, and torque specs


🔧 Pilot - Starter Motor Replacement
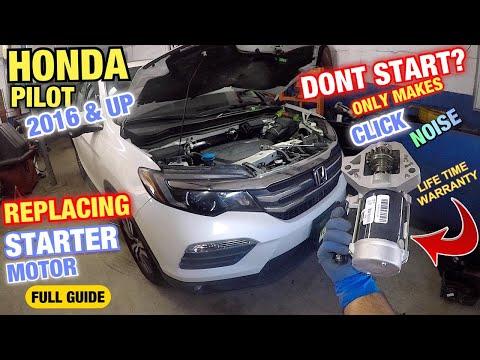
On your Pilot, the starter sits in the “V” of the V6, under the intake manifold. Replacing it requires removing the intake manifold to access the starter, then reinstalling everything with new gaskets so you don’t create vacuum leaks.
Difficulty Level: Advanced | Estimated Time: 3-6 hours
Assumption: Stock intake/starter layout; no aftermarket parts.
⚠️ Safety & Precautions
- ⚠️ Disconnect the negative battery cable first to prevent an electrical short.
- ⚠️ Let the engine cool fully; you’ll work near hot metal and coolant hoses.
- ⚠️ Keep bolts and connectors organized; several connectors look similar.
- ⚠️ Do not pry on plastic intake parts; they can crack.
🔧 Required Tools
You'll need the following tools for this repair:
- 10mm socket
- 12mm socket
- 14mm socket
- 10mm wrench
- 3/8" ratchet
- 3/8" torque wrench (10–80 ft-lbs range)
- 1/4" torque wrench (in-lbs range)
- 6" extension
- 12" extension
- Universal joint adapter
- Flat trim tool
- Needle-nose pliers
- Hose clamp pliers
- Pick tool
- Shop light
- Fender cover
- Safety glasses
- Nitrile gloves
🔩 Required Parts
HowToo sells all the parts you need for this repair:
- Starter motor - Qty: 1
- Intake manifold gasket set - Qty: 1
- Throttle body gasket - Qty: 1
- Dielectric grease - Qty: 1
- Brake cleaner or electrical contact cleaner - Qty: 1
📋 Before You Begin
- 🅿️ Park on level ground and remove the key from the vehicle.
- 🧠 Take a few photos of hose routing and connector locations before unplugging anything.
- 🔋 Use a 10mm wrench to disconnect the negative battery cable and isolate it so it can’t spring back.
- 🧼 Blow off dirt around the intake area so debris doesn’t fall into the engine.
🔨 Step-by-Step Instructions
Follow these steps in order:
Step 1: Remove the engine cover and open access
- Remove the plastic engine cover by pulling it upward (it’s held by rubber grommets).
- Use a shop light to clearly see the top of the engine and wiring.
Step 2: Remove the intake air duct
- Use a flat trim tool to release any intake duct clips (if equipped).
- Use a 10mm socket to loosen the hose clamps at the air box and throttle body.
- Lift the duct out and set it aside.
Step 3: Disconnect electrical connectors and vacuum hoses from the intake manifold
- Unplug sensors/actuators on and around the intake manifold by pressing the tab and pulling straight back.
- Tip: Push in first, then pull out.
- Use needle-nose pliers for small hose clamps and small vacuum hoses.
- Use a pick tool to gently break a hose loose if it’s stuck (do not tear it).
- Move harnesses aside; do not stretch the wiring.
Step 4: Remove the throttle body from the intake manifold
- Unplug the throttle body connector.
- Use a 10mm socket to remove the throttle body mounting bolts/nuts.
- Carefully pull the throttle body away and set it aside without kinking any attached hoses.
- Remove and discard the old throttle body gasket (you’ll install a new one later).
Step 5: Remove the upper intake manifold (plenum)
- Locate the intake manifold bolts and any bracket bolts.
- Use a 12mm socket with a 6" extension to remove the intake manifold bolts.
- If a rear bolt is tight to access, use a universal joint adapter with a 12" extension.
- Lift the intake manifold straight up and off.
- Immediately cover the exposed intake ports with a clean rag to prevent anything from falling in.
- Remove and discard the old intake manifold gaskets.
Step 6: Remove the starter electrical connections
- Locate the starter in the V of the engine.
- Use a 10mm socket to remove the small control wire nut (solenoid “S” terminal).
- Use a 12mm socket to remove the main battery cable nut (large terminal).
- Move the cables aside so they cannot touch metal.
- Tip: Take a photo of cable positions.
Step 7: Remove the starter motor
- Use a 14mm socket with an extension to remove the starter mounting bolts.
- Remove the starter and compare it to the replacement (mounting ears and terminals should match).
Step 8: Install the new starter motor
- Set the new starter into place and start both mounting bolts by hand.
- Use a 14mm socket to snug the bolts evenly.
- Final tighten: Torque to 44 Nm (33 ft-lbs).
Step 9: Reconnect starter wiring
- Clean the cable ends with electrical contact cleaner and let dry.
- Apply a small amount of dielectric grease to the connector seals (not the metal contact faces).
- Install the main battery cable and tighten with a 12mm socket: Torque to 9 Nm (80 in-lbs).
- Install the small control wire and tighten with a 10mm socket: Torque to 4 Nm (35 in-lbs).
Step 10: Reinstall the intake manifold with new gaskets
- Remove rags from the intake ports.
- Install the new intake manifold gaskets in their grooves.
- Lower the intake manifold into place carefully, making sure no wires are trapped.
- Start all bolts by hand.
- Tighten intake manifold bolts in an even, crisscross pattern using a 12mm socket.
- Final tighten: Torque to 12 Nm (9 ft-lbs).
Step 11: Reinstall the throttle body with a new gasket
- Place the new throttle body gasket.
- Install throttle body fasteners by hand, then tighten using a 10mm socket.
- Final tighten: Torque to 22 Nm (16 ft-lbs).
- Reconnect the throttle body electrical connector.
Step 12: Reinstall the intake duct and reconnect everything
- Reinstall the intake duct and tighten clamps using a 10mm socket.
- Reconnect every vacuum hose and electrical connector you removed.
- Reinstall the engine cover by pressing it down into the grommets.
Step 13: Reconnect the battery
- Reconnect the negative battery cable using a 10mm wrench.
- Tighten until snug; do not overtighten the battery post clamp.
✅ After Repair
- 🔎 Turn the key to ON (engine off) for 10 seconds, then OFF, then start the engine.
- 👂 Listen for vacuum leaks (a loud hissing). If present, recheck intake gaskets, hoses, and clamps.
- 🧪 Let it idle for a few minutes. The idle may relearn after battery disconnect.
- 🛠️ If the check engine light comes on, scan for codes and recheck any unplugged connectors.
- 🚗 Test-start the engine multiple times to confirm consistent cranking.
💰 DIY vs Shop Cost
Shop Cost: $650-$1,150 (parts + labor)
DIY Cost: $180-$450 (parts only)
You Save: $470-$700 by doing it yourself!
Shop labor rates vary but typically run $100-$150/hour. This repair takes a shop approximately 3-5 hours.
🎯 Ready to get started?
HowToo makes it easy: same-day/2-day shipping on every part, plus all the tools and specialty tools you need! Check out the parts and tools sections below to add everything to your cart.