








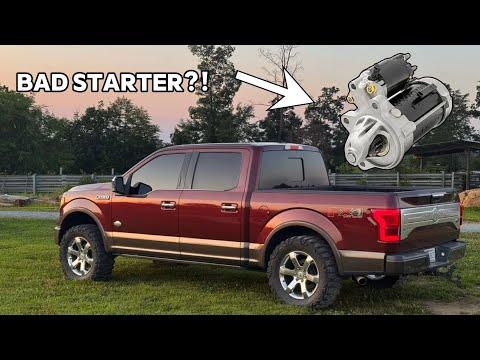







How to Replace the Starter Motor on a 2016 Ford F-150 (Step-by-Step Guide)
Tools, parts list, safety tips, and torque specs for a fast DIY no-crank starter replacement for 2012, 2013, 2014, 2015, 2016, 2017
How to Replace the Starter Motor on a 2016 Ford F-150 (Step-by-Step Guide)
Tools, parts list, safety tips, and torque specs for a fast DIY no-crank starter replacement for 2012, 2013, 2014, 2015, 2016, 2017


🔧 F-150 - Starter Motor Replacement
The starter motor cranks your engine when you turn the key. If it’s failed, you may get a single click, slow cranking, or no crank at all. Replacing it involves disconnecting the battery, unplugging the starter wiring, unbolting the starter, and installing the new unit.
Difficulty Level: Intermediate | Estimated Time: 1.0-2.0 hours
Assumption: stock 5.0L layout; access from underneath.
⚠️ Safety & Precautions
- 🛑 Disconnect the battery before touching starter wiring (the main cable is always “live”).
- 🛑 Support the truck with jack stands; never work under a truck held only by a jack.
- 🛑 Let the exhaust cool first; the starter sits near hot components.
- 🛑 Keep keys out of the ignition so nobody cranks it while you’re under it.
🔧 Required Tools
You'll need the following tools for this repair:
- Safety glasses
- Mechanic gloves
- Wheel chocks
- Floor jack (rated 3-ton minimum)
- Jack stands (rated 3-ton minimum)
- 3/8" drive ratchet
- 3/8" drive extension set (3" and 6")
- Universal joint adapter (3/8" drive)
- Socket set (8mm-15mm, 3/8" drive)
- Wrench set (8mm-15mm)
- Torque wrench (10-100 Nm range)
- Flat trim tool
- Work light
🔩 Required Parts
HowToo sells all the parts you need for this repair:
- Starter motor assembly - Qty: 1
- Battery terminal anti-corrosion pads (optional) - Qty: 2
- Dielectric grease (optional) - Qty: 1
📋 Before You Begin
- 🧰 Park on level ground, shift to Park, and set the parking brake.
- 🧰 Chock the rear wheels with wheel chocks.
- 🧰 Open the hood and disconnect the negative battery terminal using a 10mm socket (on most F-150 batteries). Move the cable aside so it can’t spring back.
- 🧰 If you need more room, raise the front with a floor jack and support with jack stands under the frame.
🔨 Step-by-Step Instructions
Follow these steps in order:
Step 1: Locate the starter
- Slide under the passenger side with a work light.
- The starter is bolted to the transmission bellhousing and has a small cylinder on it (the solenoid).
Step 2: Remove any splash shield/skid plate (if equipped)
- Use a socket set (8mm-15mm) and 3/8" drive ratchet to remove the fasteners.
- Use a flat trim tool for any plastic push-pins.
- Keep fasteners grouped by location.
Step 3: Disconnect the starter electrical connections
- Remove the rubber boot over the main power stud by hand.
- Use the correct-size wrench set (8mm-15mm) to remove the nut holding the large battery cable (B+ cable) to the starter.
- Unplug the small starter trigger wire connector (or remove its small nut, depending on your connector style) using a wrench set (8mm-15mm).
- Do not pull on wires—pull on the connector.
Step 4: Unbolt and remove the starter motor
- Support the starter with one hand (it’s heavier than it looks).
- Use a 3/8" drive ratchet, 3/8" drive extensions, and a socket set (8mm-15mm) to remove the starter mounting bolts.
- If access is tight, use a universal joint adapter (3/8" drive).
- Lower the starter out carefully and guide it past any lines or wiring.
Step 5: Compare the new starter to the old one
- Make sure the new starter matches the old one: same mounting holes, same electrical studs/connector, and similar nose length.
- If your new starter has protective caps on the terminals, leave them on until you’re ready to connect wiring.
Step 6: Install the new starter motor
- Lift the starter into place and hand-thread the mounting bolts to avoid cross-threading (damaging threads by starting crooked).
- Tighten the mounting bolts with a socket set (8mm-15mm) and 3/8" drive ratchet.
- Final-tighten using a torque wrench (10-100 Nm range): Torque to 35 Nm (26 ft-lbs).
Step 7: Reconnect the starter wiring
- Install the small trigger wire connector (or nut) using a wrench set (8mm-15mm).
- Install the large battery cable on the main stud and tighten using a wrench set (8mm-15mm): Torque to 12 Nm (106 in-lbs).
- If applicable, tighten the small terminal nut using a wrench set (8mm-15mm): Torque to 4 Nm (35 in-lbs).
- Reinstall the rubber boot over the main power stud.
- A dab of dielectric grease helps prevent corrosion.
Step 8: Reinstall splash shield/skid plate (if removed)
- Reposition the shield and start all fasteners by hand.
- Tighten using a socket set (8mm-15mm) and 3/8" drive ratchet.
Step 9: Reconnect the battery
- Reconnect the negative battery terminal using a 10mm socket.
- Make it snug (do not over-tighten and crack the terminal).
✅ After Repair
- 🧪 Start your A/C and headlights OFF first, then crank the engine. It should crank quickly and start normally.
- 🧪 Listen for grinding or a “hang-up” sound after the engine starts. If you hear it, shut it off and re-check starter seating and bolt tightness.
- 🧪 Check that the battery cable at the starter is tight and the boot is covering the stud.
- 🧪 If the truck still only clicks: re-check battery condition and all connections (battery terminals and starter terminals).
💰 DIY vs Shop Cost
Shop Cost: $450-$850 (parts + labor)
DIY Cost: $150-$350 (parts only)
You Save: $300-$500 by doing it yourself!
Shop labor rates vary but typically run $100-$150/hour. This repair takes a shop approximately 1.0-2.0 hours.
🎯 Ready to get started?
HowToo makes it easy: same-day/2-day shipping on every part, plus all the tools and specialty tools you need! Check out the parts and tools sections below to add everything to your cart.