


How to Replace the Starter Motor on a 2016 Ford Edge (Step-by-Step Guide)
Tools, parts list, safety tips, and torque specs for a smooth starter replacement
How to Replace the Starter Motor on a 2016 Ford Edge (Step-by-Step Guide)
Tools, parts list, safety tips, and torque specs for a smooth starter replacement
🔧 Edge - Starter Motor Replacement
The starter motor is what spins your engine fast enough to start. On your Edge, it’s mounted to the transmission/engine bellhousing area and is usually accessed from underneath after removing the lower splash shield.
Difficulty Level: Intermediate | Estimated Time: 2-3 hours
⚠️ Safety & Precautions
- ⚠️ Disconnect the battery before touching starter wiring (prevents short circuits).
- ⚠️ Support the vehicle with jack stands; never work under a vehicle held only by a jack.
- ⚠️ Let the engine cool; the exhaust/turbo area can burn you.
- ⚠️ Keep tools away from the positive starter terminal; it’s direct battery power.
🔧 Required Tools
You'll need the following tools for this repair:
- Safety glasses
- Mechanic gloves
- Floor jack (rated 3-ton minimum)
- Jack stands (rated 3-ton minimum)
- Wheel chocks
- 3/8" drive ratchet
- 3/8" drive torque wrench (10-100 ft-lbs range)
- Socket set: 7mm, 8mm, 10mm, 13mm, 15mm
- 3/8" drive extensions (3" and 6")
- 3/8" drive swivel/universal joint
- Flat trim clip tool
- Flathead screwdriver
- Needle-nose pliers
- Small wire brush
- Work light
🔩 Required Parts
HowToo sells all the parts you need for this repair:
- Starter motor - Qty: 1
- Starter motor mounting bolts - Qty: 2-3 (replace if corroded)
- Dielectric grease - Qty: 1
- Battery terminal anti-corrosion spray - Qty: 1
📋 Before You Begin
- Park on level ground, turn the ignition off, and remove the key/fob from the vehicle.
- Set the parking brake and place wheel chocks behind the rear tires.
- Open the hood and disconnect the battery negative terminal first. (Negative is the “-” terminal.)
- Tip: Take a photo of the starter wiring before removing it.
🔨 Step-by-Step Instructions
Follow these steps in order:
Assumption: Stock 2.0L EcoBoost layout; starter access is primarily from underneath with splash shield removal.
Step 1: Disconnect the battery
- Use a 10mm socket to loosen the negative battery terminal clamp.
- Lift the negative cable off and tuck it aside so it can’t spring back.
Step 2: Raise and support the front of the vehicle
- Use a floor jack (rated 3-ton minimum) at the approved front jack point.
- Set the vehicle down onto jack stands (rated 3-ton minimum).
- Shake the vehicle gently to confirm it’s stable before going underneath.
Step 3: Remove the lower splash shield (undertray)
- Use a 7mm socket and 8mm socket (varies by fastener) to remove the small screws.
- Use a flat trim clip tool to pop out any plastic push-clips.
- Set hardware aside in a small container so you don’t lose it.
Step 4: Locate the starter motor
- Use a work light and look where the engine meets the transmission (bellhousing area).
- The starter is a cylindrical motor with a smaller “solenoid” attached and a thick power cable going to it.
Step 5: Remove the starter electrical connections
- If there’s a protective cap over the main power stud, remove it with a flathead screwdriver.
- Use a 13mm socket to remove the nut on the large battery cable (B+ cable).
- Pull the large cable off and move it aside so it can’t touch metal.
- Remove the small control wire connector using needle-nose pliers if needed. (This is usually a push-on connector.)
- Tip: A push-on connector pulls straight off—don’t twist hard.
Step 6: Remove the starter mounting bolts
- Support the starter with one hand.
- Use a 15mm socket with a 3/8" drive extension and swivel/universal joint to remove the starter mounting bolts.
- Remove the starter from the bellhousing and lower it out carefully.
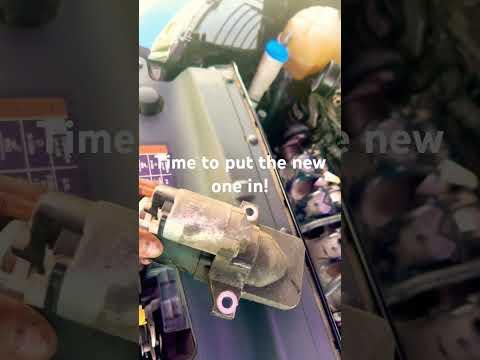
Step 7: Compare the old and new starter
- Confirm the new starter matches the old one: mounting ears, electrical stud position, and overall length.
- Clean the mating surface on the transmission/engine area using a small wire brush so the starter sits flat.
Step 8: Install the new starter
- Position the starter and start the mounting bolts by hand to avoid cross-threading.
- Tighten mounting bolts using a 15mm socket and 3/8" drive torque wrench.
- Torque to 35 Nm (26 ft-lbs) for the starter mounting bolts.
Step 9: Reconnect the starter wiring
- Reconnect the small control wire until it clicks/seats fully.
- Install the large battery cable onto the main stud and tighten using a 13mm socket and 3/8" drive torque wrench.
- Torque to 13 Nm (115 in-lbs) for the main power cable nut.
- Apply a small amount of dielectric grease to the connector seals. (Dielectric grease helps prevent corrosion.)
- Reinstall the protective cap over the main power stud.
Step 10: Reinstall the lower splash shield
- Reposition the undertray.
- Reinstall screws using a 7mm socket / 8mm socket and push-clips using a flat trim clip tool.
Step 11: Lower the vehicle and reconnect the battery
- Raise slightly with the floor jack (rated 3-ton minimum), remove the jack stands, then lower the vehicle.
- Reconnect the negative battery terminal using a 10mm socket.
- Torque to 6 Nm (53 in-lbs) for the battery terminal clamp.
- Apply battery terminal anti-corrosion spray if desired.
✅ After Repair
- Start the engine and listen: the starter should crank strong and smooth (no grinding).
- Check for warning lights and confirm the vehicle starts repeatedly (2-3 times).
- Look underneath for any loose wiring near the starter and ensure the splash shield is secure.
- Tip: If it clicks only, recheck battery cable tightness.
💰 DIY vs Shop Cost
Shop Cost: $500-$950 (parts + labor)
DIY Cost: $180-$350 (parts only)
You Save: $320-$600 by doing it yourself!
Shop labor rates vary but typically run $100-$150/hour. This repair takes a shop approximately 2-3 hours.
🎯 Ready to get started?
HowToo makes it easy: same-day/2-day shipping on every part, plus all the tools and specialty tools you need! Check out the parts and tools sections below to add everything to your cart.