









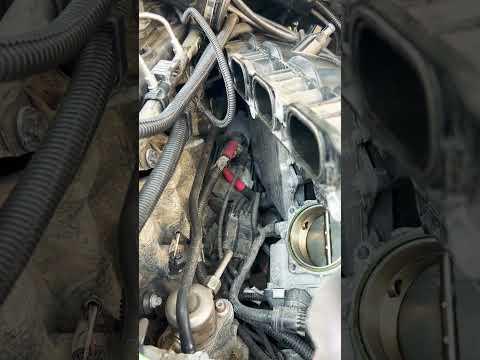







How to Replace the Starter Motor on a 2016-2019 BMW X1 (2.0T B46/B48) (Engine: Inline 4 2.0L)
Step-by-step starter replacement with tools list, parts, access tips, and torque specs
How to Replace the Starter Motor on a 2016-2019 BMW X1 (2.0T B46/B48) (Engine: Inline 4 2.0L)
Step-by-step starter replacement with tools list, parts, access tips, and torque specs for 2016, 2017, 2018, 2019


🔧 X1 - Starter Motor Replacement
The starter motor cranks your engine when you press the start button. When it fails, you may get a single click, slow cranking, or no crank at all. On your X1, the starter is bolted to the transmission bellhousing and requires battery disconnect plus some intake/underbody access.
Difficulty Level: Advanced | Estimated Time: 2.5-4.5 hours
Assumption: Common X1 2.0T layout (B46/B48). Bolt heads/locations may vary slightly.
⚠️ Safety & Precautions
- ⚠️ Disconnect the negative battery terminal before touching the starter wiring (the main cable is always “hot” otherwise).
- ⚠️ Let the engine cool; you’ll work near hot turbo/intake parts.
- ⚠️ Support the X1 on jack stands if you go underneath—never rely on a floor jack alone.
- ⚠️ Keep keys away from the vehicle (at least 15+ feet) so modules don’t “wake up” while unplugged.
🔧 Required Tools
You'll need the following tools for this repair:
- Safety glasses
- Mechanic gloves
- Floor jack (rated 3-ton minimum)
- Jack stands (rated 3-ton minimum)
- Wheel chocks
- 8mm socket
- 10mm socket
- 13mm socket
- 16mm socket
- Ratchet (3/8" drive)
- Extension set (3/8" drive)
- Wobble extension (3/8" drive)
- Torque wrench (3/8" drive)
- Torx T20 bit
- Torx T25 bit
- Torx T30 bit
- E-Torx E12 socket
- E-Torx E14 socket
- Trim removal tool
- Small pick tool
- Flashlight
🔩 Required Parts
HowToo sells all the parts you need for this repair:
- Starter motor - Qty: 1
- Starter mounting bolts - Qty: 2
- Intake/charge pipe O-ring seals (if equipped) - Qty: 1 set
- Dielectric grease - Qty: 1
📋 Before You Begin
- Park on level ground, turn ignition OFF, set the parking brake, and chock the rear wheels.
- Open the rear cargo area and access the battery under the right-side panel.
- Disconnect the negative battery terminal and isolate it so it can’t spring back. Negative cable comes off first.
- If you plan to go underneath, raise the front and place it securely on jack stands.
🔨 Step-by-Step Instructions
Follow these steps in order:
Step 1: Disconnect the battery
- Use a 10mm socket to loosen the negative battery clamp.
- Remove the negative clamp and tuck it aside so it cannot touch the battery post.
- Torque to 6 Nm (4 ft-lbs) when reinstalling the clamp.
Step 2: Remove the engine cover and intake ducting
- Pull up the engine cover by hand (it’s held by rubber grommets). If it resists, use a trim removal tool to gently lift at a corner.
- Loosen intake clamps with an 8mm socket (a clamp is the metal band that tightens a hose/pipe).
- Remove any intake snorkel/duct pieces using Torx T25 bit where applicable.
Step 3: Move the charge pipe out of the way (if it blocks access)
- Use an 8mm socket to loosen the clamp at the throttle body end.
- Release any locking clip(s) carefully with a small pick tool (a pick is a small hook tool for clips).
- Pull the pipe free and set it aside without stressing attached hoses/wiring.
- Torque to 5 Nm (4 ft-lbs) on clamp-style connections when reinstalling.
Step 4: Remove the lower splash shield (undertray) for access (recommended)
- From underneath, remove the fasteners using a Torx T25 bit and/or 8mm socket (fastener type varies by panel position).
- Lower the undertray and slide it out.
- Torque to 8 Nm (6 ft-lbs) for undertray fasteners when reinstalling.
Step 5: Locate the starter and disconnect its wiring
- The starter is mounted where the engine meets the transmission (bellhousing area).
- Remove the starter’s main power cable nut using a 13mm socket.
- Unplug the small solenoid connector (signal wire) by releasing its tab with a small pick tool, then pulling straight off.
- Do not pull on wires—pull on connectors.
- Torque to 13 Nm (10 ft-lbs) for the main cable nut when reinstalling.
Step 6: Remove the starter mounting bolts
- Support the starter with one hand.
- Use an E-Torx E12 socket or E-Torx E14 socket (varies by production) with a ratchet (3/8" drive) and extension set to remove the two starter mounting bolts.
- Back the starter out of the bellhousing and remove it from the vehicle.
- Torque to 55 Nm (41 ft-lbs) for starter mounting bolts when installing.
Step 7: Install the new starter
- Compare the old and new starter (same mounting ears and electrical studs).
- Position the starter into the bellhousing and start both mounting bolts by hand to avoid cross-threading.
- Tighten with an E-Torx E12 socket or E-Torx E14 socket and finish with a torque wrench (3/8" drive).
- Torque to 55 Nm (41 ft-lbs).
Step 8: Reconnect starter wiring
- Reconnect the solenoid connector until it clicks.
- Install the main power cable on the starter stud and tighten using a 13mm socket.
- Apply a small amount of dielectric grease to the connector seal area (not on the stud threads).
- Torque to 13 Nm (10 ft-lbs) for the main cable nut.
Step 9: Reinstall intake/charge pipe parts and undertray
- Reinstall the charge pipe, making sure seals/O-rings sit square and don’t pinch.
- Tighten clamps using an 8mm socket.
- Reinstall the undertray using a Torx T25 bit and/or 8mm socket.
- Torque to 5 Nm (4 ft-lbs) for clamps and Torque to 8 Nm (6 ft-lbs) for undertray fasteners.
Step 10: Reconnect the battery
- Reconnect the negative battery terminal using a 10mm socket.
- Torque to 6 Nm (4 ft-lbs).
✅ After Repair
- Start the X1 and verify it cranks strongly with no clicking.
- Check that no tools are left in the engine bay and that the intake/charge pipe is fully seated (no hissing/boost leak).
- If you get a warning light, recheck every unplugged connector and battery tightness first.
- Take a short test drive and confirm normal power delivery (a loose charge pipe can cause reduced power).
💰 DIY vs Shop Cost
Shop Cost: $650-$1,250 (parts + labor)
DIY Cost: $180-$450 (parts only)
You Save: $470-$800 by doing it yourself!
Shop labor rates vary but typically run $100-$150/hour. This repair takes a shop approximately 2.5-4.5 hours.
🎯 Ready to get started?
HowToo makes it easy: same-day/2-day shipping on every part, plus all the tools and specialty tools you need! Check out the parts and tools sections below to add everything to your cart.
Guide for Starter Motor replace for these BMW vehicles
| Year Make Model | Sub Model | Engine | Body Style |
|---|---|---|---|
| 2019 BMW X1 | - | Inline 4 2.0L | - |
| 2018 BMW X1 | - | Inline 4 2.0L | - |
| 2017 BMW X1 | - | Inline 4 2.0L | - |
| 2016 BMW X1 | - | Inline 4 2.0L | - |