









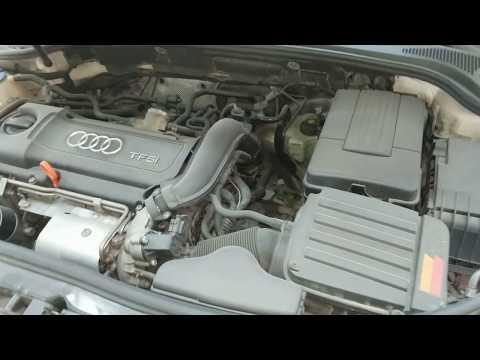







How to Replace the Starter Motor on a 2015-2016 Audi A3 (Step-by-Step DIY Guide) (Engine: Inline 4 1.8L)
Tools, parts list, wiring disconnect steps, torque specs, and safety tips for a clean starter install
How to Replace the Starter Motor on a 2015-2016 Audi A3 (Step-by-Step DIY Guide) (Engine: Inline 4 1.8L)
Tools, parts list, wiring disconnect steps, torque specs, and safety tips for a clean starter install for 2015, 2016


🔧 A3 - Starter Motor Replacement
The starter motor spins your engine fast enough for it to start. On your A3, the starter sits at the transmission bellhousing, so you’ll remove a few intake pieces for access, disconnect the wiring, unbolt the starter, and install the new one.
Difficulty Level: Intermediate | Estimated Time: 1.5-3.0 hours
Assumption: 1.8T MQB layout with top/under access; hardware types can vary.
⚠️ Safety & Precautions
- ⚠️ Disconnect the battery negative terminal before touching starter wiring (high-current cable can spark/weld tools).
- ⚠️ Let the engine cool fully; the turbo/heat shielding area can burn you.
- ⚠️ Support the car with jack stands on solid ground; never rely on a jack alone.
- ⚠️ Keep the key/fob away from the car while working to prevent accidental electrical wake-up.
🔧 Required Tools
You'll need the following tools for this repair:
- Safety glasses
- Mechanic gloves
- Floor jack (rated 3-ton minimum)
- Jack stands (rated 3-ton minimum)
- Wheel chocks
- 3/8" drive ratchet
- 1/4" drive ratchet
- 3/8" torque wrench (10-100 Nm range)
- 1/4" torque wrench (2-20 Nm range)
- Socket set 8mm-18mm
- 10mm socket
- 13mm socket
- 16mm socket
- E12 external Torx socket
- M10 triple-square bit (XZN)
- Torx T25 bit
- Torx T30 bit
- Flat trim tool
- Pick tool
- Long extensions (6" and 12")
- Universal joint adapter
- Needle-nose pliers
- Work light
🔩 Required Parts
HowToo sells all the parts you need for this repair:
- Starter motor - Qty: 1
- Starter mounting bolts (recommended) - Qty: 2
- Battery terminal clamp nut (optional, if damaged) - Qty: 1
📋 Before You Begin
- Park on level ground, turn ignition OFF, and set the parking brake.
- Open the trunk and access the battery area.
- Disconnect the battery: use a 10mm socket to loosen the negative clamp and remove it from the battery post; wrap the clamp with a rag so it can’t spring back.
- If you need under-car access, chock the rear wheels with wheel chocks, lift with a floor jack, and support with jack stands.
🔨 Step-by-Step Instructions
Follow these steps in order:
Step 1: Remove the engine cover and intake ducting
- Pull up the engine cover firmly by hand to release the grommets.
- Use a Torx T25 bit and 3/8" drive ratchet to remove any air duct/airbox snorkel screws (if equipped).
- Release hose clamps using a flat trim tool as needed, then move the ducting aside for working room.
Step 2: Remove the airbox (for access)
- Unplug the intake sensor connector (if present) by lifting the lock with a pick tool and pulling straight off.
- Use a 10mm socket to remove airbox fasteners (if equipped), then lift the airbox straight up and out.
- Tip: Take a photo before unplugging connectors.
Step 3: Locate the starter and identify the wires
- The starter is mounted to the transmission bellhousing where the engine and transmission meet.
- You’ll typically see:
- One thick battery cable on a stud (B+ power).
- One smaller plug or push-on terminal (solenoid trigger wire).
Step 4: Disconnect starter electrical connections
- Remove any protective cap from the large starter terminal using a pick tool.
- Use a 13mm socket and 3/8" drive ratchet to remove the nut on the large cable, then move the cable aside.
- Disconnect the small trigger wire by releasing the lock with a pick tool and pulling the connector off.
- Tip: Don’t pull on the wire—pull on the connector.
Step 5: Remove the lower belly pan (if needed for bolt access)
- Use a Torx T25 bit and 3/8" drive ratchet to remove the belly pan screws.
- Use a flat trim tool to pop any plastic clips without breaking them.
Step 6: Remove the starter mounting bolts
- Support the starter with one hand while you loosen the bolts.
- Use a long extension (12") with an E12 external Torx socket to remove the starter bolts (common on Audi/VW).
- If your bolts are triple-square instead: use an M10 triple-square bit (XZN). (A triple-square is a 12-point “star” style bit used on many Audi fasteners.)
- Remove both bolts fully, then pull the starter straight out from the bellhousing.
- Torque note: Starter bolt torque varies by bolt type; Torque to OEM spec for your exact fastener. If you don’t have access to the spec, match the original bolt type and do not reuse any torque-to-yield bolt.
Step 7: Compare the new starter to the old one
- Verify the mounting ears match, the pinion gear looks the same, and the electrical terminals are in the same positions.
- Move any heat shield or bracket (if equipped) using a 10mm socket or 13mm socket as needed.
Step 8: Install the new starter
- Slide the starter into place, making sure it sits flush on the bellhousing.
- Start both mounting bolts by hand to avoid cross-threading.
- Tighten the mounting bolts using an E12 external Torx socket or M10 triple-square bit (XZN) with a 3/8" drive ratchet, then finish with a 3/8" torque wrench.
- Torque to OEM spec for your exact fastener.
Step 9: Reconnect starter wiring
- Reconnect the small trigger wire connector until it clicks (use needle-nose pliers only if space is tight).
- Install the large battery cable on the stud and tighten the nut using a 13mm socket and 1/4" torque wrench.
- Torque to 10 Nm (7 ft-lbs) for the starter B+ terminal nut (do not overtighten; the stud can break).
- Reinstall the protective cap over the terminal.
Step 10: Reinstall airbox/ducting and belly pan
- Reinstall the belly pan using a Torx T25 bit and tighten snugly.
- Reinstall the airbox and ducting using a 10mm socket and Torx T25 bit.
- Plug any connectors back in and make sure locks are fully seated.
- Press the engine cover back onto its grommets.
Step 11: Reconnect the battery
- Reconnect the negative terminal and tighten with a 10mm socket.
- Torque to 6 Nm (53 in-lbs) for the battery terminal clamp.
✅ After Repair
- Start the engine and listen: it should crank strongly with no grinding noises.
- Check that no warning lights related to low voltage remain after a short drive.
- Recheck the starter electrical connections for looseness and ensure the cable cap is installed.
- If the engine cranks but won’t start, recheck the small trigger wire connector seating.
💰 DIY vs Shop Cost
Shop Cost: $500-$1,000 (parts + labor)
DIY Cost: $180-$450 (parts only)
You Save: $320-$550 by doing it yourself!
Shop labor rates vary but typically run $100-$150/hour. This repair takes a shop approximately 1.5-3.0 hours.
🎯 Ready to get started?
HowToo makes it easy: same-day/2-day shipping on every part, plus all the tools and specialty tools you need! Check out the parts and tools sections below to add everything to your cart.
Guide for Starter Motor replace for these Audi vehicles
| Year Make Model | Sub Model | Engine | Body Style |
|---|---|---|---|
| 2016 Audi A3 | - | Inline 4 1.8L | - |
| 2015 Audi A3 | - | Inline 4 1.8L | - |